Updates to the character setup tools
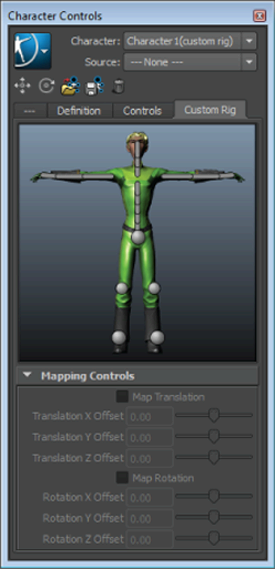 |
The new Character Controls let you perform multiple character setup tasks in a single window. As you set up your character, the previously independent HumanIK tools appear as tabs in the consolidated Character Controls, simplifying the character set up process. The Skeleton, Definition, Controls, and Custom Rig tabs appear as you select options from the Start pane, Source menu, or Character Controls menu button. Begin the character setup process using the Start pane in the Character Controls window. Whether you are creating a new HumanIK skeleton from scratch, defining an existing skeleton, or adding a Control rig or Custom rig mapping to your character, this pane is designed to guide you through the setup process. The new Source menu provides feedback about the type of source driving your character. The Source menu is available in the Character Controls window at all times, regardless of the HumanIK tool that is active. This menu updates dynamically as you work to reflect changes to the character state. You can also set your character's source type by manually selecting an option from the drop-down menu. The new Custom Rig tool gives you a visual interface for mapping your non-HumanIK rigs. Designed to streamline the mapping and retargeting process, this tool lets you map and retarget bipedal HumanIK character animation to and from a Custom rigged character. You can define your rig using the familiar click-and-assign workflow. Other controls let you save and load mapping templates and adjust the offsets between a Custom rig and the character's skeleton joints. You can now customize the character layout in the Character Controls to fit your character. The layouts for the Controls and Custom Rig tabs are available as user-editable XML files, located in the new CharacterControls directory. Editing these files lets you create custom layouts. For example, you can replace the background image or change the position, quantity, color, and size of cells. |
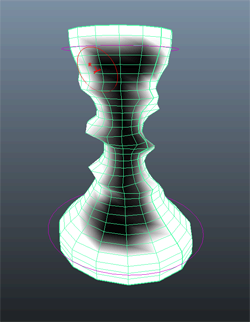
Paint weights for nonlinear deformers
Improved controls for roll bone behavior
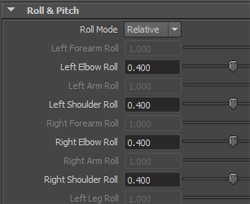 |
Updated Roll properties for the HumanIK skeleton definition are now available in the Attribute Editor to give you improved control over roll bone behavior as you rotate character limbs. See Define roll bone behavior. |
Improved Control Rig manipulation
 |
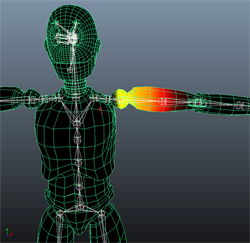
Now you can force a stance pose ( See Stance pose and Manipulation and keying modes. When manipulating your character in Full Body or Body Part mode, the IK and FK effectors of your character's Control rig now appear synchronized. By default, the IK and FK solutions visually merge to show the final solving of the character's skeleton. This feature replaces the Align Rig After Time Change option. See Align Control Rig. |
When moving weights (using the Move Weights button  in the Paint Skin Weights Tool or Skin > Edit Smooth Skin > Move Weights To Influences), the first selected influence now acts as the source influence and all other selected influences act as targets.
If an influence is locked in the Paint Skin Weights Tool, it will not receive weights when you move weights from neighboring influences.
See Move weights to other influences and Move weights for updated information.


 >
>