Importing and Soft-Importing Image Files


Import images created in other applications, such as 3ds Max, as well as images previously exported, using the Export Image menu. You can also import images from CD-ROM, USB or FireWire drives, or another platform (for example, a Macintosh or PC).

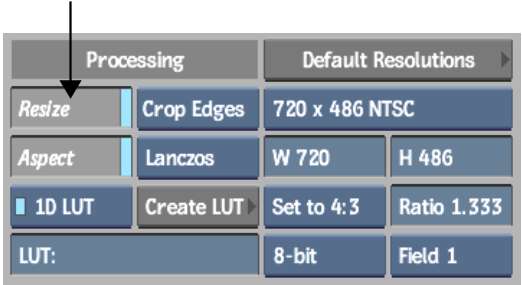
By default, clips are imported at source resolution. However, you can use the Resize option to modify imported file resolution. In this case, the default size becomes the project resolution, which you can then modify.

When you import clips containing multiple frames, the frames are saved as separate image files, each of which is assigned a sequentially-numbered filename. In the file browser, these image files appear under a single collapsible heading, which allows you to select all images in a sequence at once.

To import or soft-import an image file:

  1. In a clip library, click Import Image.
  2. In the File Format box, select the format of the media that you want to import, or select Auto to automatically detect the format of a file when you select it. See File Operations Group.

    Show small imageShow large image

    TipIf you select a file format and the files that you want to import do not use the default extension, they do not appear in the browser. Enter the extension of the files in the Ext: field and they will appear in the browser. To view all files in the current directory, enter a blank extension.
  3. Select the destination for the imported file using the Destination Library box.
  4. Browse to the directory containing the media that you want to import.

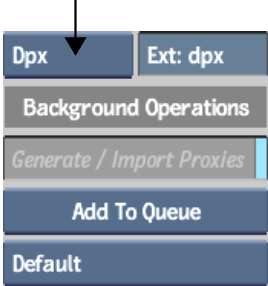
    You can set a number of display and search options to help you find what you need. See Browsing the File System.

    NoteBy default, the file browser points to the images directory for the project.
  5. Optional: Enable the Scan Subdirectories button to display all the subdirectories and their contents.
  6. Select the images that you want to import.
  7. Enable Soft-Import Full Res if you want to import a reference to the media, but you do not want to store the media on the local storage.

    Show small imageShow large image

    NoteCertain options are disabled if you choose to soft-import the media.
  8. Set any Clip Media properties.

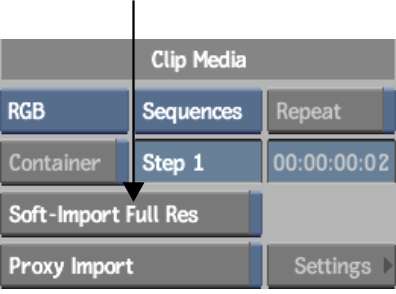
    You can choose to import an image with its alpha channel. See Importing RGBA Files. You can import an image as frames, sequences, or a clip. You can repeat frames or step through frames. See Clip Media Group.

  9. Set the tape name for the imported clips and adjust any other Clip Metadata properties.

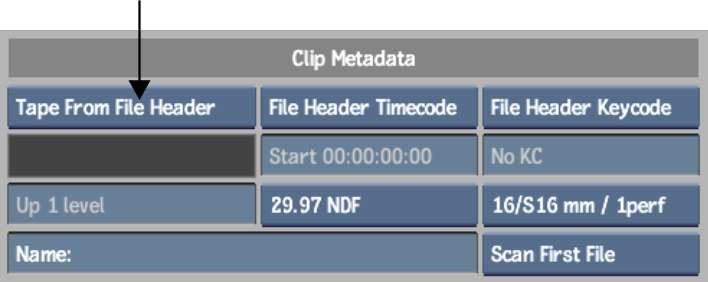
    You can infer the tape name from a directory name, read the tape name from a file header, or enter the tape name manually. You can also read timecode and keycode information from the clip. See Clip Metadata Group.

    Show small imageShow large image

  10. Optional: Use the Resize options to modify the imported file resolution. See Setting Default Image Resolution Characteristics on Import.

    Show small imageShow large image

  11. Specify a LUT to remap specific pixel values when you import. See Colour Management.

    Show small imageShow large image

  12. Click Load.

    If the width of the image that you are importing or soft-importing is a not multiple of 4 for 8-bit images, or 2 for 10-, 12-, or 16-bit images, you will be prompted to confirm that you want to pad its width to the next highest multiple. Click Confirm to proceed. If the image is part of a sequence, click Confirm All to automatically apply the padding to all images in the sequence.

    The images are imported to the clip library.

    NoteSoft-imported media is labelled with the file type in the lower-right corner. See Recognizing Types of Clips.