 Command entry:
 Material Editor
  Standard material
  Maps rollout
  Diffuse Level button (appears only for the Anisotropic, Oren-Nayar-Blinn, and Multi-Level shaders)
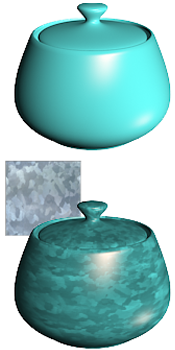
You can use a bitmap file or procedural map to control the Diffuse Level parameter. White pixels in the map leave the diffuse level unchanged. Black pixels reduce the diffuse level to 0. Intermediate values adjust the diffuse level accordingly.

Applying a map to the diffuse level
Top: No diffuse level map
Bottom: Using a bitmap to specify the diffuse level
Reducing the Amount value of the Diffuse Level map on the Maps rollout reduces the map's effect while increasing the effect of the Diffuse Level value on the Basic Parameters rollout. When the Amount is 0 percent, the map isn't used at all.
3ds Max opens the Material/Map Browser.
(If you choose Bitmap as the map type, 3ds Max opens a file dialog that lets you choose the image file.)
Alternatively, you can use the  Slate Material Editor to wire a map node to the Diffuse Level component.