To map a material component, you wire a map node to the input socket for that component’s slot. Drag from the map socket to the material socket or from the material socket to the map socket.
Play this to see how to wire a map:
 While the Select tool is active, you can select a wire by clicking it, just as you select a node. The selected wire turns
white.
While the Select tool is active, you can select a wire by clicking it, just as you select a node. The selected wire turns
white.
3ds Max gives you a great variety in the way you can combine maps, so the map tree as it appears in the view can take various forms.
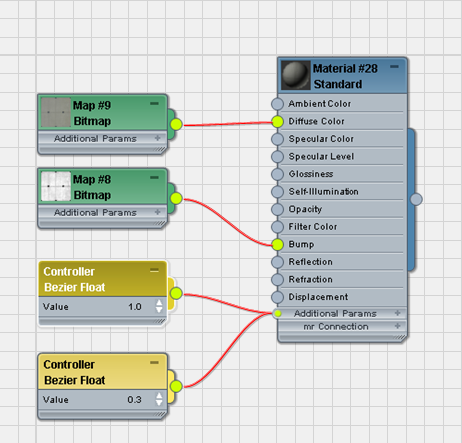
A material with one map for diffuse color and another as the bump map
For a Standard material, the Slate Material Editor adds a Bezier Float controller node to control the Amount of each map.
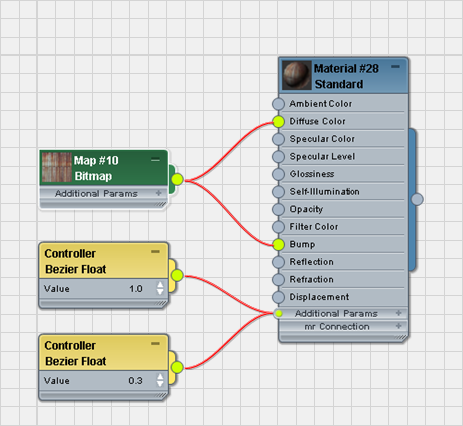
A material with a single map used as both diffuse color and bump maps
Some maps combine other maps, and some materials can combine sub-materials, so a material tree can have more than two levels.
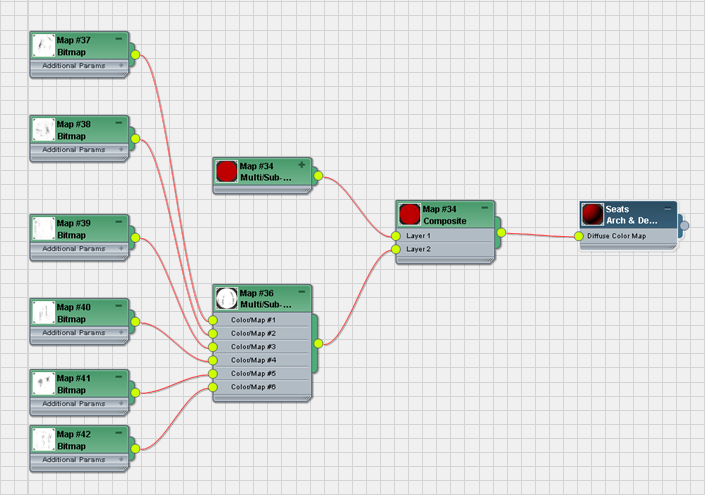
A four-level tree that uses Multi/Sub maps and a Composite map
To apply a map to a material component:
To remove a map or map connection, do one of the following:
 (Delete Selected) or press Delete.
 Select an object, then in the MAXScript Listener, enter $.material.diffusemap=undefined (the names of the map components vary with the material type: See the MAXScript Help for details).
The Slate Material Editor gives you various alternative ways to wire a material tree.
If the target node has only one socket appropriate to that material or map, 3ds Max doesn’t display the pop-up menu. Instead, it creates the wire immediately.
To replace one map with another:
To insert a node into an existing wire, do one of the following:


