Once you've installed 3ds Max (see the Installation Guide included with your software package), you open it from the Start menu, or use any other Windows method. The figure below shows the application window with a scene file loaded.
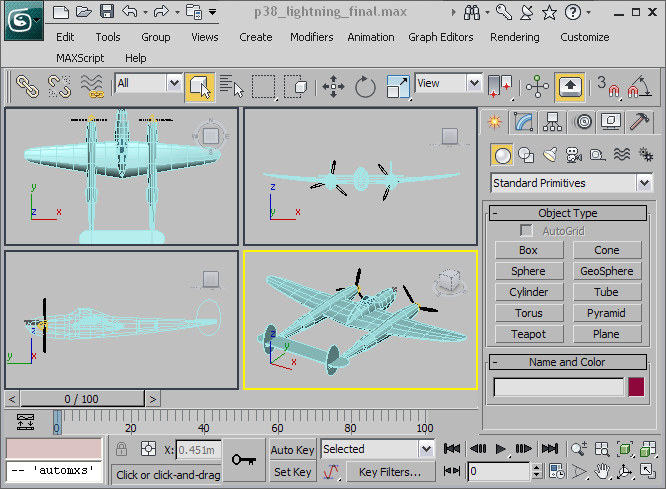
Main program window, 3ds Max
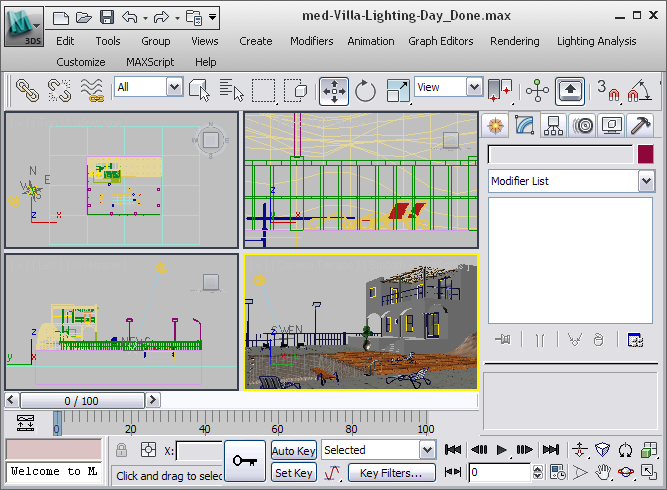
Main program window, 3ds Max Design
You model and animate objects in the viewports, whose layout is configurable. You can start with a variety of 3D geometric primitives. You can also use 2D shapes as the basis for lofted or extruded objects. You can convert objects to a variety of editable surface types, which you can then model further by pulling vertices and using other tools.

Another modeling tool is to apply modifiers to objects. Modifiers can change object geometry. Bend and Twist are examples of modifiers.
Modeling, editing, and animation tools are available in the command panels and toolbar. See Modeling Objects.
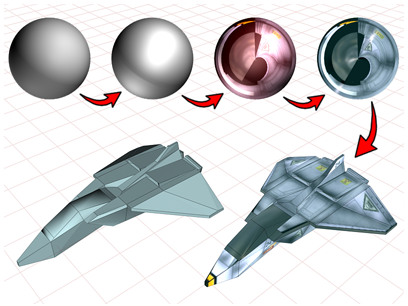
You design materials using the Material Editor, which appears in its own window. You use the Material Editor to create realistic materials by defining hierarchies of surface characteristics. The surface characteristics can represent static materials, or be animated. See Material Editor.
You create lights with various properties to illuminate your scene. The lights can cast shadows, project images, and create volumetric effects for atmospheric lighting. Physically-based lights let you use real-world lighting data in your scenes and Radiosity provides incredibly accurate light simulation in renderings. See Lights.

The cameras you create have real-world controls for lens length, field of view, and motion control such as truck, dolly, and pan. See Cameras.
You can begin animating your scene at any time by turning on the Auto Key button. Turn the button off to return to modeling. You can also perform animated modeling effects by animating the parameters of objects in your scene. You can learn more about animating in Animating Your Scene.
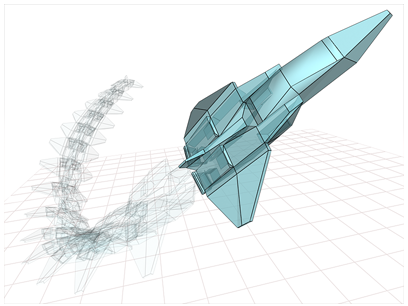
When the Auto Key button is on, 3ds Max automatically records the movement, rotation, and scale changes you make, not as changes to a static scene, but as keys on certain frames that represent time. You can also animate many parameters to make lights and cameras change over time, and preview your animation directly in the 3ds Max viewports.
You use Track View to control animation. Track View is a floating window where you edit animation keys, set up animation controllers, or edit motion curves for your animated effects.
Rendering adds color and shading to your scene. The renderers available with 3ds Max include features such as selective ray tracing, analytical antialiasing, motion blur, volumetric lighting, and environmental effects. See Rendering Your Scene.

When you use the default scanline renderer, a radiosity solution can provide accurate light simulation in renderings, including the ambient lighting that results from reflected light. When you use the mental ray renderer, a comparable effect is provided by global illumination.
If your workstation is part of a network, network rendering can distribute rendering jobs over multiple workstations. See Network Rendering.
With Video Post, you can also composite the scene with animations stored on disk.


