This topic describes how to import models from the Showcase File menu. (You can also drag model files from Windows Explorer directly onto the Autodesk Showcase window to import them.)
You can select multiple files by holding down the Ctrl key. Select a group of files next to each other by holding down the Shift key.
Import of multiple Revit files is not supported. If you select multiple Revit files, only the largest file will be imported.
The conversion process will take some time. When it is finished, the models appear in the Autodesk Showcase window.
When you are importing model files, they are first converted to A3G files. View the status of this conversion process as follows:
To open the window at any time, select File > Import > Import Status Window (or pressI).
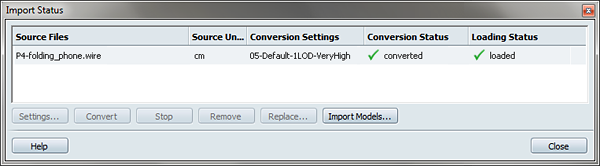
The Import Status window lists each model file you have imported, the source units, its conversion settings, its status, and the A3G files that were created. It also indicates the load status of the model file as it is loaded into the Autodesk Showcase window.
Autodesk recommends leaving source units unchanged. If you change them, this scales the model, and some parts of the model may become incorrectly positioned. Scale the model in Showcase or in the original modeling software, rather than by changing the units setting in the Import Status window.
To reverse the column order, click on the column heading again. An arrow shows whether the column entries are in forward or reverse order.
Continue to import additional files as documented in the first task of this topic.
To create APF files from Maya geometry for import into Autodesk Showcase, Autodesk recommend that you use the Maya APF add-in (AutodeskPacketFile.mll) with Maya 2009 or later. For more information on how to load this add-in, see Enhance the APF model in Maya.


