


Use animation layers to
enhance motion capture data
Animation layers are especially useful for working with motion capture data. You can edit only those specific points in the animation that require changes and leave the rest of the data untouched.
Animation layers can help you clean up many common issues with motion capture data, including body interpenetrations, shakiness in the feet or hands, and unstable floor contact. You can also use animation layers to make sure objects hit specific targets in the scene.
The following steps describe a sample workflow using animation layers over motion capture data to stabilize a character’s wrist as it comes in contact with the ground.
To use animation layers to correct or enhance motion capture data
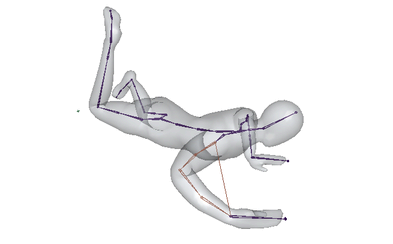
This example describes a scene with motion capture data plotted to a biped skeleton.
In this example animation, the wrist makes contact with the floor at frame 27, but the position of the hand is shaky and unnatural. We want the hand to hit the floor at frame 27, then stay steadily planted between frame 27 and 40. You can modify the animation between those frames to stabilize the hand as it makes contact with the floor.

 from
the main menu bar.
from
the main menu bar.
In the next steps, you’ll use the IK handle as an effector to manipulate the position of the wrist.
A new Override layer called AnimLayer1 is created for the IK handle in the Animation Layer Editor stack.
By default, all of the handle’s attributes are added to the layer, including its IK Blend value. (See Add and remove attributes from animation layers.)
 to mute
the layer.
to mute
the layer. 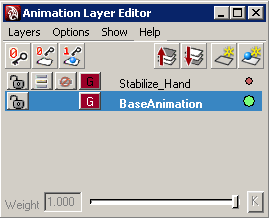
Muting the layer lets you view the original animation and identify the frames you want to modify. Even though this layer doesn’t yet contain animation, it is in Override mode which can cause the IK handle to display in an invalid position unless the layer is muted.
By default, layers are also locked from receiving keys when they are muted. You can change this option by turning off Options > Lock Muted Layers in the Animation Layer Editor. In the following steps, we will unlock this new layer so it can receive keys.
 to unlock
the layer for keying.
to unlock
the layer for keying.
This fixes the position of the IK handle at frame 27. (See also Keyframe objects on animation layers.)
In the Animation Layer Editor, notice the green “traffic light” feedback on the Stabilize_Hand layer. This indicates the layer is active for keying.

Because you created the layer for the IK handle in step 3, the keys you set on the handle are contained on that layer. Since the layer is in Override mode, its animation will override the motion capture data when you unmute the layer and play the animation in your scene.
 to unmute
the layer and play the result animation in the scene.
to unmute
the layer and play the result animation in the scene.
In the next steps, you will keyframe the handle’s IK blend value so that its effect (modifying the original animation) blends in over several frames.
After frame 27, the hand is now stabilized as it comes in contact with the floor.