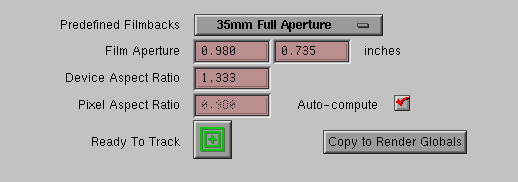
The right side of the Setup control panel is for setting the appropriate filmback and other aspect ratios. (Aspect ratio is the image width divided by height and filmback is the ratio for the exposed film negative.)
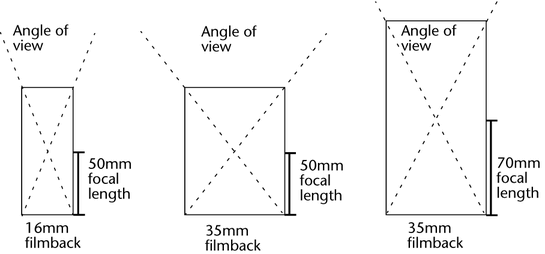
Why not ignore the filmback and use the aspect ratio of the images on disk? You could do this; in fact, the default setting, Same As Image Aspect, does just that. However, without knowing the filmback, Live has no way of deriving the correct angle of view (camera aperture) and focal length, so your rendered images may not match the original footage. The following illustration demonstrates this relationship between filmback, focal length, and angle of view.
Live cannot assume what filmback was used based on the current image size; you must specify it. The reason is that the aspect ratio of images often changes when you scan or transfer them to digital files. For example, film scanners often crop images.
You can check how Live’s predefined filmbacks affect the camera settings by opening the shotCameraShape node in the Attribute Editor (right-click the camera and select shotCamera). The attributes affected are Angle of View, Camera Aperture, and Film Aspect Ratio.
Live sets the camera’s focal length to 35mm by default. If you want to enter a different focal length or have Live calculate it for you, you must set a filmback and change the camera constraints. For more information, see Create a focal length constraint.
To set up filmback and aspect ratios
For film scanned from negative: Select from the 16, 35, or 70 mm filmbacks.
For film transferred to video: Select a filmback or one of the HDTV settings. Do not select Video Source.
For a scene shot on video: Select either Video Source or HDTV from Video Source (16:9).
Live copies the aspect ratios to the resolution settings in the Maya Render Settings. If you make changes in the Setup, click Copy to Render Settings again to update them.
If you have the Render Settings window open already, the new settings might not appear. Close and open the window to refresh the settings.
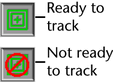
When the Ready To Track button is red, it means Maya Live has detected an inconsistency between the device aspect ratio (which is set when you select a filmback) and the actual image aspect ratio. Live detects the inconsistency based on the following relationships:
Device Aspect Ratio (AR) = Image AR x Pixel AR
Device Aspect Ratio (AR) = Filmback AR x Lens Squeeze
The inconsistency typically occurs because your images were cropped during the scan or transfer to digital images.
To correct Ready To Track errors
Ideally, you can obtain this setting from the cameraman or director. If you can’t, try different settings because some of them have slight differences.
In most cases, you see the following dialog. If you do not, skip to Select Solution 1 (Crop the Width) or 2 (Expand the Height) from the second dialog..
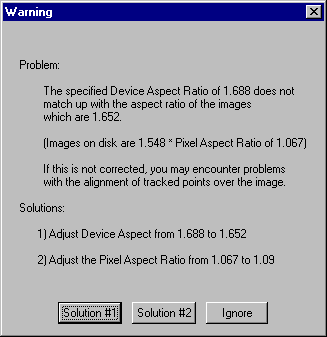
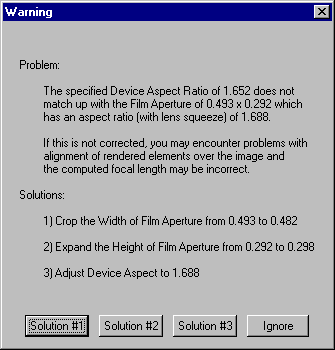
This dialog appears if you choose to adjust the Device Aspect from the first dialog (Solution 1), because the same inconsistency exists in reverse order. In the first dialog, the device aspect ratio was based on the film aperture and didn’t match the image measurements. Now it is based on the image measurements and doesn’t match the film aperture. Solution 1 or 2 will adjust the camera aperture values to match the image measurements.
Solution 3 (Adjust Device Aspect) simply switches back to the first dialog.


