Show in Contents

Add to Favorites

Home: Autodesk Maya Online Help

Bridging between edges

Lesson 1: Modeling a polygonal mesh

Splitting polygon faces

Adding polygons to a mesh
For the protective face shield on the
helmet, you'll create one large multi-sided polygon using the Append
to Polygon Tool and then split it into multiple four-sided
polygons (quads) so that the new polygons match the existing four-sided
topology of the helmet mesh.
To create the face shield using the Append
to Polygon Tool
- Tumble the perspective view so you can
see all of the edges surrounding the area for the face shield.
- Select
Edit Mesh > Append to Polygon Tool >
 .
.
- In the Append to Polygon Tool settings
window, set the following:
- Keep new faces planar:
Off
If the planar option
is on, the Append to Polygon Tool will
not create a multi-sided polygon as the edges you’ll select do not
form a planar region.
- In the perspective view, click once
on the top inner border edge of the helmet mesh to indicate which
mesh you are appending to, and then click the same edge a second
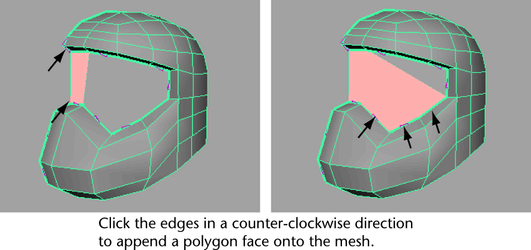
time to begin the append operation (see image below).
- Click the bottom edge of the face shield
that is opposite the first edge you just clicked.
A polygon appears that
spans the two edges.
- Continue to click the remaining border
edges in a counter-clockwise direction around the opening for the
face shield (see image above) until you reach the last edge.
- When you are finished clicking the perimeter
border edges for the face shield, press the q key to quit the tool.
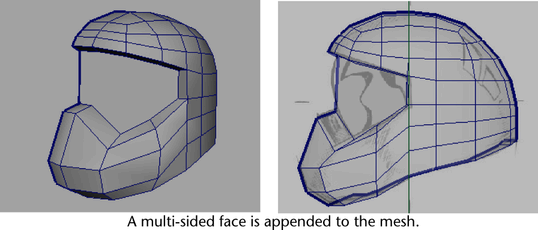
The multi-sided polygon
is completed and added to the existing mesh. Multi-sided polygons
are also referred to as n-gons.
Ideally, all faces should
be four-sided to match the other faces on the helmet mesh. In the
next section, you'll split the n-gon vertically and horizontally into
several smaller four-sided polygons using the Split
Polygon Tool.
 .
.

