You can choose to import the entire contents of scenes saved in MotionBuilder, or only those elements whose names match elements in your 3ds Max scene.
The animation you import from MotionBuilder is fully editable in 3ds Max.
 3ds Max. On the Quick
Access toolbar, click
3ds Max. On the Quick
Access toolbar, click  (Open File). Open pepe_biped_pepe.max.
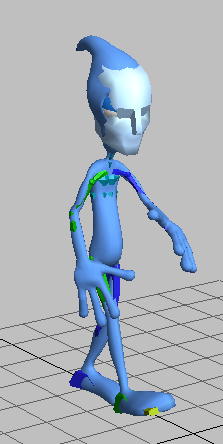
The skeleton bones in this scene file have the same PEPE prefix as the character you exported to MotionBuilder.
Import the animated character to 3ds Max:
 Application menu, choose
Import.
Application menu, choose
Import.
The File Content list displays Add And Update Scene Elements by default. If left as is, this setting would import not only the Pepe character, but the yellow reference skeleton as well.
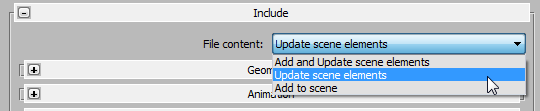
This option updates only the scene elements in 3ds Max that share the same name as those in the imported file. No new elements are imported. If you were importing animation from MotionBuilder to a new 3ds Max scene, you would instead choose the Add To Scene option.
3ds Max displays a warning about skeleton elements: The warning applies to the large MotionBuilder skeleton. You aren’t using this in the 3ds Max scene, so click OK.
Fine-tune the animation in 3ds Max:
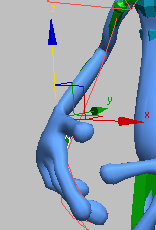
 zoom in and
  orbit around Pepe’s hands.
The character’s fingers are too close to the thighs
 Select a part of the PEPE skeleton
and go to the
Select a part of the PEPE skeleton
and go to the  Motion panel.
 (Create Layer) to create
a new layer of animation.
(Create Layer) to create
a new layer of animation.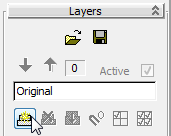
 (Select By Name) and select
the PEPE R Hand bone.
(Select By Name) and select
the PEPE R Hand bone.
 (Set Key).
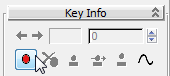
 (Opposite) to select Pepe’s
left hand.
(Opposite) to select Pepe’s
left hand.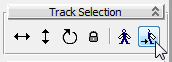
 replay the animation to
see the result of your edits.
replay the animation to
see the result of your edits.
 (Collapse).
In this series of lessons, you took a character called Pepe (consisting of a mesh and a Biped skeleton), and exported it to MotionBuilder as an FBX file. There, you characterized the biped bones, and animated the Pepe skeleton by plotting it to another skeleton whose movements were derived from motion capture. Then you baked the animation back to Pepe’s control rig, made a few adjustments so that the motion better fit his cartoon-like dimensions, and baked the animation back into Pepe’s skeleton for export to 3ds Max. Finally, you fine-tuned Pepe’s body motion using the fully preserved Biped edit functionality.


 zoom out in the viewport,
so you can see all of the animation.
zoom out in the viewport,
so you can see all of the animation.