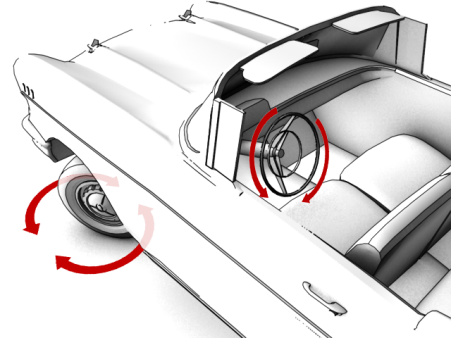
You now need to make sure the front wheels pivot or “turn” as the car moves left or right along the animation path. For added realism, you will also establish a relationship between the wheel pivot and the turn of the steering wheel.
Set up helpers for the front wheels:
In the same way you created a Point helper to direct the car animation along a path, you will also create two more Point helpers to control the pivot of the front wheels by the rotation of the steering wheel.
 zoom in on the car and press F3 to switch to Wireframe mode.
 Helpers Point.

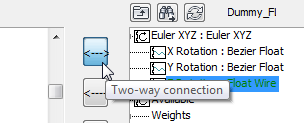
The List Con script automatically assigns the two Position list and Rotation list controllers you set up earlier, permitting you to retain control over the helper’s local orientation.
 (Align) and in the Top viewport,
click the car body.
Align Position group,
turn off X Position, Y, Position and Z Position. In the Align Orientation
group, turn on X Axis, Y Axis and Z Axis.
(Align) and in the Top viewport,
click the car body.
Align Position group,
turn off X Position, Y, Position and Z Position. In the Align Orientation
group, turn on X Axis, Y Axis and Z Axis.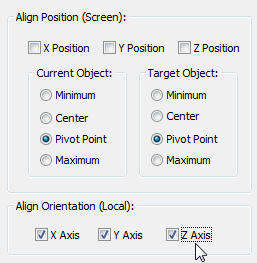
These settings ensure that the car and the helper have the same orientation.
Next, you will align the helper and the right front wheel pivot to pivot in X, Y and Z positions.
 select the Chassis object,
right-click and choose Hide Selection.
Select the new point helper.
Click (Align), and then click Wheel_FR.
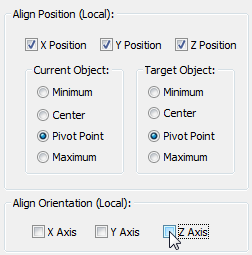
Align Position group,
turn on X Position, Y Position, and Z Position.
select the Chassis object,
right-click and choose Hide Selection.
Select the new point helper.
Click (Align), and then click Wheel_FR.
Align Position group,
turn on X Position, Y Position, and Z Position.
Make sure Pivot Point is chosen in both the Current Object and Target Object groups.
In the Align Orientation group, turn off X Axis, Y Axis and Z Axis.
Select Dummy_FL, and from
the main toolbar click (Align) tool again. In the
Top viewport, click Wheel_FL.
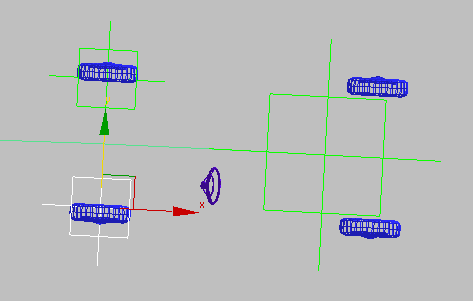
Point helpers aligned to front left and right wheels
Now you will now rework the hierarchy and parent/child relationships of the car setup, so you can pivot (steer) the wheels. These steps also prepare for the body roll you will rig in the next lesson.
Link the wheel helpers to the car helper:
 (Select And Link).
Link the rear wheels to the car helper:
 (Select And Link) still
active, select both rear wheels (Wheel-RL and Wheel-RR)
and drag to the Dummy_CAR helper.
(Select And Link) still
active, select both rear wheels (Wheel-RL and Wheel-RR)
and drag to the Dummy_CAR helper.
Link the front helpers to their wheels:
Link the front left wheel
(Wheel-FL)
to the Dummy_FL helper.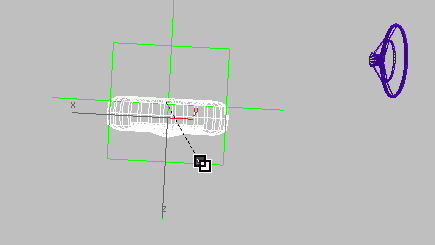
Linking front left wheel to front left wheel helper
Link the front right wheel
(Wheel-FR)
to the Dummy_FR helper.
 (Select Object) to turn
it on and turn off Select And Link.
(Select Object) to turn
it on and turn off Select And Link.
Rotate the wheels (in World X coordinates):
Camera_Birdseye.
(Select) to turn it on.
Rotation (2nd) Euler XYZ Z Rotation.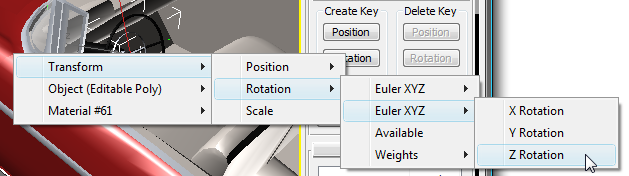
Rotation (2nd) Euler XYZ Z Rotation.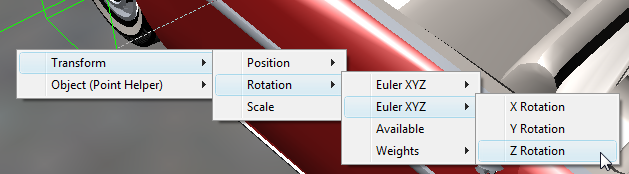
 (Select And Rotate) and
set the coordinate system to Local.
(Select And Rotate) and
set the coordinate system to Local.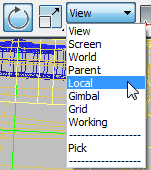
Notice how the steering wheel and the front wheel turn in the opposite direction. You will correct this by modifying the controller expression. A second adjustment is also required. The front wheel needs to turn far less than the steering wheel. This is because the pivot range of a front wheel is about 90 degrees, whereas a steering wheel range of movement is two to three complete revolutions.
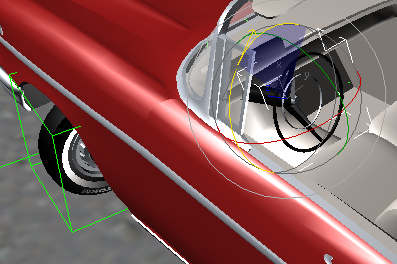
Steering wheel and front wheel turn in opposite directions
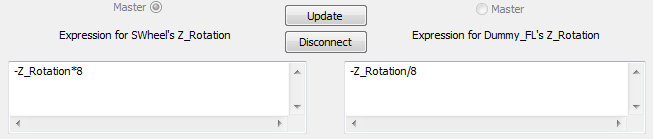
The minus sign (-) operator ensures that the two rotations are aligned, and the *8 and /8 factors ensure that the front left wheel pivots (rotates in Z) eight times less than the rotation of the steering wheel.
Be sure to specify exactly the same expressions as you did in steps 13 and 14, since the right wheel helper was copied, not mirrored, from the front left helper.
You can see the effect of wiring the front right wheel in the Top viewport.
 Close the Parameter Wiring
dialogs.
Close the Parameter Wiring
dialogs.
 (Time Configuration) and
in the Time Configuration dialog Time Display group, choose Frames.
(Time Configuration) and
in the Time Configuration dialog Time Display group, choose Frames.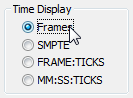
 (Zoom Extents) so you can
see the entire animation path.
(Select And Rotate).
(Zoom Extents) so you can
see the entire animation path.
(Select And Rotate).
 (Auto Key) and rotate the
steering wheel until the Z axis status bar reads –280.
(Auto Key) and rotate the
steering wheel until the Z axis status bar reads –280.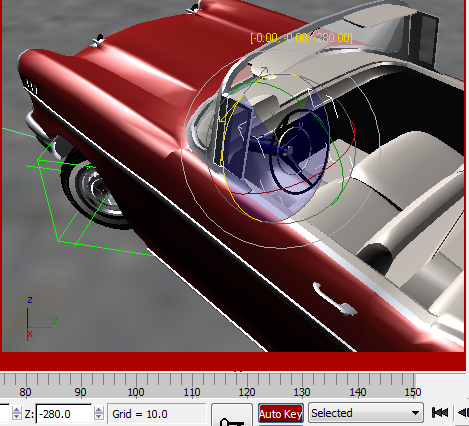
Steering wheel rotation at -280 degrees about the Z axis
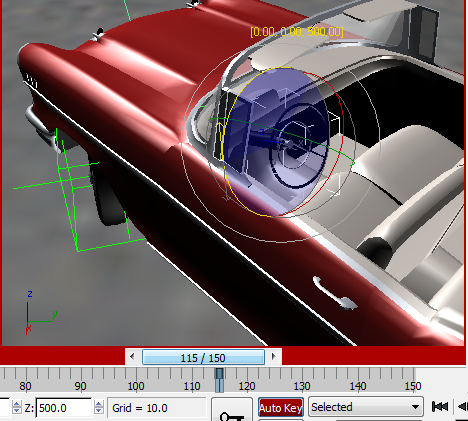
Steering wheel rotation at 500 degrees in the Z axis
 end of the animation and
rotate the steering wheel until the Z axis status bar reads –220.
end of the animation and
rotate the steering wheel until the Z axis status bar reads –220.
 (Auto Key) and test your
animation.
(Auto Key) and test your
animation.


 open
open