Body roll is a phenomenon that occurs when a car rounds a sharp corner. This behavior is not usually apparent in modern day cars unless they are travelling at high speed. In older cars, such as our 1957 Chevy, however, the amount of body roll is discernible to both passengers and bystanders even when the vehicle is travelling at low speed.
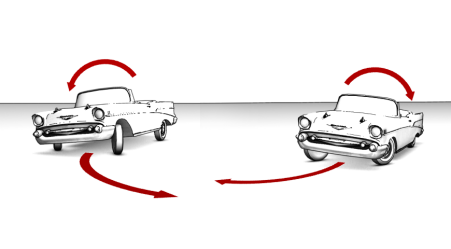
In this lesson, you will create the effect of body roll by rotating the car along its local X axis. Roll direction will be based on the rotation of the steering wheel.
 zoom in on the car and press F3 to turn Wireframe mode on.
 (Select And Rotate) and make
sure the coordinate system is set to Local.
(Select And Rotate) and make
sure the coordinate system is set to Local.
 select the steering wheel
object.
select the steering wheel
object.
 Rotation (2nd) Euler XYZ Z Rotation.
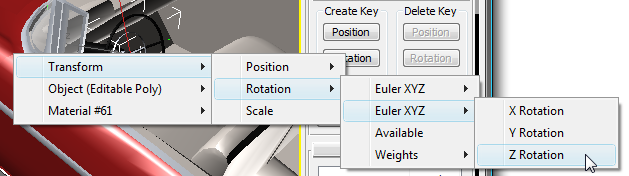
Rotation (2nd) Euler XYZ X Rotation.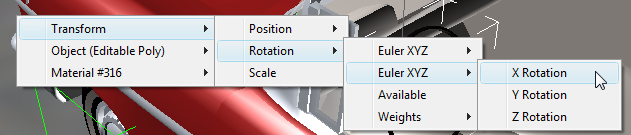
Camera_Wall_S
then scrub the animation to see the effect of the body roll.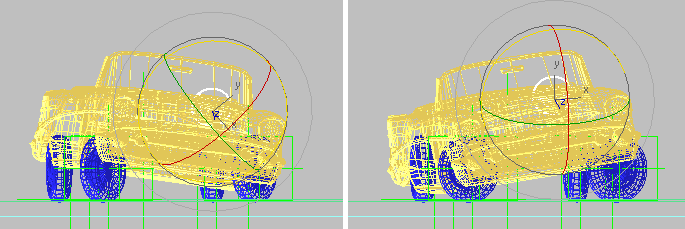
Body roll visible in the Left viewport


 open
open