The initial portion of this tutorial involves opening the scene containing the character mesh to skin, opening a rig to serve as the character skeleton, connecting the two with the Skin modifier, and finally animating the character using an included file.
 (Open File), navigate to
the \character_animation\skinning\ folder,
and open the file applying_skin.max.
(Open File), navigate to
the \character_animation\skinning\ folder,
and open the file applying_skin.max.
The character model in the scene appears at the world origin (0, 0, 0).
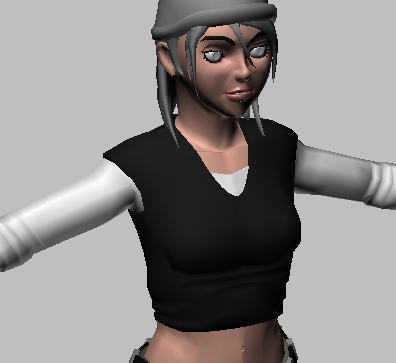
Meet Emma, a medium-resolution character mesh of about 7,500 polygons. Emma is great with kids and works well in TV, games, movies, and other applications that don’t require extreme closeups. In addition to the main character mesh, which is what you’ll be working with, the scene contains separate objects for the hat, hair, and eyeballs.
Next you’ll load the character rig to which you’ll skin Emma.
 (Helpers) and then choose
CAT Objects from the drop-down list.
(Helpers) and then choose
CAT Objects from the drop-down list.
You might be familiar with character studio; CAT is a newer, separate character-animation system included with 3ds Max that offers a different albeit overlapping set of capabilities. This tutorial deals minimally with CAT features, instead spending most the time with the Skin modifier.
The CATRig Load Save rollout that results provides a list of preset character rigs, but you’ll be using a different rig created especially for this tutorial. The easiest way to do this is to load it onto an existing CATParent.
CATParent on right
 Modify panel, and on the
CATRig Load Save rollout, click
Modify panel, and on the
CATRig Load Save rollout, click  (Open Preset Rig). Navigate
to the \sceneassets\animations\ folder
, and open emmarig.rg3.
(Open Preset Rig). Navigate
to the \sceneassets\animations\ folder
, and open emmarig.rg3.
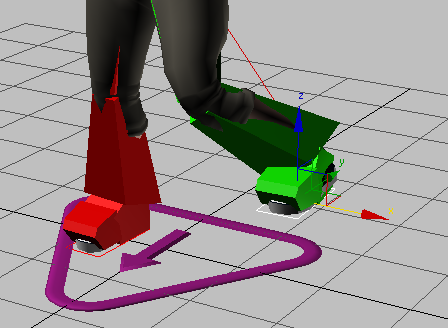
The rig appears at the CATParent location.
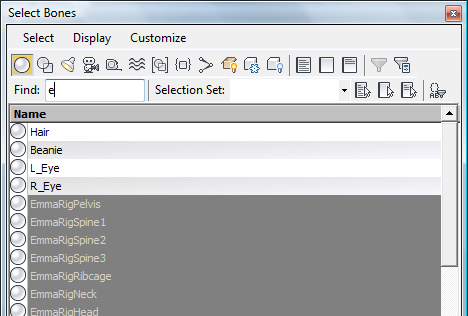
While skinning a character it’s usually desirable to hide the rig, but for times when you might want to toggle its visibility, it’s best to give the entire rig a name so it’s easy to select.
 (Select Object) on, drag
a region around the rig to select all of its bones. In the Named
Selection Sets field on the main toolbar (currently reads “Create
Selection Set”), type the name EmmaRig and
press Enter to make
sure the software registers the name. This is the same name as the
CATParent, but as it’s a selection set, not an object, there’s no
conflict.
(Select Object) on, drag
a region around the rig to select all of its bones. In the Named
Selection Sets field on the main toolbar (currently reads “Create
Selection Set”), type the name EmmaRig and
press Enter to make
sure the software registers the name. This is the same name as the
CATParent, but as it’s a selection set, not an object, there’s no
conflict.
Ideally, when skinning a character, the rig should be centered on the skin mesh. Because Emma is already positioned at the world center, this is easy to do.
 (Select And Move) on the
main toolbar.
(Select And Move) on the
main toolbar.
The skeleton jumps to the world center and is perfectly aligned with the Emma character mesh.
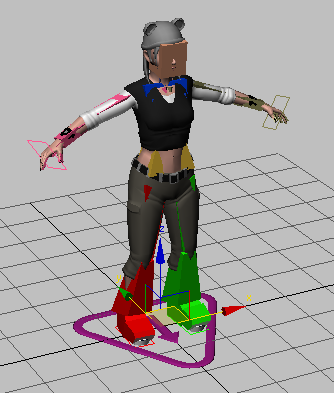
Emma and rig, both at world center
Next you’ll apply the bones to the mesh using the Skin modifier.
(Select Object) on, select
the Emma object and from the Modify
panel  Modifier
List Object-Space Modifiers
category, choose Skin.
Modifier
List Object-Space Modifiers
category, choose Skin.
This applies the Skin modifier to the mesh. The next step is to tell the Skin modifier which bones are to affect the mesh shape. In this case, it’s all of them.
This opens the Select Bones dialog, which is the same as the familiar Select From Scene dialog.
The bones appear in the list on the Parameters rollout and the basic skinning is done. You can demonstrate this by moving the leg via the foot platform.
You can probably see some problems already, such as the loss of volume at the knee. You’ll deal with these in the following sections of the tutorial.
When skinning a character, to work efficiently it’s best to first create a basic animation containing the various poses that the character is likely to assume. This lets you adjust skinning anomalies in the different poses without having to consume time posing and reposing the character manually.
We’ve included an animation file you can load onto the rig using CAT’s Clip Manager feature. It’s instructive to go through this process, and it doesn’t take long, but if you prefer to start skinning now, skip to the next section.
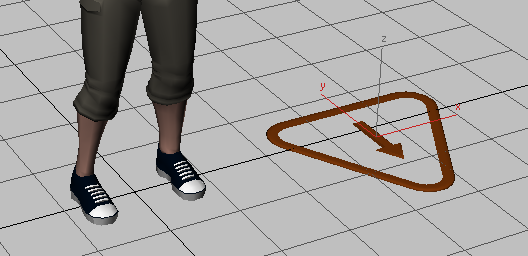
Select the CATParent: the
triangular object at the base of the rig.
 and scroll down to the Clip Manager
rollout. Make sure the Clip button is active.
and scroll down to the Clip Manager
rollout. Make sure the Clip button is active.
 (Browse), and then use the
Open dialog to open the file \sceneassets\animations\emma_stretching.clp.
When the Clip Options dialog opens, click Load to accept the default
settings.
(Browse), and then use the
Open dialog to open the file \sceneassets\animations\emma_stretching.clp.
When the Clip Options dialog opens, click Load to accept the default
settings.
CAT has two modes: Setup, for modifying the rig, and Animation, for animating it. Setup is the default mode; to play animation it’s necessary to switch to Animation mode.
 Setup/Animation Mode Toggle
button, indicating the rig is currently in Setup mode. Click this
button.
Setup/Animation Mode Toggle
button, indicating the rig is currently in Setup mode. Click this
button.
The button image changes
to  , signifying that Animation
mode is active.
, signifying that Animation
mode is active.
 in the animation controls
section of the 3ds Max window to open the Time Configuration
dialog. Set Length to 500 and click OK to close the
dialog.
in the animation controls
section of the 3ds Max window to open the Time Configuration
dialog. Set Length to 500 and click OK to close the
dialog.
 play the animation. It “exercises”
all parts of the body that are likely to need skinning adjustments, starting
with the feet and ending with the fingers.
play the animation. It “exercises”
all parts of the body that are likely to need skinning adjustments, starting
with the feet and ending with the fingers.
However, the cap, hair, and eyeballs, or “accessories,” don’t move with the rest of the mesh.
 (Select And Link), and drag
from each accessory to the EmmaRigHead object to link them
as children (four drags in all). Play the animation again
to ensure that everything moves together.
(Select Object) and then
right-click in the viewport and choose Unhide All.
(Select And Link), and drag
from each accessory to the EmmaRigHead object to link them
as children (four drags in all). Play the animation again
to ensure that everything moves together.
(Select Object) and then
right-click in the viewport and choose Unhide All.


