Material libraries are containers for all of the materials in a scene. Each time you create a material, it's added to a material library. Although all of the materials in a scene belong to a library, they are used only by the objects to which they are assigned.
Storing materials this way makes it easy to share a single material among several objects. It also allows you to access and edit all of the materials in a scene from a single place. Furthermore, because materials belong to libraries and not to individual objects, you can delete an object from the scene, but keep its material for later use. If you no longer want to use a material, you can simply delete it once, regardless of the number of objects to which it's assigned.
The material manager is designed to let you easily view and manage your material libraries (see The Material Manager).
You can open the material manager by pressing Ctrl+7 or choosing Modify  Materials from the Render toolbar.
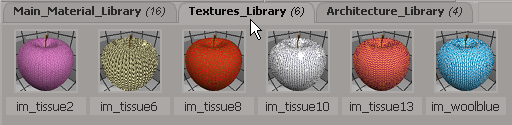
Most of the commands that you need for managing your libraries are found in the Libraries menu. Multiple libraries appear on separate tabs in the shelf. Click on the tab to display that library.
The All tab displays all available material libraries, while the Favorites displays only the materials that you have dragged onto that tab. You can also create your own "favorites" tabs.
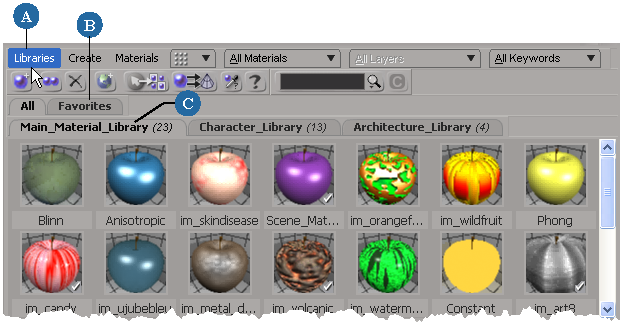
| A |
Most useful commands for libraries are appropriately found in the Libraries menu. |
| B |
The All tab displays all available material libraries, while the Favorites displays shortcuts to materials that you want to keep handy while working. Drag a preset from any library onto this tab to make a copy of it. You can also create your own "favorites" tabs — see Creating Custom Favorites Tabs. |
| C |
Click a library tab to switch between libraries. The selected tab becomes the current library — see Setting the Current LibraryTo set the current library. |
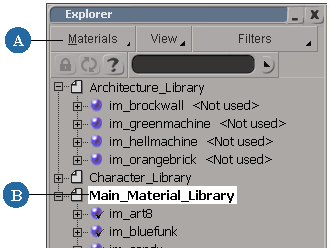
You can also manage your libraries using an explorer with its scope set to Materials (press M).
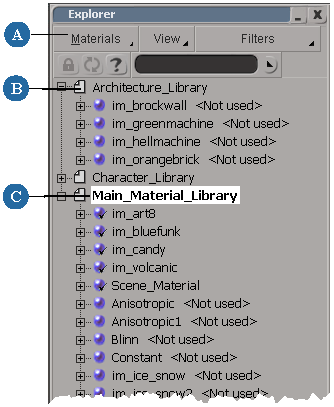
| A |
Set the explorer scope to Materials to view all material libraries in the scene. |
| B |
Expand each library's node to display all of its materials. |
| C |
The name of the current material library is in bold. |
You can also view your material libraries by setting the explorer's scope to Sources/Clips, and expanding the Sources node. The Material node under Sources has a List node that contains all the same libraries that you see when the scope is set to Materials.
By default, every new scene has a material library called DefaultLib. Initially, the library contains only the default scene material (see The Default SceneMaterial), but all new materials that you create in the scene are added to the default library until you create or import a new library and set it as the current library.

By default, material libraries are stored internally as part of the scene. However, you can store them externally, as dotXSI binary or text files, which allows you to share them between multiple scenes.
By default, every new material library is stored internally. Storing a material library internally means that it's part of the scene and has full access to all scene data. This allows you to do things like write expressions that reference particular materials or link a material's parameter's to an object's parameters.
For more information about exporting material libraries, see Importing and Exporting Material Libraries.
Storing material libraries externally allows you to share them between scenes within a project or between projects. By default, external libraries are stored in the MatLib folder, which is part of the project structure; however, you can store external material libraries anywhere.
Whether your external material libraries are binary dotXSI files or text dotXSI files is strictly a matter of preference, though the text format has the advantage of being human-readable. This allows you to manually edit a material library in a text editor without opening Softimage.
Once a library is stored externally, you can import it into other scenes. For more information about importing material libraries, see Importing and Exporting Material Libraries.
Click the icon of the material library whose storage options you wish to change. The library's property editor opens.
Set the Storage parameter to Internal, External (dotXSI binary), or External (dotXSI text).
If you choose either of the External storage options, then you must enter a file name and path for the library.
The library is now stored externally, but the file is not created until you save the scene.
Unless you explicitly create a new material in another library (see Creating New Materials without Assigning Them), the current library is the one to which all newly created materials are added.
You can create as many material libraries as you need. This is useful for categorizing the different types of materials in your scene. For example, you might want to keep separate libraries different types of materials (wood, metal, rock, skin, scales, and so on), or create a material library for each character in your scene.
Right-click a library tab in the shelf and choose New Material Library.
Choose the Libraries New Material Library command from the command bar.
A tab for the new library appears in the shelf and it automatically becomes the current library.
You can rename the library as described below in Renaming Material Libraries.
You can rename material libraries as you would any other scene element.
The default Favorites tab in the material shelf lets you create and collect shortcuts to materials that you want to keep handy. When you drag and drop a material from a library onto this tab, it creates a shortcut to where it is in that material library.
You can also create your own custom tabs to sort the material shortcuts as you like.
The Favorites and custom user tabs aren't "real" material libraries: they're simply tabs where you can collect shortcuts to the materials. Dragging materials to these tabs doesn't make copies of the materials.
Choose the Libraries New User Tab command from the material manager's command bar.
The new tab appears beside the other Favorites tabs. They are automatically sorted in alphabetical order.
Drag a material preset from any library onto the tab name to make a shortcut for it. It may look as if nothing has happened, but the shortcut to the material has indeed been created on the tab.

You can import material libraries, directly or by reference, and export them.
You can import and export material libraries as either dotXSI (.xsi) text files or as material library files (.xsiml). Material library files are the same basic format as dotXSI files except that they contain only material library information. The .xsiml extension also helps you easily distinguish these files from regular .xsi files.
You can import any externally stored material library into a scene. By default, the imported library is stored internally as part of the scene (Storing Libraries: Internal or External).
You can import material libraries as either dotXSI (.xsi) text files or as material library files (.xsiml) (see above).
If you would rather import the library without adding it to the scene, you can import it by reference as described in the next section, Importing Material Libraries by Reference.
From the browser that opens, choose a material library to import.
Select the File Type to import the material library in either the dotXSI (.xsi) or Material Library (.xsiml) file format.
The material library is imported into the scene and becomes a part of it. By default, it is stored internally. A new tab for the library appears on the shelf.
Referenced libraries are externally stored material libraries that you import into a scene by reference rather than adding them to the scene. Referenced libraries can belong to another scene, or can be libraries that you've exported to a storage directory. When you make changes to a referenced library, those changes are reflected in any scene into which you've imported the library.
For example, you could create a master scene that an artist uses to create and test materials. The material libraries in this scene can then be stored externally and imported into several other scenes as referenced libraries. Those libraries' materials can then be used by other artists, but there's no danger that they'll be accidentally altered or deleted since changes can only be made in the master scene.
When you import a material library by reference, you'll notice that the library and all of its materials are locked such that you can apply them to scene objects, but you cannot modify them. For more information, see Locking and Tagging Scene Elements [Data Exchange].
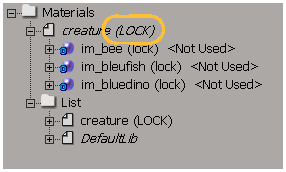
Libraries imported by reference are locked, as are their materials.
If changes have been made to a referenced library that you've imported into a scene, the library is not updated until you close the scene and reopen it.
From the browser that opens, choose a material library to import.
Select the File Type to import the material library in either the dotXSI (.xsi) or Material Library (.xsiml) file format.
The material library is imported into the scene. The library and all of its materials are locked. A new tab for the library appears on the shelf.
You can export material libraries as either dotXSI (.xsi) text files or as material library files (.xsiml). Material library files are the same basic format as dotXSI files except that they contain only material library information. The .xsiml extension helps you easily distinguish these files from regular .xsi files.
Exporting a library is not the same as storing it externally. Internal libraries that you export continue to be stored internally until you specify otherwise.
Select the library you want to export by clicking its tab in the shelf.
In the browser that opens, specify a destination name and path for the exported library.
Select the File Type to export the material library as either dotXSI text files (.xsi) or as Material Library files (.xsiml).
Select the Export Used Image Clips Only if you want to export only the image clips that are used by the materials of the material library that you are exporting.
If you don't select this option, all image clips in the scene are exported.
You can delete material libraries from the explorer as you would any other scene element. If you delete a library that's stored externally, it is not deleted from the project, but simply removed from the scene.
 Except where otherwise noted, this work is licensed under a Creative Commons Attribution-NonCommercial-ShareAlike 3.0 Unported License