There are several issues surrounding the mental ray renderer assemblies that are used for rendering particle instances. This section provides some solutions to the different issues.
The ShapeInstanceTime attribute is used in the Set Instance Geometry, Set Particle Instance Animation Time, Control Instance Animation, and Control Displacement Instance Animation compounds. This attribute defines the "local" time of animated particle instances, and is used to control the shape animation on particle instances.
The ShapeInstanceTime attribute implements instances using assemblies when rendering with mental ray. Assemblies write each instanced geometry to disk and then load them for rendering. Because this process is memory-intensive, it may cause memory problems while rendering many animated particle instances.
As well, assemblies can render only geometry, not lights or cameras.
So, what's the solution? Use the Instance Shape node in each of these situations:
Stand-ins provide a method of offloading assets such that they can be loaded and unloaded, on-demand, at render time — see mi Archives and Stand-ins [Rendering]).
Using stand-ins for rendering animated instance objects can greatly increase their rendering efficiency. In this case, the mental ray assembly basically finds the stand-ins file name and uses it directly. This gives you full control over the contents of the instances and the life-cycle of the assemblies because the original instanced object doesn't have to be a part of the scene. You can export all the frames of the animation that you want for the instanced object and ensure that no re-generation occurs.
The only limitation for using stand-ins as instance objects is that a stand-in object's children won't be rendered. However, you can put all objects under a single parent or a model. You can then select (make sure to branch-select) the top-most node for export and all of the children objects will be contained in the stand-in.

Animated club-bot model is archived as a stand-in, then imported and used as the instanced object.
To use stand-ins, you need to first create a stand-in of the animated geometry to be used for the instance. Any object that
you can export through Render  Export Selected Object is supported (this doesn't include lights and cameras). Then you import the stand-in into your scene and specify it as the
instance object to use.
Export Selected Object is supported (this doesn't include lights and cameras). Then you import the stand-in into your scene and specify it as the
instance object to use.
Create a stand-in using the animated object to be used for the particle instance, then import it into the scene — see Exporting Objects to Object Render Archives for Use as Stand-ins [Rendering] for information on how to do this.
Set up the point cloud's ICE tree for creating particle instances using the Instance Shape node — see Creating Particle Instances. You can also plug in the Control Instance Animation compound to control the instances' animation offsets.

In the Instance Shape node's property editor, pick the stand-in as the instanced object to use.
Select Object Only from the Hierarchy Mode list.
If you select Object+Children, and the stand-in has children, then the stand-in is ignored because nested assemblies are ignored at render time. Only the non-stand-in children of the stand-in will be rendered in that case.
If you have a large number of animated instances, you may want to use stand-ins to render animated instances. However, you can also avoid rendering problems with offset animated instances in a simpler way: duplicate the animated instanced object as many times as you need for variation, then put those objects in a group to be used as instances. The reason you need to do this is because mental ray uses assemblies for rendering offset animation, even if you're using the Instance Shape node.
Duplicate the animated instanced geometry for as many variations as you want to use.
Offset each variation in the timeline so that each one has a different starting point for its animation sequence.
Create a group that includes all the versions of the instanced geometry.
In the Instance Shape node's property editor, pick the group as the instanced object to use.
The objects in the group are used according to their creation order, as shown in the explorer — see Using Groups of Master Objects for more information.
Rendering lights and cameras using the Set Instance Geometry compound is not possible because they are not supported by mental ray assemblies, as described above.
However, you can use lights and cameras as instanced geometry with the Instance Shape node. Just make sure that there are no compounds in the ICE tree that are using the ShapeInstanceTime attribute (see The ShapeInstanceTime Attribute).
Remember that the color and rendering attributes come from the instance master's shader, not the particle's shader. The instance's Position, Velocity, Orientation, and Size, however, do come from the particle, so make sure to set these attributes appropriately.
You may want to create a group of lights, then reference that group as the master object in the Instance Shape node, using Object Only as the Hierarchy Mode.
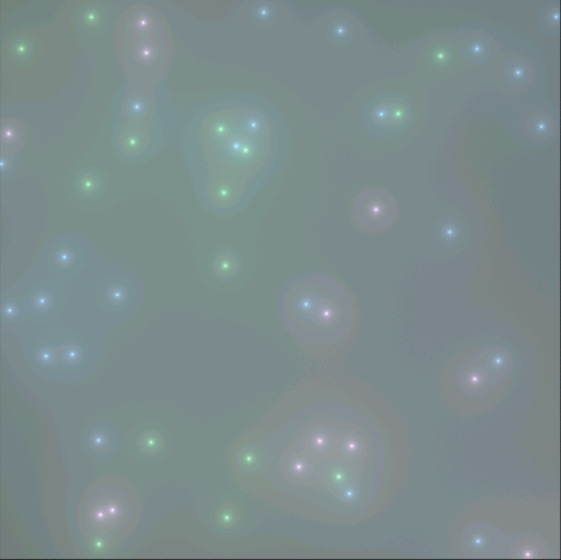
Three colored lights were placed in a group, then the group was referenced from the Instance Shape node. A Randomize node was plugged into the node's Index port to randomly reference each of the lights.
 Except where otherwise noted, this work is licensed under a Creative Commons Attribution-NonCommercial-ShareAlike 3.0 Unported License


