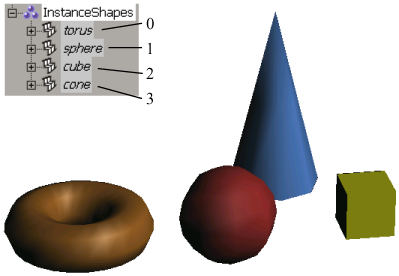
If you've used a group of objects for the instances, you can pick out the instance object you want to display using the Group Object Index in the Set Instance Geometry property editor. If you're using the Instance Shape node, the group member that is picked is determined by the index order, as described below.
The objects in a group are picked according to their creation order, as shown in the explorer. You can use the View  General Sort None (Creation) filter in the explorer to make this easy to see. For example, the first object created is 0 in the index, the second object
is 1, and so on.
General Sort None (Creation) filter in the explorer to make this easy to see. For example, the first object created is 0 in the index, the second object
is 1, and so on.
With the Creation filter on, you can then use the View Reorder Tool in the explorer to change the objects' order in the group.
You can keep adding objects to this group as you like — just remember to add the new object's index number to the Out-of-Range Index value if it's set to Clamp. Or switch this to Wraparound to automatically include any additions made to the group.
Adding to groups makes it easy to test out a few instance objects to see the effect, then add more as you like. You can also easily replace simple, stand-in (proxy) objects with the more complex ones when you've worked out the rest of the particle simulation's movement and basic look.
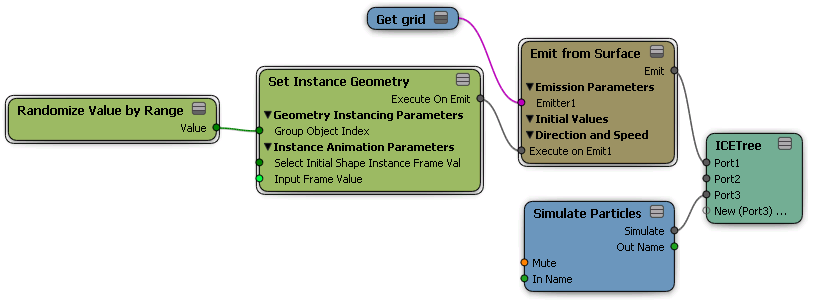
If you want to randomly select objects from the Group Object Index, you can use a Randomize compound (such as Randomize Value by Range, as shown in the tree below). Plug its Value output into the Index port of the Instance Shape node or the Group Object Index port of the Set Instance Geometry compound, then set its value range, which is the index values of the objects you want to use.

 Except where otherwise noted, this work is licensed under a Creative Commons Attribution-NonCommercial-ShareAlike 3.0 Unported License


