The predefined ICE deformations can be applied using commands on the Deform  Create menu of the ICE toolbar.
In general, follow these steps to apply a predefined deformation:
If you want to change the settings of a predefined deformation after it has been applied, you need to open the deformation's property editor:
Update the ICE tree view if it is locked.

If there are multiple ICE trees in the object's construction stack, select the desired tree in the explorer on the right of the ICE tree view.
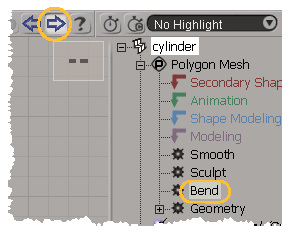
Double-click on the deformation compound in the tree to open its property editor and make the adjustments you want.
The ICE-based Bend deformation is an alternative to the Bend operator found on the Deform menu of the Model, Animate, and Simulate toolbars.
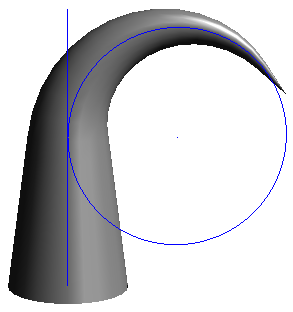
In the Bend property editor, select the Axis to bend and set the other options as desired. You can activate Helper Display to visualize the effect better.
The ICE-based Deform by Curve is an alternative to the operator found on the Deform menu of the Model, Animate, and Simulate toolbars. It produces a slightly different effect, with some squashing in areas of high curvature. The squashing can be useful for avoiding self-penetration with sharp curves, but if you want to reduce the amount of squashing then you should use a curve with a high number of evenly spaced points.
In the Deform by Curve property editor, select the Axis that follows the curve. You will probably need to adjust Translate Along Curve and maybe Scale Along Curve as well. Set the other options as desired.
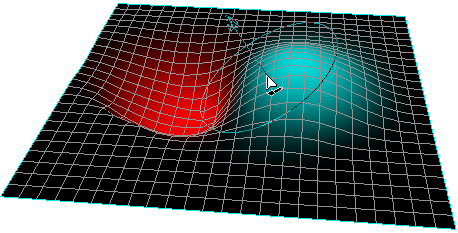
The ICE-based Sculpt deformation is an alternative to the Paint Push Tool (found on the Get Property Map Paint Tools menu).
Choose Deform Create Deform by Curve from the ICE toolbar.
A weight map is created and used to control the ICE deformation, and the Paint tool is automatically activated.
Set the options in the Sculpt property editor as desired, and click and drag in a 3D view to paint. In normal (additive) paint mode:
To push points in, either use the right mouse button or press Shift while using the left mouse button.
To change the brush radius, press R while dragging with the left mouse button.
To change the opacity, press E while dragging with the left mouse button. The opacity controls the amount of weight added or removed with each brush stamp.
To change other brush properties, display the Brush Properties Property Editor [Properties Reference] by choosing Get Property Map Paint Tools Brush Properties or pressing Ctrl+W.
For more information about painting, see Using Brush-based Tools [Commands and Tools].
If you want to resculpt the object at a later time, you can select the original weight map and reactivate the Paint tool.
Activate the Paint tool by pressing W or by choosing Get Property Map Paint Tools Paint Tool.
If an object has more than one paintable property then you may need to select the desired property before painting on it.
You can do this by choosing Explore Property Maps on the MCP, and then picking the associated weight map (by default, named Sculpt_Map).
The ICE-based Transform Mesh deformation moves an object's points. It is similar to transforming an object, but only its points move while its center is unchanged.
Despite its name, this command can be applied to any geometry type including polygon meshes, curves, NURBS surfaces, and point clouds.
Set the Scale, Rotate, Translate, and other options in the Transform Mesh property editor as desired.
The ICE-based Turbulize Mesh deformation is an alternative to the Randomize and Shape Jitter operators (found on the Deform menu of the Model, Animate, and Simulate toolbars).
Despite its name, this command can be applied to any geometry type including polygon meshes, curves, NURBS surfaces, and point clouds.
Set the options in the Turbulize Mesh property editor as desired. In particular:
The ICE-based Turbulize Mesh deformation is an alternative to the Smooth operator (found on the Deform menu of the Model, Animate, and Simulate toolbars).
In the Smooth property editor, set the Mode, Iterations, Strength, and other options as desired.
 Except where otherwise noted, this work is licensed under a Creative Commons Attribution-NonCommercial-ShareAlike 3.0 Unported License


