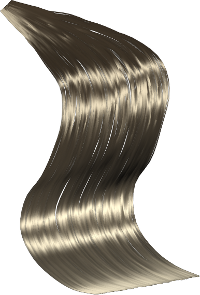
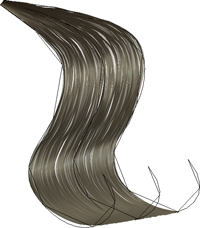
Emitting hair from curves is a little different than from other objects because there isn't a surface from which they're emitted. Instead, the hairs are created between three or more curves along their length, resulting in "ribbons" of hair. No guide hairs are created when you create hair from curves: only render hairs.
While you can't make a volume of hair as you do from other objects, hair from curves is useful for creating things like long hair strands, pony tails, eye lashes, or seaweed.

When you generate hair from curves, the number of vertices on the curve determines how smooth the resulting hair strands are. One hair "guide" point is created for each vertex on the curve. If there are too few segments, the hair may look too chunky. In this case, you may need to add more vertices to the curves before generating hair from them.
Parameters that use weight and texture maps (see Connecting Maps to Render Hair Parameters), such as Cut Map and Density Map, are not directly supported for hair from curves because there is no surface upon which to project a map. However, you can create an interpolated surface for texturing hair from curves by attaching some shaders to the hair's render tree. See Creating a Surface for Texturing Curve-Based Hair for more information.
Create at least three curves, each with a minimum of three points.
Select the curves in a consecutive order. This is important because the hair is interpolated between each adjacent pair of curves in the order in which you select them.
To help select the curves, use the free-form selection tool (press F9) or any selection tool that lets you pick in a definite order. Using a rectangle selection tool selects many curves at once and may not produce the correct interpolation.
With the curves selected, choose Create  Hair
Hair  from Curves from the Hair toolbar.
The render hairs are created between the curves. The curves themselves are the guides that you modify to style the hair.

No guide hairs are created when you create hair from curves: only render hairs. As a result, you can't manipulate or style the hairs using the standard styling operators for guide hairs, but you can change the hair by deforming the curves themselves (moving points, using deformers, etc.).
When you animate the curves, they are reparameterized on the fly, so if there's any kind of stretching on the source curve, the hairs may jump around. Using more subdivisions on the curve minimizes this problem.
If you animate hair created from curves using a deformation (such as a lattice, envelope, etc.), the render hairs may appear to shift or "pop," especially if they have kink or frizz. To resolve this, set the Stiffness parameter value to 1 (on the Dynamics page in the Hair property editor). This means you can't use dynamics on the hair, but the shifting will be resolved.
 Except where otherwise noted, this work is licensed under a Creative Commons Attribution-NonCommercial-ShareAlike 3.0 Unported License