Hair is actually represented by two types of hairs: guide hairs (geometry) for styling and render hairs for viewing and rendering. You can display either the guide or render hairs (or both) in a viewport.
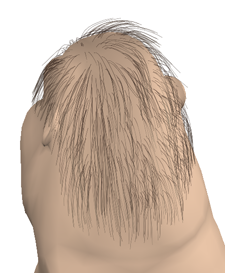
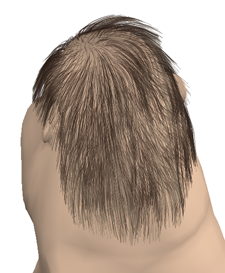
Render hairs are the "filler" hairs that are generated from and interpolated between the guide hairs. And as their name implies, render hairs are the hairs that are actually rendered. Color information is consistent with what you set in the shaders that are connected to the hair, and much tweaking of hair properties can be done without needing to use a render region.
Guide hairs are displayed when you select the hair object, regardless of the display type that is set.
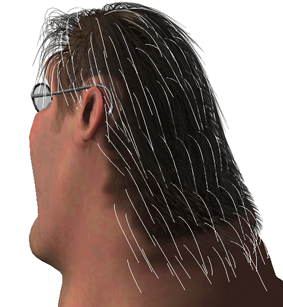
Dr. Bunsen is shown here with both guide hairs (in white) and render hairs (the "filler" hairs). Although the Render Hairs display type is active here, the hair object is selected which highlights the guide hairs in white.
For information on styling the guide hairs, see Styling and Animating Guide Hairs; for information about render hairs, see Getting the Look with Render Hairs.
Select Guide Hairs as the Display Type in the Hair property editor to display only the guide hairs. This speeds up the display and is useful when you're styling the hair.
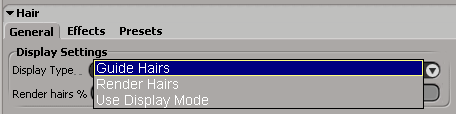
Select Render Hairs as the Display Type to display only the render hairs.
Then set the Render hairs % value to view only a certain percentage of the render hairs (the default is 10%) in the viewport.
This value is a percentage of the Total Hairs value (6500 by default) in the Render Settings section of the Hair property editor (see Connecting Maps to Render Hair Parameters). Increasing the percentage gives you a better sense of what the final results will be, but also slows down the interaction speed.
Remember that the Render hairs % value in the Display Settings is the value only for viewing the render hairs in the viewport. To determine the percentage of hairs rendered, you must set the value for the Render Hairs% parameter in the Render Settings area as described on Rendering a Percentage of Hairs.
Whatever percentage and display option you set for the render hairs in the Hair property editor is reflected in the Render Hairs menu on the Hair toolbar, as shown here.
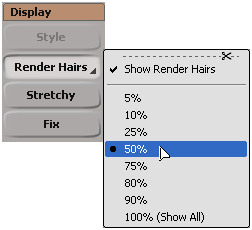
The value selected here is the same as is set in the Hair property editor.
Select Use Display Mode to view the hairs using whatever display mode is set in each viewport. Guide hairs appear in the Wireframe, Depth Cue, and Hidden Line Removal type, and render hairs appear in the Constant, Shaded, Textured, Textured Decal, and Realtime Shader type (the OpenGL display modes).
This can speed up the interaction and reduce visual clutter since you won't have render hairs in every view.
 Except where otherwise noted, this work is licensed under a Creative Commons Attribution-NonCommercial-ShareAlike 3.0 Unported License