Each region of the face has a specific deformer that lets you tune that area of the face. These regions correspond roughly to the face's muscular anatomy. They deform different areas of the face to simulate tissue compression when you move an animation control, such as the way a cheek creases with a smile, or the way a cheek puffs from inflating the inside of the mouth.
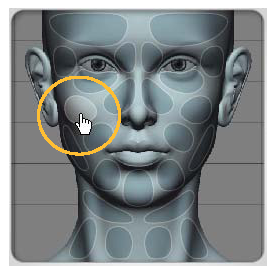
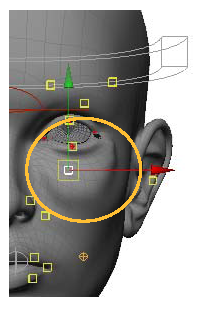
Region deform areas are represented on the face map on the Regions tab as elliptical areas that you can click.
You can modify the area that the deformer affects, as well as the strength of each deformer. The strength pushes or bulges out the skin in each area of the face, which is the opposite effect of when you use a wrinkle map or puff map (these maps cause creases — see Painting Wrinkle Maps).
You can modify which points or polygons are included in each region. As well, you can adjust the size and falloff for each region by painting a weight map for it.
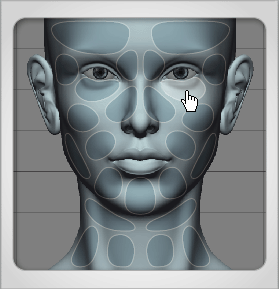
The following illustration shows how each region deform area is mapped to which animation control. When you move an animation control, the corresponding region deform map is used.
Note that not all animation controls are mapped to a region deform area.

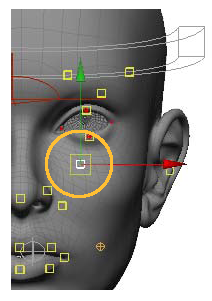
On the face in the viewport, select an animation control in the region you want to adjust and position it in relation to how you want it according to the region's deformation.
Consult the image above to see which animation controls maps to which region.
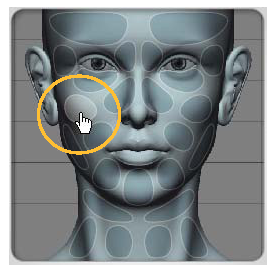
Click the corresponding region of the face on the Face  Regions tab. When you do this, the region's parameters appear on the Options area below.

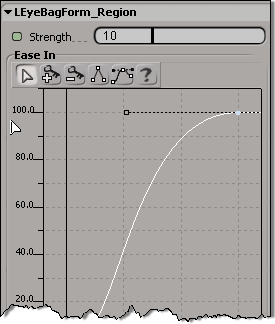
In the Options area, set the value of the Strength (amplitude) or Multiplier parameter (for the tendon and cheek puffing deformers), which is a global value that determines the bulging strength applied when an animation control is activated.
This value is tempered in different ways by the weight maps that you have painted. See Painting Weight Maps for more information.
Adjust the profile curve in the graph in the Options panel to change the area of the face that should bulge, as well as the ease-in and ease-out for the area affected by that deformer.
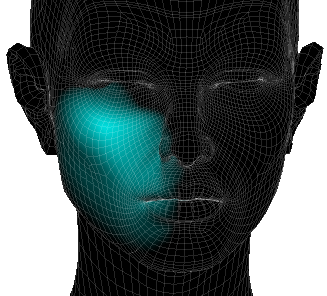
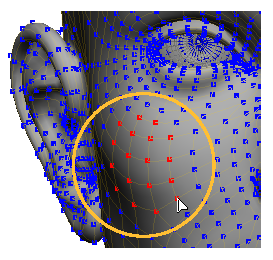
You can paint a weight map for each region displayed on the Face > Regions image to control each region's influence on the face.
Painting lets you control the falloff of the deformation of that region: for example, you can create a smooth falloff at the edges of the weight map with any unwanted points ending up with a zero weight but still blending in nicely with their neighboring points.
You can also make the regions larger to get a better blending effect, or change the shape of the region to deform the face a little differently.
Do either of the following to paint the weight map for the region:
Release the Shift key and move the cursor over the head to activate the weight paint tool.
When you paint, values of 1 (turquoise) are where the region is 100% affected by the deformation (100% of the Strength value is used).
A value of 0 (black) means that the region is not affected by the deformation (Strength value is ignored).
Hold down the Alt key while painting to gradually blend the region's edges.
Press Esc or the space bar to exit from weight painting mode.
Click the Face Maps tab and choose Toggle Maps On Selected to turn off the map display.
You can change which points and/or polygons are included in each region's area. This lets you expand or contract the size of the region, allowing you to set exactly what you want to be affected by the region deformer.
Click a region of the face on the Face Regions tab.
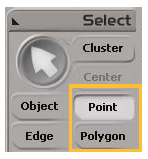
On the main command panel, click the Point or Polygon button in the Select panel.
On the head, select the points or polygons that you want to add to the selected region.
In the Options area on the Tune panel, click the Modify Region with Selected Add button.
Select the Recalculate Falloff Paint option to automatically recalculate the falloff of the new region area.
You can check the results of the new region area when you paint the region (see below) or sculpt that region (see Overview of Sculpting).
On the main command panel, click the Point or Polygon button in the Select panel.
On the head, select the points or polygons that you want to remove from the selected region.
In the Options area on the Tune panel, click the Modify Region with Selected Remove button.
Select the Recalculate Falloff Paint option to automatically recalculate the falloff of the new region area.
You can check the results of the new region area when you paint the region (see Region and Stress Maps) or sculpt that region (see Overview of Sculpting).
Region maps and stress maps are provided only for visual feedback of the region deformers: you cannot paint on region or stress maps as you do wrinkle, puff, or tendon maps.
You can find the region and stress maps in the explorer by expanding the Face Actor Head Polygon Mesh Clusters WeightMapCls node.
A region map is a weight map that displays the Strength values you set for the region deformers that have been tempered by the effect of any wrinkle, puff, and tendon maps that you've applied. This map basically gives you visual feedback of the location of where the skin gets compressed when the controllers are moved. It can also be used to drive parameters of a shader applied on the head. For example, it could control the intensity of a bump or displacement map.
A stress map is a weight map that is identical to a region map, but shows the Strength value results without the effect of any of the wrinkle or puff maps. Stress maps can be created for different face poses and output to blend normal maps in games, allowing you to create more detail for facial expressions. This way, you can use Face Robot as a photo shoot center for generating normal maps for different facial expressions.
You can also create a tendon stress map for the same purposes as a stress map. A tendon stress map is the same as a region map, but shows the Strength value results without the effect of a tendon map (see Painting Tendon Maps).
 Except where otherwise noted, this work is licensed under a Creative Commons Attribution-NonCommercial-ShareAlike 3.0 Unported License