Keyframing (or "keying") is a process for animating values over time. In the case of Face Robot, it means animating the position and rotation parameter values of the animation controls which animate the face. Keyframes are saved for the extreme (or critical) poses at the appropriate frames, creating "snapshots" of movement at specific moments, and Face Robot performs the interpolation between the keyframes.
You can set keys for any control in any order and at any time. When you add a new key, Face Robot recalculates the interpolation between the previous and next keys. If you set a key for a parameter at a frame that already has a key set for that parameter, the new key overwrites the old one.
When you need to adjust an area of the face to have it deform properly according to the animation, click the Tune button to go to Stage 6: Tune.
Keying is done by selecting the animation controls and clicking the Key All or Key Select buttons on the Act panel. You can also use the standard Softimage keying methods (such as pressing the K key, clicking the key icon, or using autokey - see Overview of Setting Keys). When you key, Face Robot automatically keys the correct parameters for the selected animation controls.
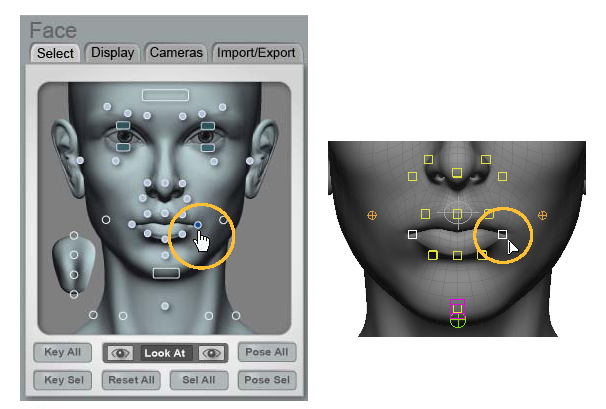
On the Face > Select tab on the Act panel, select one or more control points that you want to position and key.
Click the Sel All button to select all the controls.
When you select a control on this tab, the corresponding control on the face in the viewport is selected. You can also directly select the controls in the viewport.
See Animation Control Set for the names of each control.
On the timeline, go to the frame at which you want to set a key.
Position the selected controls as you want by translating or rotating them.
Click the Key Sel button to set keys on this frame for the selected controls, or click the Key All button to set keys on this frame for all controls.
You can also press the K key, or click the key icon at the bottom of the interface.
You can click the Reset All button at any time for all controls to return to their default positions.
Continue setting keys in this manner at different frames in the timeline.
In the image on the left, a key is set at the first frame of the scene for the animation controls in a neutral pose.
On the right, the animation controls are moved up at a later frame to create a slight smile, and another key is set for this state.
To edit the fcurves, select the controls you have animated and open the animation editor - see Overview of the Fcurve Editor.
When you need to adjust an area of the face to have it deform properly, click the Tune button to go to the next stage: Stage 6: Tune.
 Except where otherwise noted, this work is licensed under a Creative Commons Attribution-NonCommercial-ShareAlike 3.0 Unported License


