A cluster is a named set of components that are grouped together for a specific modeling, animation, or texturing purpose. By grouping and naming components, it makes it easier to work with those same components again and again. For example, by grouping all points that form an eyebrow, you can easily deform the eyebrow as an object instead of trying to reselect the same points each time you work with it. You can also apply operators like deformations or Cloth to specific clusters instead of an entire object.
You can define as many clusters on an object as you like, and the same component can belong to a number of different clusters.
You can define clusters for points, edges, polygons, subsurfaces, and other components. Each cluster can contain one type of component. For example, a cluster can contain points or polygons, but not both.
A cluster can contain only elements from a single object. Clusters cannot span multiple objects.
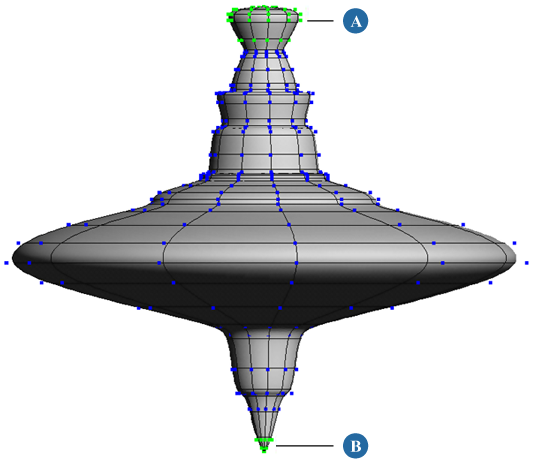
Spinning top with two clusters: Top (A) and Bottom (B)
In addition to creating a cluster, you can create a cluster constrained to a null (cluster center) or you can create non-overlapping clusters. Non-overlapping clusters are particularly useful when applying local materials and textures to polygons.
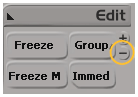
Choose Edit Create Cluster from the Edit panel. A cluster is created and automatically selected.
If desired, press Enter to open the cluster's property editor and change the default name. You can also change the default display color for unselected clusters — this is useful if you have many clusters on the same object.
Choose Edit Create Cluster with Center from the Edit panel. A cluster and a null are created, with a Cluster Center deformation already applied. The null center
is automatically selected.
Modify and animate the scaling, rotation, and translation of the null to affect the cluster.
For more information about cluster center deformations, see Cluster Centers [Data Exchange].
You can select clusters in a 3D view or by using the explorer. Selected clusters are displayed in white by default.
For more information about selecting in general, including selection tools and filters, see Selecting.
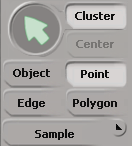
With a selection tool and component filter active, click the Cluster button on the Select panel. Note that the Cluster button changes to the Group button when an object-type filter is active.
If both Select SI|3D Selection Model and Select Extended Component Selection are off, use the middle mouse button when a select tool and component filter are active.
Use the mouse to select components.
If a component is a member of a cluster, the cluster is selected.
If a component is a member of multiple clusters, all the clusters are selected. You can use the Selection button to refine the selection further (see Refining the Selection with the Selection Explorer).
If a component is not a member of any cluster, nothing is selected.
Click the Clusters button at the bottom of the Select panel. A pop-up explorer opens, showing all clusters on the active objects.
You can use this pop-up explorer to select one or more clusters just as in an explorer window. See Selecting Elements in the Explorer [Windows and Views].
You can toggle the display of clusters in the 3D views, change cluster display colors, and display cluster reference frames.
Click on a view's Show menu (eye icon) and choose Clusters.

For other ways of setting this and other display options, see Displaying Types of Elements and Other Data [Basics].
By default, components in clusters are displayed in green. If you have many clusters on an object and need to distinguish them easily, you can set their display color.
Like objects, selected components and clusters have a local center. Unlike objects, this reference frame is computed dynamically; it is the average local reference frame of all the selected components. You can display this reference frame as a visual guide, which is useful when setting tangency and normal parameters for object to cluster constraints.
After you have created a cluster, you can still add and remove members.
Add one or more components of the same type to the selection.
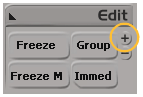
In the Edit panel, click the + button (next to the Cluster button).
Choose Edit Add to Cluster from the Edit panel.
When you add components to an object, any new components that are completely surrounded by similar components in a cluster are automatically added to the cluster.
However if you manually add components to a cluster after applying a topology operator, any components you subsequently add to the cluster will not be affected by operators previously applied to the cluster.
For example, if you apply a Twist deformation to a point cluster on a surface and then add a knot curve to the surface, any points you add to the cluster will not be affected by the Twist.
When you apply a material or texture to selected polygons or a polygon cluster, Softimage creates a local material on the cluster. For more information about local materials and textures in general, see Assigning Materials to Selected Polygons and Polygon Clusters [Materials].
 Except where otherwise noted, this work is licensed under a Creative Commons Attribution-NonCommercial-ShareAlike 3.0 Unported License