There are a variety of ways to display camera information in 3D views.
To display camera information in 3D views, you can use camera-related tokens and templates to create a viewport slate. A viewport slate can be defined for a specific camera, or for all cameras at once. You set the Viewport Slate options on the Stats tab of the Objects.
When working with cameras, the most useful tokens are [Camera], [Frame], [CameraProjection], [CameraAspect], [CameraType], and [CameraFormat]. In addition, the [Value] token allows you to display the value of any camera property you wish.
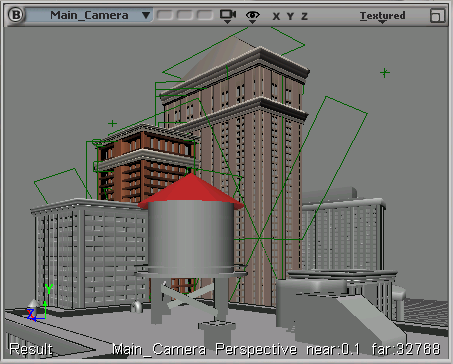
The viewport slate (in the image below) displays basic camera information: camera name, projection type, as well as the values for the camera's near and far clipping planes.
The template is specified as follows:
[Camera] [CameraProjection] near:[Value main_camera.camera.near] far:[Value main_camera.camera.far]
For more information about using tokens and building templates, see Tokens and Templates [Data Exchange].
In addition to the viewport slate, you can create a "heads-up display" (HUD) to show and edit the values of camera-related parameters. For example, you can use custom DisplayInfo parameters to quickly turn on and off the display of camera cones which are useful visual cues when setting clipping planes and field of view parameters. For more information, see Displaying Custom and Proxy Parameters in 3D Views [Customizing Softimage].
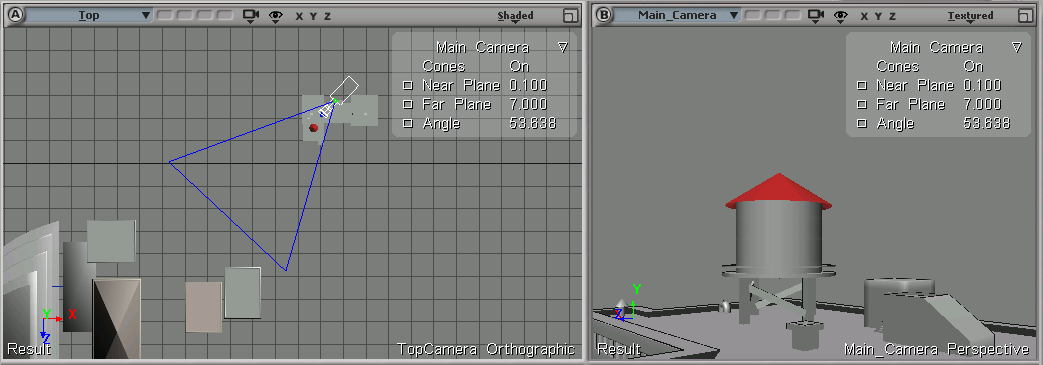
When you're working with cameras, it's very useful to be able to visualize the camera's frustum in any or all viewports. The frustum is a truncated pyramid shape that is defined by the camera's Field of View, Clipping Planes, and all Projection Plane parameter values in the Camera Property Editor.
All objects that are within the frustum are viewed by the camera, and will be rendered.
From a viewport's command bar, click the eye icon and choose Cones. This displays the selected camera's frustum in that viewport.
You can also display Cones for unselected cameras by specifying this in the Objects (Transforms tab).
From the main menu, choose Display Cones. This displays the selected camera's frustum in all viewports.
The frustum is displayed in blue lines for the selected camera.
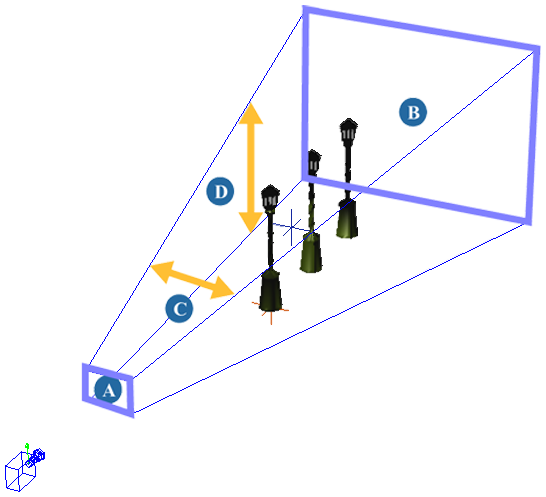
You can see how far an object is from the render pass camera (or output camera) in any or all viewports. This option can be useful when trying to build a scene or set up your lighting. It is also used to help define clipping-plane distances and the zero parallax plane for stereo cameras.
From a viewport's command bar, click the eye icon and choose Distance to Output Camera. This displays the distance in the selected viewport.
From the main menu, choose Display Distance to Output Camera. This displays the distance in all viewports.
Once activated, the Distance to Output Camera tool displays a reading of how far a selected object is from the render pass camera. The value is displayed in Softimage units.
 Except where otherwise noted, this work is licensed under a Creative Commons Attribution-NonCommercial-ShareAlike 3.0 Unported License


