


You can cache the simulation of the non-ICE rigid bodies current environment into a simulation environment cache. The environment cache stores the simulation as global transformation function curves that you can edit in the animation editor. The fcurves are raw curves, meaning that there is a key at every frame.
You can use this cache to scrub the simulation back and forth in the timeline. It also provides you with an easy way of testing variations to your simulation: every time you change something in the simulation, you can simply play the simulation again to update the cache with the changes.
You can also save the environment cache to an action source and optional clip to use in the animation mixer — see the section below. You can cache one action source per model, which lets you import and export models with their cached simulation intact.
To cache the rigid body simulation environment :
Select the environment you want to be current for the rigid bodies simulation cache, then right-click on it and choose Set as Current Environment.
Open the Cache Manager (see Opening the Cache Manager), then click the Simulation tab at the top of its window.
Open the Simulation Time Control property editor for the current simulation environment. (In the explorer, open the current Environment and click the Simulation Time Control icon).
Play the frames of the simulation that you want to cache. This creates an environment cache file that you can find in the current environment's Caches node.
You can also cache the frames by jumping to the last frame of the simulation that you want to cache: all the frames of the simulation up to that frame are cached.
If you want to keep making changes to the simulation and update the contents of the environment cache every time you play it, keep the Cache on Playback option on.
If you don't want to do this, make sure to turn off the Cache on Playback option when you're done playing back the simulation.
After you have created an environment cache of the rigid body simulation, you can also create an action source to keep with the model. You can have one cache file source per model, which lets you import and export models with their cached simulation intact.
At the same time you create an action source, you can also create an action clip from this source and apply it in the animation mixer. Note that creating a clip removes the simulation from the rigid body objects. If you want to keep the simulation intact, you can copy the objects or your scene before creating the clip.
Once you have an action clip in the animation mixer, you can use it like any other action clip. For example, you can load other simulation action sources on tracks in the mixer, then play each one separately (solo), or mix the weights of two or more simulations together.
For information in general about action sources and clips in the animation mixer, see Actions.
Click the Save Cache to Mixer button to open the Store Environment Cache in Mixer dialog box.
In this dialog box, enter an Action Name for the action source that contains the cached simulation. This source is kept in the model's Mixer > Sources > Animation node. Click OK in the dialog box to create the action source.
You can optionally select the Add Clip to Mixer option to create and apply the action source as an action clip in the model's animation mixer.
The simulation is removed from the rigid body objects when you click OK in this dialog box.
By default, the action source is stored as an Internal type of source. However, you can change it if you like:
In the explorer, click the action source's icon (in the model's Mixer > Sources > Animation folder) or click the current environment's Environment Cache icon to open its property editor.
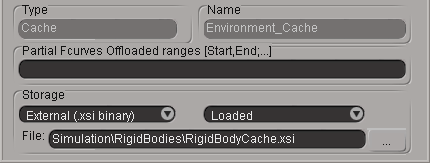
In the Action Source or Environment Cache property editor, select the cache file's Storage type as Internal (saved with the scene) or as External (saved to a file).
If you select Internal as the storage type, the source is saved as any other action source in the current model's Mixer > Sources > Animation folder.
If you select any of the External options as the storage type, select a location and File name for the simulation source. This allows you to export the cached simulation in a separate file.
For information on external action sources, see Creating External Action Sources [Nonlinear Animation in the Animation Mixer].
Once you have created a simulation environment cache file, you can lock it so that its contents can't be resimulated once it is complete. This is particularly useful when you're happy with the current state of the simulation and want to make sure that it won't change.
You should lock a cache file before sending it to a render farm.
 Except where otherwise noted, this work is licensed under a Creative Commons Attribution-NonCommercial-ShareAlike 3.0 Unported License