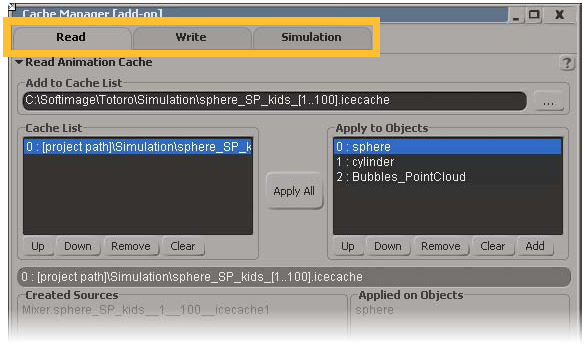
The Cache Manager is your one-stop shopping center for all your caching needs. Using this tool, you can save animated deformations and simulations into cache files, as well as load cache files into the animation mixer.
A point cache file contains the point position data of an object that is simulated or has animated deformations. The object's point position is stored in local space by default, but you can also choose to store it in global space. A point cache file stores only the XYZ positions of an object's points (vertices) in space, not the object's transform data (translation, rotation, or scale) in its Kinematics node.
In addition to regular cache files, you can also create Caches List (.cacheslist) files that help you manage how you load multiple objects and multiple cache files.
 Simulation
  Save Cache on Simulation and Load Cache on Selection commands on the ICE toolbar are designed to be used mostly with the Lagoa ICE simulator. See Applying Cached Post Sim Effects for more information on using them.
Saving different variations of a simulation or animated deformation as you're testing it out.
Reducing the number of calculations that are performed when playing back or rendering scenes.
Exporting an object's data to other scenes, other computers, and to other 3D software packages, such as Autodesk® Maya® or Autodesk® 3ds Max®.
Blending multiple cache file clips in the animation mixer to create various effects.
Blending multiple cache files in an ICE tree by using the Cache On File node.
You can cache these types of simulations and animation into cache files:
ICE particle and deformation simulations (including Lagoa and Syflex ICE cloth/curve simulations) — use the Write tab or Simulation tab (simulation environment cache) in the Cache Manager, or use the Cache on File node in the ICE tree.
ICE animated deformations — use either the Write tab in the Cache Manager or the Cache on File node in the ICE tree.
Animated deformations— use the Write tab in the Cache Manager.
Soft body and cloth simulations (non-ICE Syflex is not supported) — use the Write tab in the Cache Manager.
Rigid body simulations — use the Simulation tab (simulation environment cache) in the Cache Manager.
You can open the cache manager in any of these ways:
Click the tabs at the top of the Cache Manager window to display the appropriate property editor for each caching task:

On the Read tab, you can read and load any type of point cache files in the animation mixer — see Reading Cache Files
On the Write tab, you can create point cache files for objects with animated deformations, cloth simulations, soft body simulations, ICE simulations, or ICE animated deformations — see Writing Cache Files
On the Simulation tab, you can create point cache files, simulation environment caches, and cache file sources and clips for ICE simulations - see Creating ICE Simulation Environment Cache Files.
For rigid body (non-ICE) simulations, you can create simulation environment caches and action sources and clips - see Caching Non-ICE Rigid Body Simulations.
Once you have created a cache file, you can:
Load it into the animation mixer where you can play it back, blend it with other cache files, change the clip's timing, and so on — see Reading Cache Files.
Read it in the ICE tree using the Cache on File node — see Reading a Cache File in the ICE Tree.
Export it and use it on another machine or in another scene.
When you create a cache file, it is saved to the folder that you have specified in the Path text box in the Cache Manager. When you load this cache file into the animation mixer, a cache file source and clip is automatically created for it.
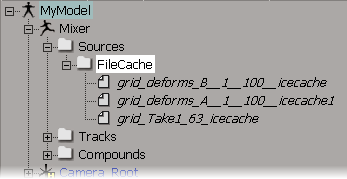
You can find the cache file sources in the explorer: select the Sources/Clips filter, then open the Sources  FileCache folder.
A copy of each of the sources (displayed in italics) is also available in the appropriate model's Mixer  Sources
  FileCache folder.

You can also inspect a file cache source by right-clicking on a file cache clip in the animation mixer and choosing Source. This opens the File Cache Source Property Editor.
You can copy cache files to move them between folders and drives, such as from local drives to network drives. This is handy for working and generating cache files locally, which is usually faster, and then copying them to the network for sharing with others or for using on a render farm.
You can copy cache files via scripting using the CopyCacheFiles2 command. For example:
CopyCacheFiles2 [ObjectsToCache], SourcePathString, SourcePathString, [Overwrite], [ShowProgressbar], [Version]
 Except where otherwise noted, this work is licensed under a Creative Commons Attribution-NonCommercial-ShareAlike 3.0 Unported License