You can customize the script editor in the following ways:
TipYou can zoom in and out of the editing and history panes by clicking in the pane, then pressing the key and moving the scroll wheel (up for zooming in or down for zooming out). This action only affects the display and does
not affect the
script editor preferences for text size.
Setting the Scripting Preferences
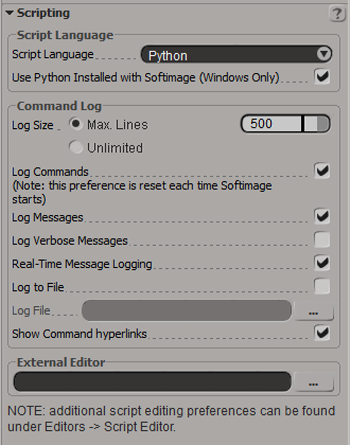
You can use the scripting preferences to customize how Softimage logs information and for selecting a scripting language.
To access the scripting preferences, select from the command bar.
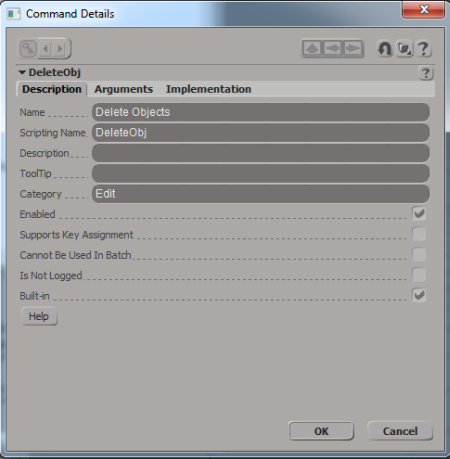
One of the interesting settings is the check box. When this check box is selected, the command names appear as hyperlinks in the history pane. The Command Details
dialog appears to display information about the command when you click on the associated hyperlink.
Setting the Script Editor Preferences
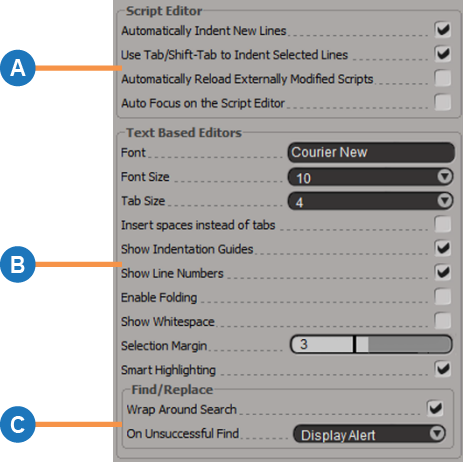
You can customize different properties such as indentation, font, and others in the editing pane using the script editor preferences.
In addition, you can specify how find and replace works in the script editor. To access the script editor preferences, select
from the command bar. Alternatively, you can select from the application menu bar, expand the node, and click .
| A
|
Script Editor-Specific Options
-
Indents a new line with the same number of tabs or spaces as the previous line. By default, this option is enabled.
-
You can select one or more lines and press Tab to increase the indent. You can press Shift+Tab to decrease the indent. By
default, this option is enabled.
-
Reloads any open file that has changed (for example, if the file is modified in another text editor or by another instance
of Softimage). By default, this option is disabled and Softimage prompts you to reload externally modified files.
-
Controls whether the script editor automatically pops in front of other windows as soon as the mouse pointer moves over it
so that you do not need to click in the editing pane to start typing. By default, this feature is disabled.
|
| B
|
General Text Editor (Scintilla) Features
-
The font to use in the script editor. You can type the name of any font in this text box. If the specified font is installed
in your system, the editor uses the font. If it is not installed or recognized, the font defaults to the closest match.
-
The font size in points to use in the script editor. You can select a font size in points from the drop-down list between
4 to 60.
-
The number of spaces used to represent tab characters. You can set the tab size between 1 to 16 spaces.
-
Enabling this option inserts spaces when you press the Tab key.
-
Displays the indentation guides in the editing pane. By default, this option is enabled.
-
Displays line numbers in the left margin. This is very helpful when working with large scripts. By default, line numbers appear
in the left margin.
-
Displays folding controls in the left margin. There are two folding controls: "-" (collapses lines within a syntactic block such as an if-clause or a function), and "+" (expands any previously collapsed syntactic blocks). Folding blocks in your code makes it easier to read and navigate long
files. By default, this option is disabled.
-
Displays spaces as dots and tabs as arrows in the editing pane. This can be very helpful when you are working with a language
like Python, where tabs are syntactically significant. By default, this option is disabled.
-
Sets the width of the margin which is used to indicate bookmarking in the editing pane. If the margin size is 0 (default), bookmarked lines appear with light blue highlighting in the editing
pane. Any other value (between 1 to 22) indicates a bookmarked line using a light blue square in the margin. You can click in this area to select an entire line.
-
When you select a word in the editing pane, the script editor highlights all the occurrences of the word. By default, this
option is enabled.
|
| C
|
Find and Replace Features
-
Continues searching from the beginning of the file after reaching the end. If this option is disabled, text searches start
at the cursor position and stop at the end of the file.
-
You can specify an action to perform when the search string is not found. Available options are , , and (default).
|
Using the Tools Development Environment
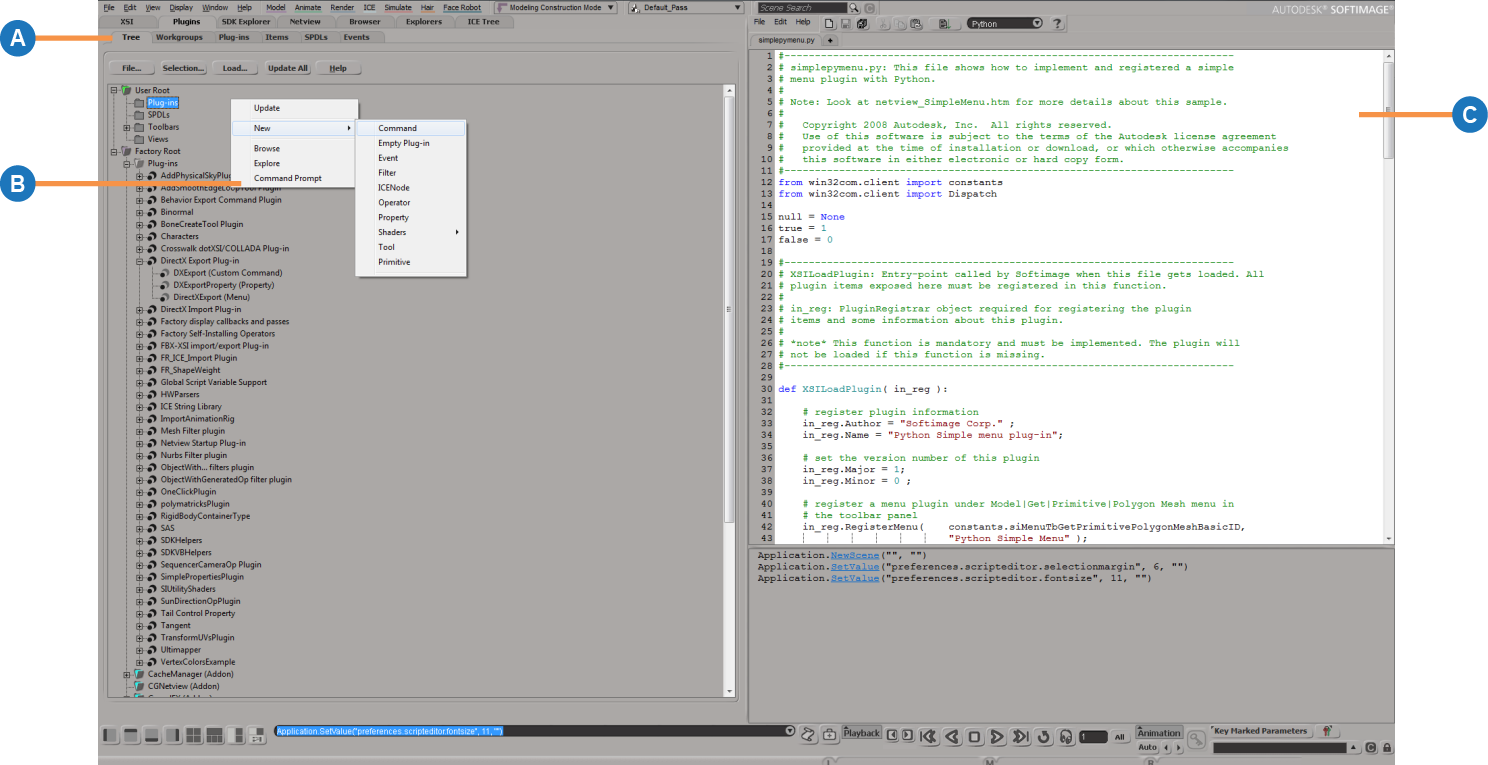
You can use the tools development environment for developing tools and plug-ins. To access the tools development environment,
select from the application menu bar.
| A
|
The tab provides easy access to the file structure for creating and maintaining self-installing plug-ins.
|
| B
|
Context-sensitive menus in the plug-in tree. For example, you can invoke the Custom Command wizard or Custom Property wizard
in the plug-ins context while the Shader wizard is available in the SPDLs context.
|
| C
|
You can use separate editing panes containing code snippets to run on the fly and load files (even text and HTML files).
|
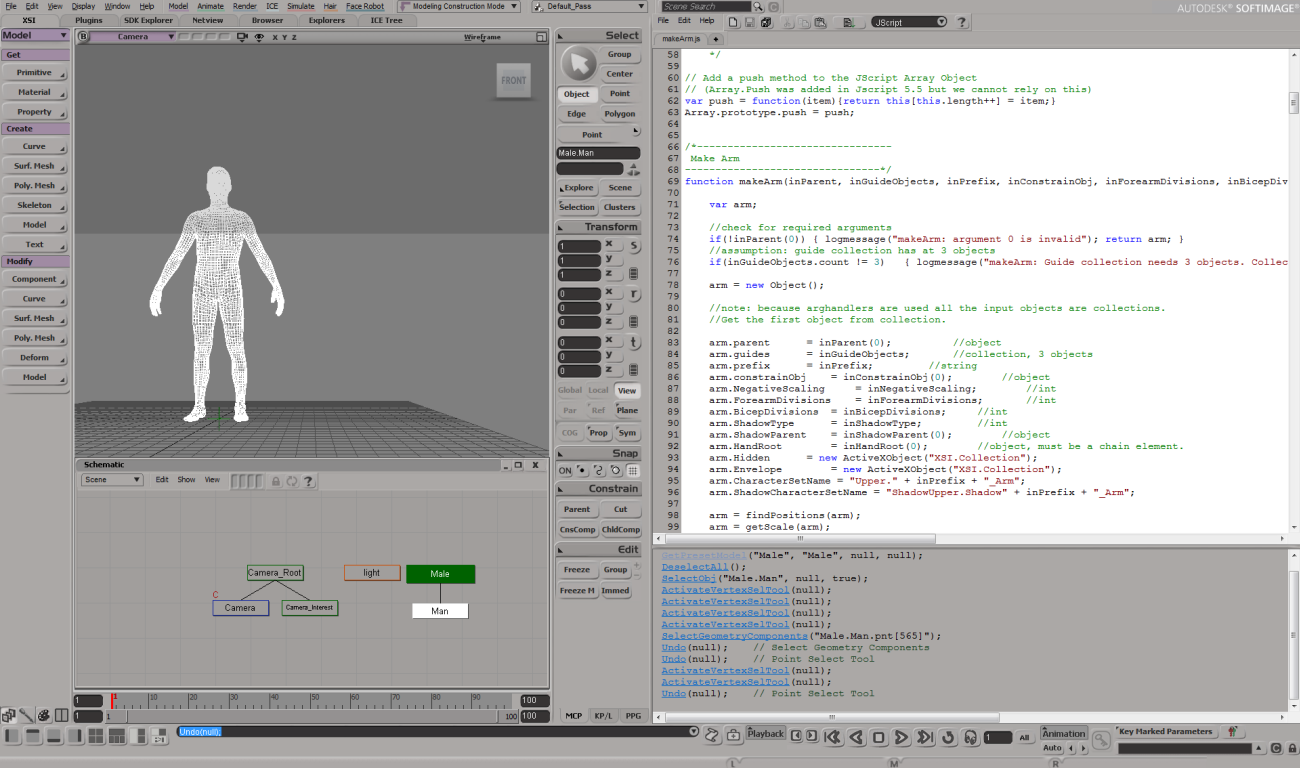
The work area is divided in two as shown in the following figure. On the left, you can toggle between the Softimage content,
Plugins Tree, SDK Explorer, Netview, Browser, Explorers, and ICE Tree. On the right, you can toggle between the editing panes
and view the common history pane.
 Preferences from the command bar.
 Preferences from the command bar. Alternatively, you can select File
  Preferences from the application menu bar, expand the Editors node, and click Script Editor.
 Layouts
  Tools Development Environment from the application menu bar.
 Except where otherwise noted, this work is licensed under a Creative Commons Attribution-NonCommercial-ShareAlike 3.0 Unported License