There are two ways to rendermap multiple objects: you can simultaneously create a single set of rendermap images for each object or you can create a single set of rendermap images that is used by all of the objects. These techniques are described in this section.
Generating Multiple Objects' Rendermaps Simultaneously
If your scene contains several objects that you want to rendermap separately, the easiest and fastest thing to do is to generate their rendermaps all at once. Not only is it faster to set the rendermaps' options simultaneously, it is also considerably faster to generate rendermaps for several objects at once than one at a time.
Apply a Rendermap property to the multi-selection, as described Basics of Baking with RenderMap or RenderVertex.
While setting the rendermap options, make sure to select the Prepend owner name to file name option. This ensures that rendermap does not try to write two object's output images to the same file.
When you've finished setting the RenderMap options, click the Regenerate Maps button to generate the rendermaps.
Generating a Single Set of Rendermap Images for Multiple Objects
Generating a single set of rendermap images for multiple objects is a bit more complex than generating several objects' rendermaps at the same time. The trick is to group the objects and give each object a set of UV coordinates used strictly for rendermapping. You can then adjust those sets of UV coordinates in such a way that they will not overlap when placed on the same texture image. When you generate the rendermap, the properly positioned UV coordinates are used to sample all of the objects and write their textures to the correct position on a single image.
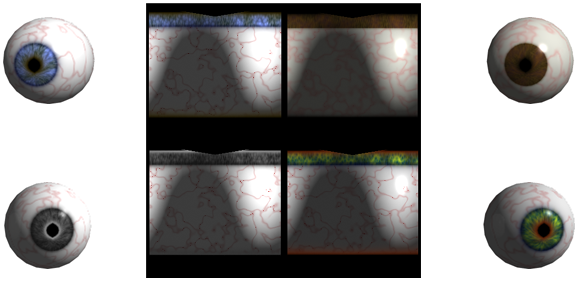
The illustrations for this procedure are taken from a simple scene in which four spheres have been turned into eyes using a complex combination of procedural shaders. The rendermap image shown is a surface color map, though the method applies equally to any type of rendermap image.

Although the objects that you want to rendermap are textured already, apply a second texture projection to each of them. These are the projections that you'll use to generate the rendermap, so make sure not to use them to texture your objects.
From the Clips menu in the texture editor menu bar, select or import an image clip. The clip should be the same size as you want the final rendermap images to be.
Selecting an image clip from the Clips menu does not apply it to your object. The image is simply displayed in the texture editor workspace to help you position the object's UV coordinates over it.
For more information about displaying image clips in the texture editor, see Choosing a Texture Image to Display.
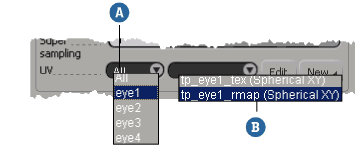
From the UVs menu in the texture editor menu bar, select the texture projections that you created specifically for generating the rendermap. You can Shift+click the appropriate projection for each object to display them all simultaneously.
For more information about working with multiple projections in the texture editor, see Editing Multiple UV Sets.
Transform each object's UV coordinates so that they occupy only a portion of the total texture image. Make sure that no object's UV coordinates spill into the space occupied by another object's UV coordinates.
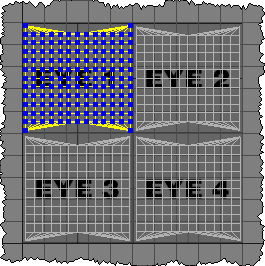
For more information about transforming UV coordinates in the texture editor, see Working with UVs in the Texture Editor.
Make sure that all of the objects that you want to rendermap are still selected and click the Group button in the Edit panel to put them objects in a new group.
Select the group and apply a RenderMap property to it as described Basics of Baking with RenderMap or RenderVertex.
As you are setting the rendermap options, make sure that each object in the group is using the correct texture projection (the one that you created for the rendermap).
When you are finished setting the rendermap options, click the Regenerate Maps button to generate the rendermap.
The output images should show each object's texture (or normal map, or surface color map, and so on) in the correct area.
You can now texture the objects, individually or as a group, using the output image and the texture projections that you created for the rendermap.


