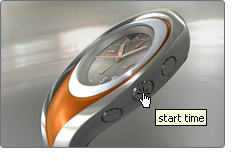
3D triggers add interactive control and annotations to your scene while in Presentation mode, and can be linked together to
cause many items to change or activate at once. A trigger makes specific objects in your scene “clickable” which can then
cause another scene item to be activated in the scene. Triggers are created and defined in the Behaviors interface, but can
activate behaviors, alternatives, shots, storyboard slides and lighting environments.
For more information on Presentation mode, see: Present the scene
Items that can be triggered
- Alternatives: any geometry, material, or positional alternative, in any lineup.
- Behaviors: turntables, keyframe animations, imported FBX animations. With playback direction and type options.
- Lighting environments: any lighting environment in the scene.
- Shots: both animated and still shots.
- Storyboard Slides: containing many of the items above, triggered at once.
Create a 3D trigger
- Press B to show the Behaviors interface.
- Select the objects in the scene you wish to make into a clickable object.
Note
If an object is selected when the trigger is created, it will automatically be associated with the 3D trigger as the clickable
geometry in the scene.
- Click the arrow beside the button and select .
A new 3D trigger is added, with an icon in the Behaviors interface.
- Right-click the trigger icon and select the item in the scene to activate when the 3D trigger is clicked.
Associate an item with a 3D trigger
Alternately, an item can be associated to the trigger, as opposed to associating the trigger with the item. The results are
the same.
- Right-click the item icon in its overlay interface (Shots, Behaviors, Alternatives, Lighting environments, Storyboard).
- Select from the context menu.
All triggers in the scene will be listed, with any existing associations next to them.
Note
If a trigger already has an item associated with it, any new association will overwrite the previous one, with no undo.
- Select the 3D trigger to associate with the item.
The item will then be activated by this trigger, and the icon for the item will have a Trigger label in the upper left corner
of the icon.
View and test interactive 3D triggers
- Press Tab to enter Presentation mode.
- Place the cursor over your object in the viewport.
The cursor changes to a hand, and the name of the 3D trigger is displayed as a tooltip (if Trigger notifications are enabled).
Note
To disable the 3D trigger name from showing as a tooltip, go to the menu, and select . It will show as unchecked when they are not shown.
- Click on the geometry to activate the item that is associated with that 3D trigger.
Add geometry to a 3D trigger
To change or expand the scene geometry that will be clickable in Presentation mode, add objects to the 3D trigger.
- Press B to show the Behaviors interface.
- Select the objects in the scene you wish to make into a clickable object.
Note
If an object is selected when the trigger is created, it will automatically be associated with the 3D trigger as the clickable
geometry in the scene.
- Right-click the trigger icon and select .
The selected objects will activate the trigger when clicked in Presentation mode.
Remove geometry from a 3D trigger
To change or minimize the scene geometry that will be clickable in Presentation mode, remove objects to the 3D trigger.
Note
If no scene geometry is associated with a 3D trigger, it will only be activated when right-clicking the 3D trigger icon and
selecting .
- Press B to show the Behaviors interface.
- Select the objects in the scene you wish to remove from the 3D trigger.
To see what scene geometry is already a part of the 3D trigger, right-click the trigger icon and select .
- Right-click the trigger icon and select .
The selected objects will no longer activate the items associated with that trigger.


