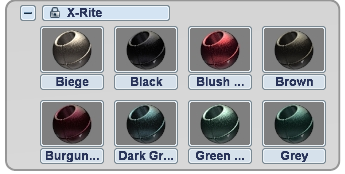
X-Rite materials are derived from data scanned from real paint samples with an X-Rite MA98 sprectrophotometer. They can be applied to objects in the scene like any other material (with the exception of Decal), and can have some basic parameters adjusted. To create new X-Rite measured materials, the X-Rite hardware is required.
Color accuracy and monitor calibration
The measured materials displayed in Showcase are only visually accurate if the display system is calibrated. Perceived colors can shift when moving from one display to another, particularly when using a laptop or an external monitor or projector. In order to achieve good on-screen color and a definite relationship to the scanned material, it is necessary to use a monitor calibration device such as the X-Rite i1 Display 2 or the X-Rite Color Munki. This should always be the first step, even if the shader is being used for design purposes.
The X-Rite material presets can be used at any time, but to create new measured materials from the X-Rite device, the plug-in for the X-Rite MA98 must be installed into the Showcase user directory.
To install the plug-in
The UI for editing advanced material properties and connecting to the USB X-Rite device will be enabled.
The process for building a color from a measurement in Showcase follows these steps, after the plugin is enabled.
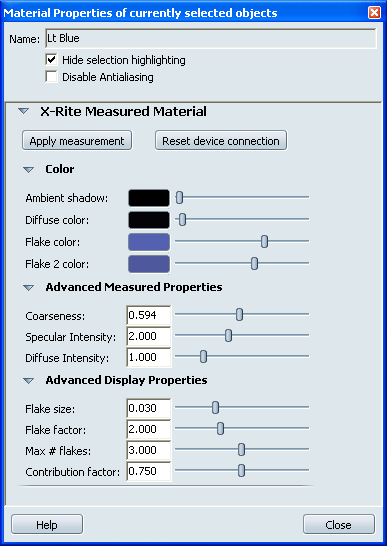
Once a connection to the X-Rite MA98 has been established, and a measurement taken with the device, press this button to transfer the data from the scanner to the material in Showcase.
Use this button to re-establish a connection to the device if it has been lost or if an error occured.
Color properties
Filters the color and brightness of any Ambient Shadows on the object that the material is applied to. (Black = default black ambient shading, White = no ambient shading visible, Color = colored ambient shadows on top of the current material) For details on how to create and control Ambient Shadows, see Add ambient shadows to surfaces
Sets the base color for the materials. For details on how to use the Color controls, see Change colors.
The Flake color is a differential color that represents the flake that is nearest to the surface of the material and is influenced by the light color. Small modifications of this color can produce very different results.
The Flake 2 color is a differential color that represents the flake that is deeper in the material, and is therefore predominantly influenced by the pigment or flake effect.
Advanced Measured Properties
Regulates the influence of the flake on the material. Realistic values for this parameter go from 0.3 to 0.8. Car paints without flake should not use this material type, as even a value of 0.0 will show a flake.
The Specular Intensity controls the absolute influence of the Flake Color on the material. This is an artistic parameter and is set to 2 by default.
The Diffuse Intensity controls the absolute influence of Flake 2 Color on the material. This is an artistic parameter and is set to 1 by default.
Advanced Display Properties
The Flake Size describes the apparent size of the flake relative to the material. This is in the same units as the material since the specification of the flake is done in object space (as opposed to texture space.) Decreasing this parameter results in smoother surface coloration but will potentially decrease the performance of the shader. Setting this parameter to the correct size is important particularly when rendering close-ups of the material.
The Flake Factor describes the density of the flakes in the material. Since it is very closely related to the Flake Size in terms of its effects, modifications to this parameter also can affect performance and the perception of flakes in close-ups of the material. In general, it is recommended to leave this parameter at its default value of 4.
The Maximum Number of Flakes is a performance parameter designed to limit the flake sub-sampling that is performed. The effect of this is squared so a setting 7 requires roughly 5 times more computations than a setting of 3. The particular setting will depend on the number of triangles using this material, the number of triangles in the scene, and the capabilities of the particular video card that is being used
The Contribution Factor roughly corresponds to the flake orientation distribution. Artistically, it modifies the spread of the flake highlight around specular.
Considerations and limitations


