Before you save the scene for later viewing, you need to consider some final settings that will enhance the viewer’s experience navigating around the scene.
Set up final scene settings
Verify the environment size
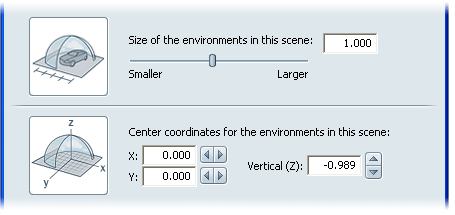
When you built the scene, you probably resized the environment already to fit the objects into your scene.
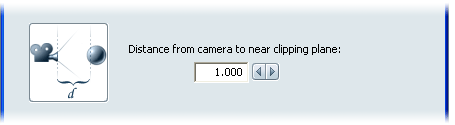
Only the objects located behind the near clipping plane will be visible in the scene. (A clipping plane is an imaginary plane located at a specific point along a camera's sight line.)
If part of an object is in front of the near clipping plane, then only the part of the object beyond the near clipping plane will be shown.
This value also determines the sight line of the ground. If it is set too close, the ground won’t always be visible in the scene.
Set this value in the Distance from camera to near clipping plane field. When you change this value, the changes are visible immediately in the scene.

Set the base speed when walking or orbiting using the Walk and Orbit fields under Navigation Base Speed.
The default starting speeds will be determined by these settings, although the navigation speeds can still be changed interactively with the = (+) and -keys.
Specify when objects are loaded

A scene may refer to many object files. If you have hidden many of these objects when the scene is first opened, you may want to delay loading all of the object files until they are actually needed (that is, when the person viewing the file decides to view them).
Select one of the following choices in the Scene Settings window:
The scene takes longer to load, but then showing hidden objects and switching between alternatives is faster.
The scene loads faster, but then it takes longer to show hidden objects or to switch between alternatives.
Set Units and Precision for the scene
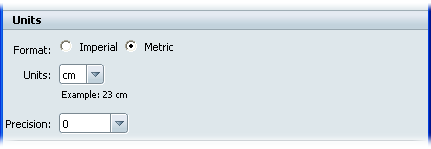
Set the defaultFormat and Units for the scene. All units of measurement in the scene will be translated and presented in this notation. Actual sizes of objects and distances will not be affected, but UI elements will display with this default format.
The precision of all numeric entry areas in the UI can be set to more or less decimal places using the Precision drop-down menu. A setting of “0” allows only whole integers (such as 10 or 3) within the default units above, wihle a setting of “0.00” allows two decimal places of precision beyond a simple integer value (such as 10.25 or 3.14).


