Move, rotate and scale objects by typing numbers


NoteIf you re-import a model that was transformed outside Autodesk Showcase, the external transformations will be reflected in the scene. Transformations are cumulative (that is, transformations you made in the scene are made to the new position of the re-imported model).

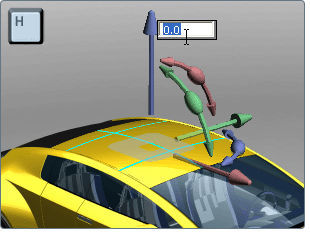
Type numbers to move or rotate in one direction

  1. Select the objects you want to move or rotate.
  2. Press the H key to see the transform handle.

  3. Click on the move arrow or rotate arc pointing in the direction you want to transform the object.

    A field appears where you can type in a value.

    The values you type in are relative to the current position of the selected objects. Units are in centimeters for movement, unless otherwise denoted (such as typing “m” after a value for meters), and always degrees for rotation.

    NoteIf you re-import a model that was transformed outside Autodesk Showcase, the external transformations will be reflected in the scene. Transformations are cumulative (that is, transformations you made in the scene are made to the new position of the re-imported model).

Type numbers to move or rotate in several directions

  1. Select Edit > Transform.

    The Transform window appears:

  2. To move the object, select the Translate relative menu choice, type in X, Y, and Z values (in centimeters) and click Apply.
  3. To rotate the object, select the Rotate relative menu choice, type in X, Y, and Z values (in degrees) and click Apply.
  4. To type numbers relative to a new position, click Clear.
  5. Continue typing in numbers until the object is positioned how you want it.

Move, rotate or scale relative to original values

  1. Select Edit > Transform Properties.

    The Transform Properties window appears:

    The Object Position section of the window shows position, rotation, and scale of selected objects relative to the values when the model was imported and any scaling applied from the Model Settings window. The Pivot Position section shows the location of the object pivot in world space.

    NoteIf you have multiple objects selected, the values shown are from objects at the top of the selection hierarchy. To see this hierarchy and which objects are already transformed, select Scene > Organizer.
  2. To change any of these values for the selected objects, type in new numbers and press Enter.
  3. To type in values relative to the current position, click the Transform... button to use the Transform window.
    NoteIf you change the units (and therefore the scene scale) of the model using the Model Settings window, its scaling factor will not be shown in the Transform Properties window. However, this scaling factor is taken into account when you translate objects in the Transform window. Values you type in this window are scaled when they update existing values in the Transform Properties window.
  4. To adjust the Pivot Position, type new local coordinates for each axis, or press the Move Pivot... button to interactively adjust the pivot in the view.
  5. To recenter the Pivot Position, press the Center Pivot button. To reset the Pivot Position, press the Move to Natural Pivot button.

Undo your actions

See Also