


You can use the Path constraint to convert a 3D Curve created in the Viewer window into an animation path.

Path constraint settings A. Object settings B.Objects cells
Your object is constrained to the start point of the 3D Path. Click play in the Transport Controls and the object travels along the curve.
To create an animated path using the Key Controls:
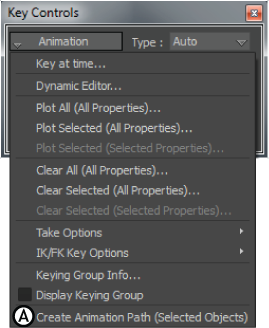
Key Controls Animation menu A. Create Animated Path option.
A Path constraint is added to the Constraints folder in the Scene browser.
This number is the start frame as specified in the Transport Controls Start field. A key also appears at this frame.
 Except where otherwise noted, this work is licensed under a Creative Commons Attribution-NonCommercial-ShareAlike 3.0 Unported License