Right-clicking in the Schematic view displays a context menu that contains options that are specific to the Schematic view.
Like the camera view context menu, the options in the Schematic view context menu change depending on what you click and on whether anything is selected.
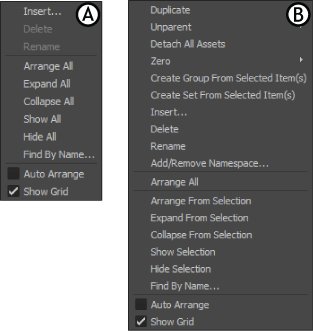
Schematic view context menus A. Menu available when right-clicking an empty space B. Menu available when one or more than one node is selected and you right-click
The Duplicate, Detach All Assets, Insert, Delete, and Rename options are common to both the Schematic and Camera views. See Viewer context menu for more information on these options.
The following are the options specific to the Schematic view context menu.
Rearranges the hierarchy display so that it is organized, keeping nodes from overlapping or from being too far apart.
When no assets are selected, Arrange All repositions the hierarchy displays of the entire Schematic view.
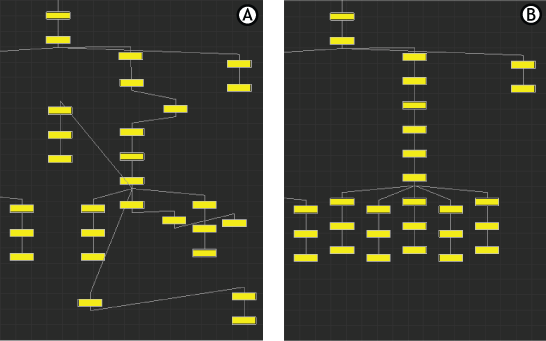
A. Disorganized hierarchy displayed B. Arrange All is activated
When one or more assets are selected, use Arrange From Selection option to reposition only the children of the selected node or nodes.

A. The hierarchy displayed is disorganized. One asset is selected. B. Arrange From Selection reorganizes only the selected asset and its children.
When you merge an .fbx file to another file, the saved arrangement of appended assets appears below all assets already showing in the Schematic view.
Expands every hierarchy display that is collapsed.
This hierarchy display is expanded. A minus sign displays under the root node “Cube.”
When one or more assets are selected, use Expand From Selection expands only the children of the selected node or nodes.
Collapses every hierarchy display so that only the root nodes remain visible.
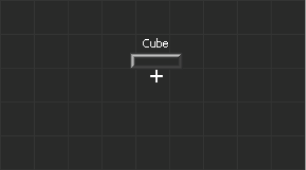
This hierarchy display is collapsed. A plus sign displays under the root node “Cube.”
When one or more assets are selected, use Collapse From Selection to collapse only the children of the selected node or nodes.
Shows all assets in your scene. Use Show Selection to show only all selected assets.
For more information about parenting in the Schematic view, see Parenting and hierarchies and Schematic view.
Hides all assets. Use Hide Selection to hide only selected assets. In the Schematic view, nodes that represent hidden assets display in dark gray.

A. All assets are shown, displaying in various colors. B. All assets are hidden, displaying in dark gray.
Lets you find an asset by searching for its name. The Find Model By Name dialog box automatically includes an asset’s namespace. Enter the name of the asset and click Ok.
The asset is selected and framed. This feature is not case sensitive.

The Find Model By Name dialog box
When the Auto Arrange option is enabled, it automatically repositions nodes in so that they are optimized and accessible. It is disabled by default.
For example, Auto Arrange can be useful when you are creating parent-child relationships.
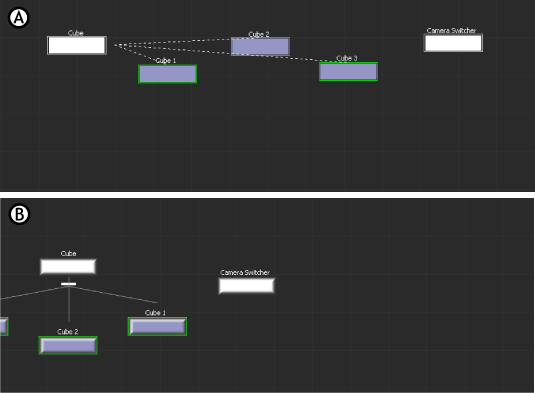
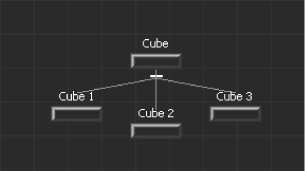
Auto Arrange is disabled. A. Cube 1, Cube 2, and Cube 3 are constrained to Cube. B. The child nodes move underneath the parent node, and do not display fully in the Viewer window.
When Auto Arrange is enabled, child and parent nodes are repositioned so that they do not overlap or move too far away when you are parenting.
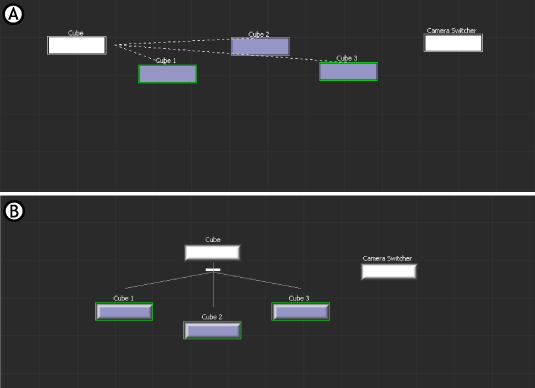
Auto Arrange is enabled. A. Cube 1, Cube 2, and Cube 3 are constrained to Cube. B. The child nodes move under the parent node, and the parent node is also repositioned.
 Except where otherwise noted, this work is licensed under a Creative Commons Attribution-NonCommercial-ShareAlike 3.0 Unported License


