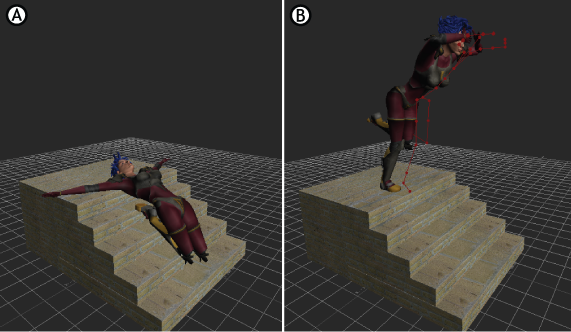
You can use character poses in a Ragdoll solve so you can define how a character collapses or falls. Using poses in this way
is useful if you want to create a specific reaction or impression.
NoteYou must first create poses in the Pose Controls window to use with this solve. See
Creating a pose.
To use poses to define the collapse of a character:
- Set poses for the solve in the Pose controls window.
See Creating a pose.
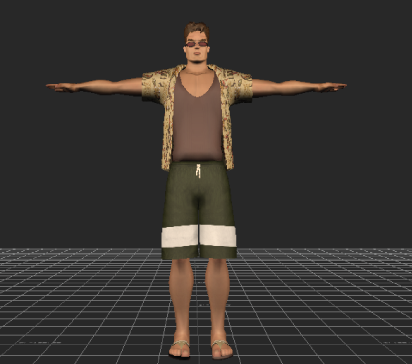
- Make sure that your character is in a stance.
See Stance.
- Switch to the Ragdoll Animation pane and use the Add/Remove poses button to include your poses in the Pose system list.
NoteAvoid adding poses to the Pose list that you do not plan to use in the solve. All poses in the Pose list are used to derive
the solve. Or to exclude a pose from the solve, set the Strength or Match Tolerance to 0.
- Activate the corresponding option in the Match column if you want to create a Match pose. Leave the option disabled if you
want to set a Guide pose. Choosing a Match or Guide type of pose so lets you specify how you want to achieve the solve.
For an explanation of the difference between Match and Guide poses, see Match and Guide poses.
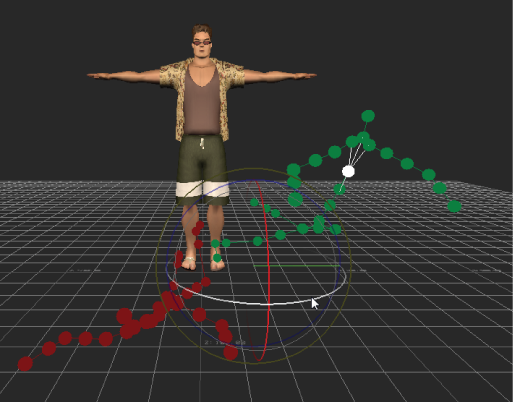
- Activate the Show option in the Pose list to view the Pose ghosts in your scene. You can select the ghost and position it
in your scene until is it where you want it.
- In the Pose settings, specify a weighing type from the Weight menu.
See Weight for a description of the different types of weighing available.
NoteThe Weight menu is set to Linear by default. Using the Linear setting is a good place to start for your first solve. You can
then fine-tune the Interpolation types later.
- If you specified a Match pose, use the Match Object menu menu to set off which body part the pose match should be driven. The Match pose becomes the driving force of the solve.
If you specified a Guide pose, use the Match Tolerance slider to how little or how much you want the Guide pose to influence the solve. The Guide pose suggests which way the solve
is driven without forcing the solve to match the pose exactly.
Tip Normally, Hips or the Chest are best to use as Match objects.
- In the Navigator window Scene browser, expand The Solvers folder and set the Physics solver to Online.
- When you are ready to start the solve, click Live.
Observe the solve and note the areas for improvement, if any. Pose Ghosts “light up” when they become active during the solve,
so that a green Guide pose becomes a brighter green, and a red Match pose becomes a brighter red.
See Perfecting your solve.
Note It is a good practice to record your first solve. Recording the solve creates a first iteration that you can use as a reference
as you continue to perfect the movement.
- When you are ready to start recording the Ragdoll solve so you can convert it to keyframes, disable the Live option.
- Click Reset to Start to set the Control rig in the pre-collapse position.
- Press Record in the Transport controls.
A dialog box appears asking if you want to overwrite the take or create a take.
- Select an option.
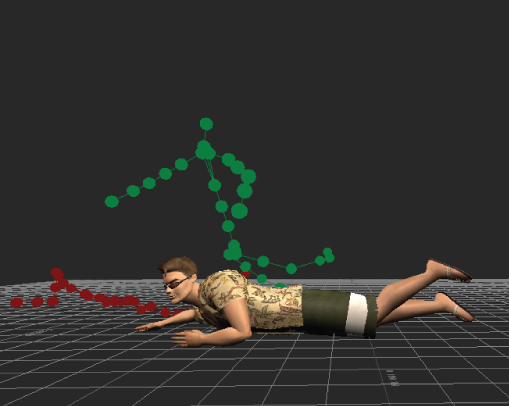
- Press Play in the Transport controls and Stop when the animation is over.
The character collapses.
- In the Physics Properties Setup pane, deactivate Online.
- To view the recorded keyframes, select one of the animated objects.
Keyframes appear in the Transport controls, and the FCurves window.
You can also press Ctrl-Home and then Play to replay your animation.
Note On 64-bit systems, the Physics solver cannot process objects that have degenerated polygons or invalid normals. When this
occurs, a warning message appears that identifies the models that have this problematic geometry, and bounding boxes are used
to approximate these shapes instead. Using these bounding boxes for the joint solve may produce solve results that differ
from the expected behavior. If possible, use the Box, Capsule, Sphere, or Mesh approximations to match your geometry with
more precision. For more complex geometry, reconstruct your model with 3D software to avoid these non-standard geometry problems.
This problem does not occur in the 32-bit version of MotionBuilder.
 Except where otherwise noted, this work is licensed under a Creative Commons Attribution-NonCommercial-ShareAlike 3.0 Unported License