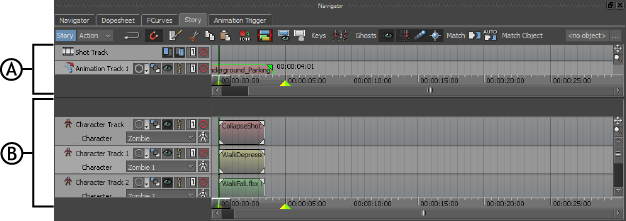
A story is defined as a series of events. Similarly, the Story window lets you assemble scenes by combining and manipulating elements such as characters, lights, cameras, audio, and animation along a timeline, much like a non-linear editor.

Story window: A. Edit timeline B. Action timeline
The Story window is made up of two timelines that look similar but are used for different purposes. You can switch between these two timelines using the Story Mode button at the top left corner of the Story window.

Story window clip illustrations A. Clips on Character track on the Action timeline B. Character track on Action timeline C. Action timeline D. Shot clips on Shot track E. Shot track on Edit timeline F. Edit timeline
To use the Story window, you need to create clips of data (A and D) that represent objects or actions in your scene and arrange them on tracks placed in the Action and Edit timelines (C and F). Which timeline you use determines what you can do with the clips on tracks.
Once you have assembled the story’s actions in the Story window, you can edit and rearrange them without losing your original action.
To access the Story window, select Window > Story from the menu bar.
Story window animation can be edited in the FCurves and Dopesheet windows, as well as the Transport Controls.
 Except where otherwise noted, this work is licensed under a Creative Commons Attribution-NonCommercial-ShareAlike 3.0 Unported License