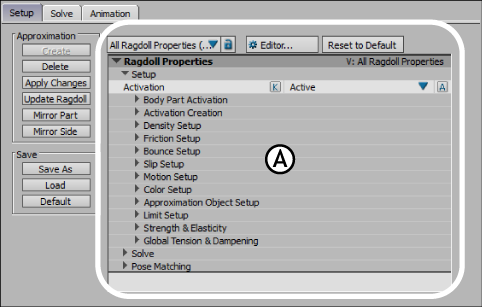
The Ragdoll properties area is where you can configure the settings for the solve. Expand each heading to expose a list of properties for body parts on which you can set custom levels for your solve.

Ragdoll Setup pane A. Properties area
The Ragdoll Property options display along the top of the Ragdoll Setup pane. These Property options are the Lock option, View menu, Group properties menu, and the Editor button, and they are described in Property options.
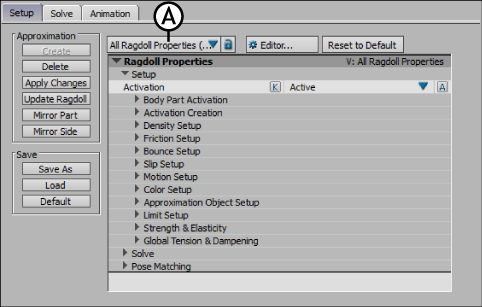
Certain body-part settings only appear when you change the the Ragdoll properties View menu to All (Type) or a specific body part view (for example, Right Foot). The following list of options is generally based on the properties that appear in when All Ragdoll Properties (Type) is selected in the View menu (A) and when there is an approximation in the scene. Otherwise, the description of the settings states which Ragdoll Property view to use.

Ragdoll Setup pane A. View menu with All Ragdoll Properties (Type) selected
Use this menu to set when the collision reaction starts for the object. For example, you can create objects that only react when they are struck.
| Option | Function |
|---|---|
| Active | Ragdoll solving begins when the session is set to Live. You can key and animate this setting to turn the Ragdoll behavior off and on during your animation. See Keyframe (K) and Animate (A) buttons for more information. |
| Active at collision | Ragdoll solving reacts only when a collision occurs. |
| Passive | The object is not affected but still interacts with other objects in the scene. |
Expand Body Part activation to expose a list of body parts affected by the solve. Disable a body part in the list to exclude that body part from the solve.
These are the same settings as found in the Approximation area. See Approximation area for descriptions of each of these options.
Expand Density Setup to expose a list of body parts on which you can set custom density levels. The Density setting represents the thickness and mass of the character.
You can key and animate this setting to turn the Density behavior off and on during your animation. See Keyframe (K) and Animate (A) buttons for more information.
Expand Friction Setup to expose a list of body parts on which you can set custom levels for the solve’s Friction settings. See the Rigid Body Friction (Mu) field section for a description of the Friction setting.
Expand Slip Setup to expose a list of body parts on which you can set the amount that your solve object slides off-course.
Use this setting to set how a solve object will move perpendicular to the force. For example, if you had an animation of a car driving around a corner and you assigned a slip value to a tire, it would make the tire skid.
Expand Motion Setup to expose a list of body parts on which you can cause the object to move by itself. For example, set a Motion value on a cube, and the Motion setting creates a conveyer belt-like action. X and Y refer to local directions from the object.
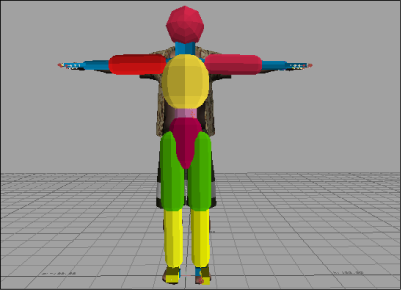
Expand Color Setup to expose a list of body parts on which you can set different colors for the Ragdoll approximation. This way you can single out body parts to observe during the solve.

Ragdoll approximation with custom coloring.
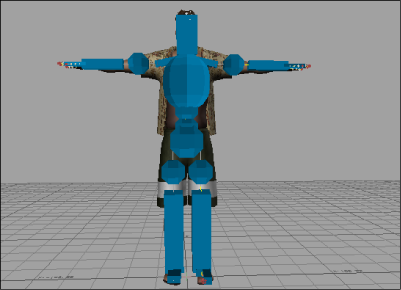
Expand Approximation Object Setup to expose a list of body parts for which you can choose an approximation shape that best fits the character. Select Capsule, Sphere, Cube, or Mesh.

Ragdoll approximation with non-standard object shapes.
Expand Limit setup to expose a list of body parts on which you can set the High and Low limits for the Solve. The High and Low limits act like degrees of freedom that you can set and animate individually for each body part.
Use the limits settings to set behavior so that the affected body parts only move in specific direction, for example left to right, or no more than 90 degrees.
Expand Strength and Elasticity to expose a list of body parts on which you can set the amount of resistance, or force, needed to keep the ragdoll character connected.
You can key and animate this setting to turn the Strength and Elasticity behavior off and on during your animation. See Keyframe (K) and Animate (A) buttons for more information.
Expand Global Tension and Dampening and activate the Global Muscle option so you can use the Global Muscle Strength and Global Muscle Elasticity sliders.
| Slider | Description |
|---|---|
| Global Muscle Strength | Use the Global Muscle Strength slider to sets the amount of resistance, or force used with the Ragdoll. The Global Muscle Strength slider sets a Strength setting for all body parts associated with the Ragdoll Physical property. |
| Global Muscle Elasticity | Use the Global Muscle Elasticity slider to specify how much give or rigidity the Ragdoll has in relation to the connected objects. This setting creates a stretch effect. |
Dampen linear/angular settings
Use the Dampen settings to define the clamp value applied to the linear and angular velocity when calculating the rolling friction. Because the Physical property does not model rolling friction, it uses dampening clamps behavior so that objects can come to rest.
For example, without a dampening setting, a rolling sphere rolls on forever. The dampening is done by scaling linear velocities at each simulation step by dampening factor for all colliding objects.
A value of 1 retains actual velocity. Any value below one decreases velocity, while any value greater increases it.
| Value | Description |
|---|---|
| Linear | Change the Linear Velocity to modify the linear movement of the object |
| Angular | Change Angular velocity setting to modify the rotational movement of the object. |
System Auto-disable clamps the calculation of collisions below a specified threshold. By default, MotionBuilder uses the same Auto-disable settings as in the Physics Solver.
Activate the System Auto-disable option so that the animation is cut off below a threshold, otherwise system resources absorb processing vibrations so minute that they are no longer visible.
But on a per-property list basis, you override the default Auto-disable settings. Disable the System Auto-disable option to override these settings for every object to which the Property list is applied.
Use the following properties to specify a speed for the solve process:
| Option | Description |
|---|---|
| Enable Auto-disable | This option is active when you disable System Auto-disable. |
| Linear Threshold | Sets a linear cutoff limit for motion. |
| Angular Threshold | Sets an angle-based cutoff limit for motion. |
| Steps | Lets you specify the number of steps that the Physical property must process before it falls below the threshold. |
Weight Linear velocity/Weight angular velocity fields
When a collision occurs with a body, velocities are used to calculate the force of the collision.
Weight is the “weight transfer” or energy transfer between two objects. When two objects collide, you can control the apparent transfer of energy from one to the other.
If the values are left to 1 the solvers uses the normal calculations to predict how far an object travels when hit. If you set this value over 1, the apparent transfer of energy increases, while if set run it below 1, it decreases this transfer.
Modify the Linear and Angular Velocity settings to override the default force of the collision. For example, use these settings to assign more or less collision force to an object than what is already specified in the Physical property.
The Collision Propagation menu lets you select a relationship between the Ragdoll body parts. The Collision propagation menu determines how the motion in one body part in the solve transfers to the others. Select a direction that the range of movement is spread from the Collision Propagation menu.
You can find the Collision Propagation setting when you select All (type) or a specific body part view (for example, Right Foot) in the Ragdoll properties View menu.
| Collision Propagation | Description |
|---|---|
| Two way | A collision with to either the parent or child body part affects the other. |
| Parent-to-child | A collision with the parent body part affects the child body part, but a collision with the child body part does not affect the parent body part. |
| Child-to-Parent | A collision with the child body part affects the parent body part, but a collision with the parent body part does not affect the child body part. |
| No Propagation | A collision does not pass from the affected body part to any of the other body parts. |