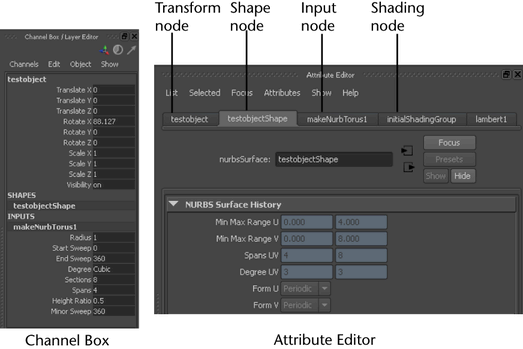
Maya is built around nodes. An “object”, such as a sphere, is built from several nodes: a creation node that records the options that created the sphere, a transform node that records how the object is moved, rotated, and scaled, and a shape node that stores the positions of the spheres control points.
An attribute is a position associated with a node that can hold a value or a connection to another node. Attributes control how a node works. For example, a transform node has attributes for the amount of rotation in X, Y, and Z. You can set attributes to control practically every aspect of your animation.
There are many ways to set attributes in Maya: with the Attribute Editor, the Channel Box, the Attribute Spread Sheet, menu selections, and MEL.

Every node is created with certain default attributes. Some attributes (such as Opacity and Color of particle objects) are added dynamically when you need them.
You can also add your own attributes to any node to store information. This is often useful for animation expressions and scripts, and can be used to control several normal attributes using one custom attribute.
As you work in Maya, most of your actions create nodes in the construction history of the objects you work on. At each point in your work, the current scene is the result of all the nodes you’ve created so far.
For example, you can revolve a curve around a center point to create a new surface with a cross-section in the shape of the curve. When you apply this action to the curve, a new revolve node is created. The new node has the shape of the curve as an input. It has attributes that control how it creates the surface from the curve. And it has the resulting surface as its output.

This chain of nodes, from the curve to the revolve node to the surface, is called the surface’s construction history. The most important thing about construction history is that you can change it. You can reshape the curve, or change the attributes on the revolve node, and the resulting surface updates automatically.
Much of working in Maya involves directly manipulating nodes and attributes using manipulators.
Manipulators are visual objects that let you accomplish complex tasks easily, concretely, and visually by dragging handles and seeing the results immediately.
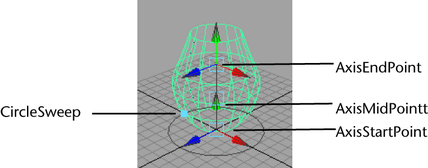
Using the revolve example above, you can select the revolve node and edit its attributes (how it creates the surface) visually by showing its manipulator with the Show Manipulator Tool.

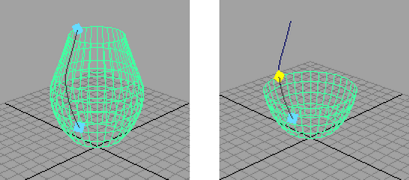
This lets you control attributes (such as how far around the centerpoint the surface goes) simply by dragging a handle.
You can also show manipulators for individual attributes to edit their values visually.

Animation in Maya is not limited to making things move. You can animate practically any attribute of any node in Maya. Attributes that control how a surface is constructed, or the look of a texture, or the influence of a deformer or physical force, can all change over time.
MEL stands for Maya Embedded Language. It is Maya’s scripting language. It is deeply integrated with Maya, and allows you to do anything from open a window or perform a simple action with a command, to total customization of the Maya interface, to writing an entirely new application on top of Maya. Practically everything that Maya can do can be accomplished through MEL (and what can’t can be done in another language with the Maya API).
 Except where otherwise noted, this work is licensed under a Creative Commons Attribution-NonCommercial-ShareAlike 3.0 Unported License