-
-
Controls the kind of primitive that the Description generates.
-
-
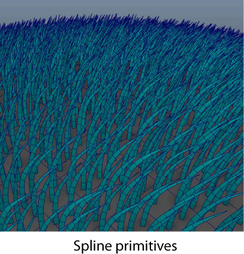
primitives are curves made up of two or more segments. Use Splines for fur, simple stiff shapes, and complex ribbon shapes
like long or curly hair.
-
-
primitives define a sphere with controllable length, width, and depth.
-
-
primitives define a NURBS patch that is attached to the patch at the center.
-
-
primitive use the generic attributes to instance Alembic-based geometry that is specified by an XGen archive (.xarc) file.
See Custom archive primitives.
-
-
Sets whether primitive or control the grooming of the Description. (Groomable Splines are controlled by Attributes and image maps created by the grooming
tools.
-
-
When selected, guides control the placement and shape of the primitives. Guides use an interpolation algorithm to calculate
the placement and shape of associated primitives. See Guides.
-
-
-
-
Sets the number of Control Vertices (CVs) that each has under attribute control. By default, there is only a start, middle, and end point, which allow a single bend. You can
increase this number to get additional bend parameters to control.
-
-
If you apply to this description, the splines may need more flexibility to bend. This sets the number of Control Vertices (CVs) that each
spline has available for the Modifier Stack.
-
-
Reparameterize the splines so that their CVs are uniformly spaced along the length. You can turn this off for long hair, but
otherwise leave it on.
-
-
Controls the length along the curve.
When is set to , this value sets the primitive length. When is set to , scales primitive length based on the guide length.
-
-
Controls the width as the cross sectional width of the curve.
When is set to , this value sets the primitive width. When is set to , scales primitive width based on the guide width.
-
-
Controls the width at the tip of each spline compared to its base. Positive values make the tip narrower than the base, and
negative values make the tip wider than the base.
-
-
Controls where the spline width starts to taper. ranges from 0.0 (the base) to 1.0 (the tip).
-
-
Tilts primitives away from the surface normal. 0 is no tilt, and 1.0 is a 90-degree tilt.
-
-
Tilts primitives away from the surface normal, but at right angles to .
-
-
Magnifies how much the primitive tilts away from the surface normal by and . If and are 0, then has no effect.
-
-
Rotates the primitive orientation around the surface normal. This vector is not affected by , and .
This has no apparent effect until the splines are bent or tilted with , , or.
-
-
Controls where along the spline bending occurs. Ranges from 0.0 (the base of the spline) to 1.0 (the tip). A set of bend controls
are created for each curve CV aside from the base and tip.
-
-
Controls how much the spline is bent at the corresponding CV. 0 is no bend, and 1.0 is a 90-degree bend.
-
-
Controls how much the spline is bent at right angles to the corresponding CV. 0 is no bend, and 1.0 is a 90-degree bend.
-
-
-
-
Turn on to display the spline width and taper in the Maya scene view. The spline width displays as a poly-strip.
-
-
Turn on to make each primitive rotate so its flat side faces towards the camera as much as possible. This has no apparent
effect if is turned off.
For splines, this sets the width cross section to always be perpendicular to the camera. does not affect the pose of the spline, just the cross section. When not set, the width cross section will be set such that
it is orthogonal to each joint bend direction.
-
-
Displays the previewed splines so that they appear tubular, rather than flat. only works in and has no effect on the final render.
-
-
-
-
Rebuilds the guides with the set number of spans without changing the guide shape. Click to open the window to specify the number of spans with which to rebuild the guides.
-
-
Rebuilds the guides to ensure evenly spaced spans.
-
-
Rebuilds the guides based on the value you set in the window.
-
-
Opens the window, which lets you use a Maya polygon cylinder object to create a spline clumping effect.
 Except where otherwise noted, this work is licensed under a Creative Commons Attribution-NonCommercial-ShareAlike 3.0 Unported License

 Except where otherwise noted, this work is licensed under a Creative Commons Attribution-NonCommercial-ShareAlike 3.0 Unported License