An Action node is collapsed by default. When you connect to its output tab, it expands temporarily. If the node contains multiple outputs, you can then connect to any output.
You can also expand an Action node manually to connect to its outputs. Do this when you want the node to remain expanded after connecting to its outputs. You can also display a proxy of a specific output on an expanded node as well as set a context view on an output.
Outputs are set up in the Action menu’s Output list. See Processing Multiple Outputs.
If an Action node is expanded manually, you can connect to its outputs manually, automatically, or using the Advanced Autolink feature.
If a collapsed Action node contains multiple outputs, you connect to its outputs using the Advanced Autolink feature.
The Action node expands displaying available outputs.


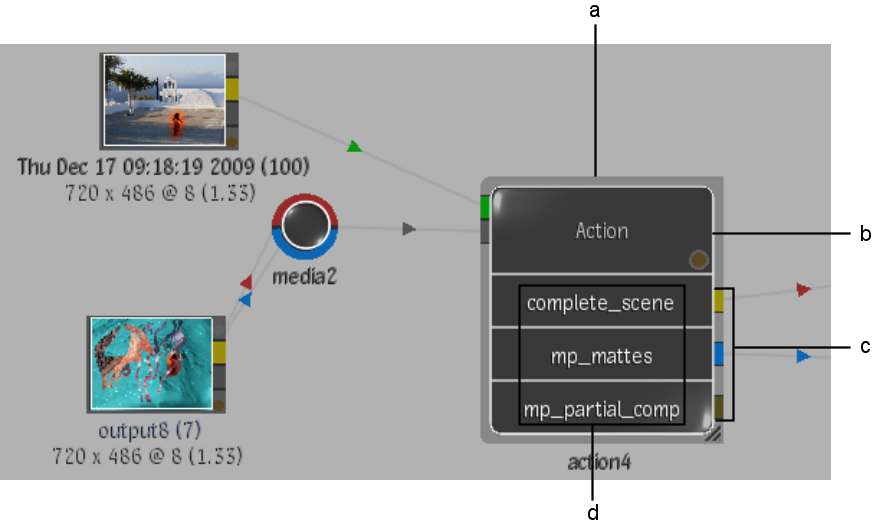
(a) Expanded node (b) Proxy display window (c) Tabs of available outputs (d) Names of available outputs
To display a proxy of an output in an expanded Action node:
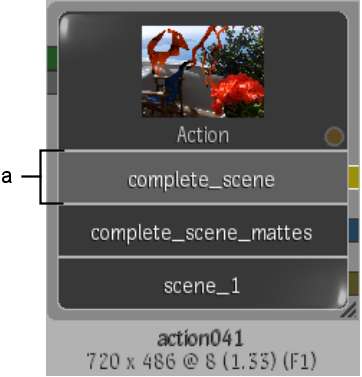
The top and bottom borders of the output tab turn white indicating a proxy of its output is displayed in the display window.

(a) Proxy of complete_scene output (b) White lines indicate proxy of output is displayed
To set a context view for any output in an expanded Action node:
(C1) or (C2) is added to the output name and the node name. As well, a green dotted line appears around the output name.

(a) Context 1 is set for complete_scene mattes
To set a context view for the current output in an expanded Action node:
The selected output is the current output. Its name in the group node is highlighted.
(a) Current output
A context view is set on the current output. (C1) or (C2) is added to the output name and the node name. As well, a green dotted line appears around the output name.

(a) Context 2 is set for current output
To change the size of an expanded Action node:
To connect to a multiple output tab of a collapsed Action node:
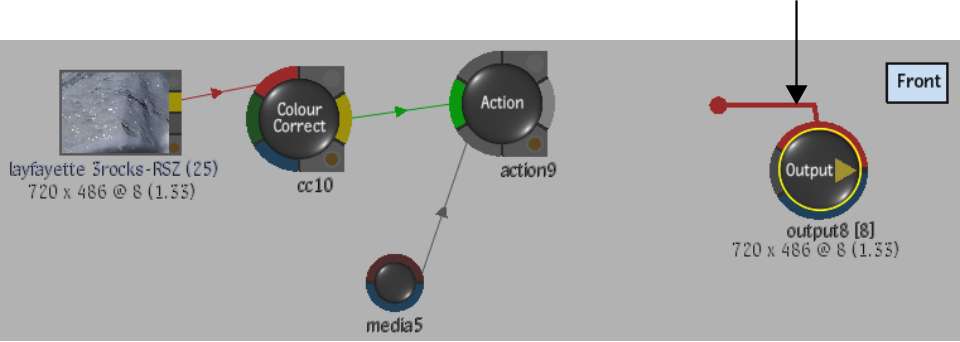
When the arm is close to the Action node, the Action node expands displaying its outputs. Three outputs have been set up in the following example.

(a) Possible outputs
When you are finished connecting, the Action node collapses again.


