Chapter 18, Rendering
| About Rendering in Lustre | Saving and Loading Colour Mapping Presets | ||
Chapter 18, Rendering |
|||
 Specifying the Shots to Render
Setting the Resolution for the Render
Specifying the Destination for Local Render Files
Rendering the Multi-Layer Timeline
Burning Timecode into the Render
Rendering with the Viewing LUT
Rendering Head and Tail Frames
Specifying the Output Format of the Render Files
You can use the Render menus to render your work. You can render selected shots, all shots in a cut, a specific layer in the Multi-Layer Timeline, or the flattened result of a Multi-Layer Timeline. To prepare for rendering, do the following:
Specify the shots to render.
Specify the layer to render.
Set the resolution of the render files.
Set resize options as needed.
Specify the destination for the render files.
Specify the output file format.
Specify the file density (logarithmic or linear).
(Optional) Change the output colour space or specify an output LUT.
Set other options such as timecode burn-in and rendering with a viewing LUT.

Renders are done on a shot-by-shot basis--you can render one shot, several selected shots, or all shots in a scene. To specify a shot for rendering, you flag it. You can flag shots manually or have Lustre automatically flag any shot to which changes have been applied. By default, all shots are automatically flagged for rendering.
A file containing rendering information is created and stored in the sacc_data directory found under each scene directory. This file contains a line for each shot that includes the shot path and name and the number 0 or 1, which indicates if a render flag is set for the shot (1) or not (0). These files are named <grade name>.render and are updated each time the grade is saved. Other applications, such as the command line renderer or scripts, can read or bypass this file setting.
If you are rendering a Multi-Layer Timeline and Solo and Mute mode are disabled, only the flagged shots in the flattened timeline will be rendered. If you are rendering a Multi-Layer Timeline and Solo or Mute mode is enabled, only the flagged shots in the active layer(s) will be rendered.
A shot that is flagged for rendering is identified by a red square in the upper-left corner of the screen.

 "Show full-size image")
To flag shots, use the Render Local menu.
In the Main menu, click Render, and then click Local.
The Render Local menu appears.

 "Show full-size image")
|
|
|
|
|
|
Note: If using the Linux version of Lustre, the Cluster menu will be part of the Render menu. This is for use with Lustre on an Incinerator high-speed network. If applicable, refer to your Autodesk Incinerator Installation and User Guide.
Navigate to any frame in the shot.
Enable Render Flag or press ].
Click Set All.
The render flag is set for all shots in the cut and the Render Flag button is enabled.
Navigate to the shot.
Disable Render Flag or press [.
Click Clear All.
Note: Render flags are not automatically cleared after rendering.
Enable Render Flag Update.
Shots will be flagged for render immediately after any grading or other effect has been applied.
After you set your render flags, you can still choose to render just the current flagged shot or all flagged shots in the timeline.
Do one of the following:
Enable Scene to render all flagged shots in the cut.
Enable Shot to render the current flagged shot.
Note: In both cases, rendering starts from the current frame and continues forward.
You can render your original shots at full resolution, which is the same resolution as the original footage, or at half resolution. You can also render resized shots at either full or half resolution. If you use half-resolution scans as the source, they can affect the quality of the output but are usually faster to process. You may opt to do this if you want a quick, intermediate render as opposed to a final quality render.
To set the resolution, use the Render Local menu.
Note: The resolution parameter in the Render Local menu is the same as that found in the Grade menu and in the user interface controls directly below the image window.

 "Show full-size image")
|
|
Specify the output resolution you want to use by enabling the Full Resolution or Half Resolution button.
Specify the source resolution you want to use for your render files by enabling the Full Resolution or Half Resolution button.
Select a video format in the Render Resize menu. See Resizing Shots.
Resize shots prior to rendering them to conform to a different destination output format. For example, if you plan on playing out a cut to a video format, use the controls in the Resize menu to select the appropriate video format and then render the cut at that format to use as the version you play out to a VTR. After you have selected the output format, you can set crop and resize options to control how the image fits into the new format.
Note: Support for resizing depends on the version of the graphics card installed on your system. See your release notes for details.
Resize data is saved with the grade in a Resize preset file that uses the grade name.
When you resize shots using the Resize menu, all shots in the timeline are resized. To resize individual shots, use the tools in the Reposition menu. See Repositioning an Image.
Note: The Lustre HD Station does not support bit depths greater than 10-bit, input resolutions greater than 2K, or output resolutions greater than 1920x1080.
Load the grade linked to the cut containing the shots you want to resize. See Loading a Cut.
Click Render and then click Resize.
The Resize menu appears.

 "Show full-size image")
|
|
|
|
|
|
To resize to a new format, such as a video format, enable Size, and then select a format from the list. If you select Custom, you can enter a width and height in the Width and Height fields, or click Set Current to set the format to the current frame size.
If the selected format is larger than the original image size, by default a black border appears around the image, showing the final output size. If the selected format is smaller than the original image size, the image is cropped, showing the final output size.
Note: You can check the resolution of the original scans in the Shot bin, accessible from the Editing Browse menu. Source resolution is important for quality resizing. For example, you obtain a better quality HD output with 2K full scan sources than with 1K half scan sources.
Select a Resize option to specify how the image will fit into the specified format.
| Select: | To: |
| Letterbox | Fit the entire image into the specified output format. Vertical or horizontal black borders accommodate any difference in the aspect ratio of the original image and final output format. |
| Crop Edges | Fill the new format size with the image, cropping the edges of the original image as needed to accommodate differences in the aspect ratio of the original image and final output format. |
| Stretch | Stretch the original image to fit the specified output format. If the aspect ratio of the original image and final output format is different, the image is distorted. |
Set the crop size. Enable Crop and then do one of the following:
Enter custom crop values in the Left, Right, Bottom, and Top fields.
Enable one of the standard Crop Preset buttons.
Enable Cust and then use the Crop Aspect slider to set the aspect ratio of the crop.

 "Show full-size image")
|
|
|
|
|
Note: Cropping in Lustre affects both output resolution and how the source file is read. For example, if you crop a 2K (2048x1556) scan to 1:85, the render size becomes 2048x1107. Lustre also reads the scan more quickly since there are fewer lines of pixels to go through.
To proportionally scale the image, enable Cust and then enter a scaling value in the Cust field.
If needed, you can squeeze or stretch the image horizontally using the Resize Aspect slider.
The Resize Aspect value you set is displayed in the field to the right of the slider.
In the case of Normal and No ShotID renders, render files are saved in sub-folders of a folder called grd, which Lustre creates automatically when you first render shots. The location of the grd folder depends on your project directory structure. See Recommended Directory Structure for Projects.
Note: One Sequence renders are saved in sub-folders of the scene folder.
Note: Dust removal render files created using the Rendering controls in the Dust menu are not saved in the grd file. See Rendering the Result.
You can specify how you want render files to be organized under the grd folder using the Render Place controls in the Render Local menu.

 "Show full-size image")
|
These controls affect the naming scheme of the render files, the location where they are saved, and the way that multiple instances of the same shot in the timeline are saved. When Normal is selected, Lustre saves all the render files of each given shot into a render folder for that shot. The name for each render folder is the unique ID (UID) of the shot. When No ShotID is selected, Lustre saves all render files to a single folder called Grd.
Enable Normal, No ShotID, One Sequence, or Src Grade.
Note: Examples in the following section use backward slashes. On a Linux system, these would be forward slashes.
Normal-- Individually graded shots are rendered to their own UID folder in the Renders Home location.
For example, the shots are rendered to:
<HOME>/grd/<shot_grdXX_UID>/<resolution>/<origfilename_grdXX_UID.xxxx>.dpx
Gaps are rendered out as black frames to a separate folder in the Renders Home location.
For example, the frames are rendered to:
<HOME>/ <scene>/grd/color_<grdXX_UID>/<resolution>/color_<grdXX.xxxx>.dpx
No ShotID-- Individually graded shots are rendered to the grade folder as individual shots in the Renders Home location.
For example, the shots are rendered to:
<HOME>/grd/<shot_grdXX>/<resolution>/<origfilename_grdXX.xxxx>.dpx
Gaps are rendered as black frames to a separate folder in the Renders Home location.
For example, the frames are rendered to:
<HOME>/ <scene>/grd/color_<grdXX>/<resolution>/color_<grdXX.xxxx>.dpx
One Sequence-- Individually graded shots are rendered to the scene folder as a single sequence in the Renders Home location. Black frames are rendered to the same single sequence in the same scene folder.
For example, these shots are rendered to:
<HOME>/ <scene>/grd/<grdXX>/<resolution>/<scene_grdXX.xxxx>.dpx
Src Grade-- Individually graded shots are rendered to their own UID folder in the Renders Home location.
For example, the shots are rendered to:
<HOME>/grd/<shot_grdXX_UID>/<resolution>/<origfilename_grdXX_UID.xxxx>.dpx
Gaps are rendered out as black frames to a separate folder in the Renders Home location.
For example, the frames are rendered to:
<HOME>/ <scene>/grd/color_<grdXX_UID>/<resolution>/color_<grdXX.xxxx>.dpx
Lustre renders out what is displayed in the Multi-Layer Timeline and Player, according to:
top vertical priority
the presence or absence of priority shots and muted layers
the Solo status
If Solo mode is disabled, Lustre renders the topmost layer by default. If there are gaps, Lustre takes into account top vertical priority behaviour and render out all the shots from the lower layers that are visible through the transparent gaps that are above.
If you do not want a shot in a lower layer to be rendered that is located beneath a gap, you can replace the gap with a virtual black clip. See Adding a Virtual Black Clip using the Storyboard and Adding Black Media to the Multi-Layer Timeline.
If you wish to render out the shots on a specific layer, you either must Solo the active layer, or Mute the unwanted layers. If there are gaps in this layer, the gaps are no longer seen as transparent, and automatically render out as black frames.
If you wish to render out a shot that normally would not be rendered because top vertical priority renders out a shot on a different layer, you can use the shot priority function to prioritize this shot.
For more information, refer to the following links:
When the Normal button is selected, Solo mode is disabled, and there are no muted layers, Lustre interprets gaps as being transparent and flattens layers in a top-down manner. Lustre renders out what is visible in the Multi-Layer Timeline in accordance with top vertical priority. The individually graded shots with frames that are visible are rendered and saved to their own unique ID (UID) folder in the Renders Home location. If there are no shots beneath the gap, Lustre renders the gap as a virtual black clip to a separate folder in the Renders Home location.
You can render one specified layer at a time by muting unwanted layers or soloing a desired layer. Lustre renders individually graded shots with frames that are visible as individual shots and saves them to their own UID directories in the Renders Home location. In addition, gaps are rendered out as black frames to a separate folder in the Renders Home location.
When the No ShotID button is selected, Solo mode is disabled, and there are no muted layers, by default, Lustre sees gaps as transparent and flattens layers in a top-down manner. Lustre renders out what is visible in the Multi-Layer Timeline in accordance with top vertical priority. Lustre renders the individually graded shots with frames that are visible to the grade folder as individual shots in the Renders Home location. If there are no shots beneath the gap, the gap is rendered out as black frames to a separate folder in the Renders Home location.
You can render individually graded shots with frames that are visible and save the render files to the grade folder as individual shots in the Renders Home location. Gaps are rendered out as black frames to a separate folder in the Renders Home location.
Note: When rendering with No ShotID, you can render one layer only for each grade. Consequently, when rendering out L1 first, then rendering out L2 within the same grade, the L2 render overwrites the previous L1 render files. To render out L2 without overwriting the previous L1 render, you must save a new grade (i.e., grd02).
When the One Sequence button is selected, Solo mode is disabled, and there are no muted layers, by default Lustre sees the gaps as transparent and flattens the layers in a top-down manner. Lustre renders out what is visible in the Multi-Layer Timeline in accordance with top vertical priority. Lustre renders the individually graded shots with frames that are visible to the scene folder as a single sequence in the Renders Home location. If there are no shots beneath the gap, the gap is rendered as black to the same single sequence in the same scene folder.
When the One Sequence button is selected, you can render one specified layer at a time by soloing the desired layer or muting the unwanted layers. Lustre renders the individually graded shots with frames that are visible to the scene folder as a single sequence in the Renders Home location. Gaps are rendered as black to the same single sequence in the same scene folder.
Note: When rendering with One Sequence, you can render one layer only for each grade. That is, if you render out L1 first, and then within the same grade renders out L2, the L2 render will overwrite the previous L1 render files. To render out L2 without overwriting the previous L1 render, you must save a new grade (grd02).
Src Grade works just like Normal render in that it renders each shot to its own UID folder under the grade directory and gaps are rendered as black frames to a separate folder in the Renders Home location. When this option is enabled, the rendering process bypasses any dissolve transitions and retime parameters. In other words, dissolves become hard cuts and retimes are rendered with a default of 100% value.
You can render shots with or without dust metadata. This is a workflow decision. You can render dust metadata either from the Render Local menu or from the Image Dust menu. See Rendering the Result.
To render shots with dust metadata, you must first use the dust removal tools to remove dust artefacts. See Chapter 9, Removing Dust.
In the Render Local menu, do one of the following:
To render shots without dust metadata, disable Dust.
To render shots with dust metadata, enable Dust.

 "Show full-size image")
You have the option of burning the timecode into the render files. For example, burn a timecode into the black border of a letterboxed shot to identify the location of the shot.
In the Render Local menu, enable Video Info.

 "Show full-size image")
For linear work, you can render shots to 8-bit BMP files using the currently loaded viewing LUT with the Viewing option. Use this option when you want to render the image displayed in the monitor.
When this option is enabled, the output consists of exactly what you see on the monitor, namely, the image resulting from the applied monitor calibration setting, viewing LUT, and colour space settings applied in the Render Output menu.
When this option is disabled, the currently applied viewing LUT is not taken into account in the output image, and the files are rendered to the file format specified in the Render Output menu rather than to 8-bit BMP files.
For information on monitor calibration, see Calibrating a Monitor. For information on output colour space settings, see Setting Colour Space Options.
Note: You can also render shots to DPX files with a viewing LUT applied. This is performed in the Render Output menu. See Setting Colour Space Options.
In the Render Local menu, enable Viewing.

 "Show full-size image")
When rendering shots or timelines, you can render the grade on the head and tail frames. This can be useful if, for example, the graded shot needs to be changed to include a longer dissolve and requires additional frames.
Note: Rendering the head and tail frames is only applicable to the Normal, No ShotID, and Src Grade rendering options.
In the Render Local menu, enable Heads & Tails.

 "Show full-size image")
You can render your shots to the same file format as the original footage or select a different one. By default, shots are rendered to the same format as the original footage. Currently supported formats are DPX and Cineon at 10 and 8 bits per channel, TIFF at 8 and 16 bits per channel, and TARGA®, SGI, and BMP at 8 bits per channel.
Note: The Lustre HD Station does not support bit depths greater than 10-bit, input resolutions greater than 2K, or output resolutions greater than 1920x1080.
In the Main menu, click Render and then click Output.
The Render Output menu appears.

 "Show full-size image")
|
|
Do one of the following:
To render to the same format as the originals, enable Same as Input.
To render to another format, disable Same as Input.
If you are rendering to another format, select the format in the list by highlighting it.
You can convert the colour space of the output shots from Log to Lin or vice versa. Whether you are outputting in Log or Lin colour space, you have several options for setting the LUT used on output. You can:
Use the default colour mapping. The default mapping differs according to the colour architecture used on the project (as set in the Grade menu).
| Colour Architecture | Output Colour Space | Colour Mapping Applied |
| Log | Log | Full range |
| Log | Lin | Standard log-to-lin (95-685) |
| Lin | Lin | Full range |
| Lin | Log | Standard lin-to-log (95-885) |
Create a LUT.
Note: You can save LUTs that you create in the Render Output menu as presets for use on other renders. See Saving and Loading Colour Mapping Presets.
Select an output LUT from a list of those made available in Lustre.
Use the current viewing LUT. The colour mapping settings made in the Render Output menu are taken into account with the current viewing LUT. See Rendering with the Viewing LUT.
The output colour space and colour mapping affect the image you see on the monitor. These settings are saved in the output buffer, which is applied to the output on the monitor after the viewing LUT and nd monitor.calib correction (if used) are applied. For this reason, when working on shots prior to rendering, it is recommended that you set the output colour space to that set for the grade colour architecture in the Grade menu, and set the output colour mapping to Default.
Access the Render Output menu.

 "Show full-size image")
|
|
Enable either Log or Lin.
Do one of the following:
Enable Default to use the default colour mapping.
Disable Default and either create a LUT or select one, as shown in the following procedures.
Access the Render Output menu.

 "Show full-size image")
|
|
|
Make sure Default is disabled.
Set the Black and White values.
Set the Gamma and Film Gamma values (for Lin colour space output only).
Note: If needed, you can reset these values to their default settings by clicking the Reset button and confirming.
Access the Render Output menu.

 "Show full-size image")
|
|
|
Make sure Default is disabled.
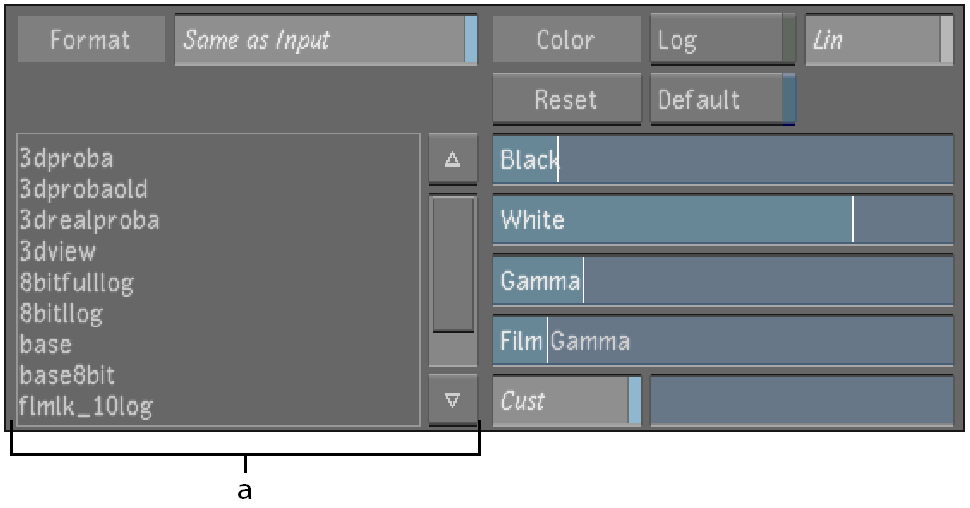
Enable Cust.
Click in the text field next to the Cust button.
A list of available LUTs appears in the scrollable window to the left.
 "Show full-size image")
|
Note: The LUTs displayed in the list are all located in the C:\Program Files\Autodesk\lustre 2009\luts folder, if running the Windows version of Lustre, and in the/usr/autodesk/lustre2009/luts directory, if running the Linux version of Lustre.
Select a custom setting from the list.
The image is updated and the LUT name appears in the LUT box.

 "Show full-size image")
|
Note: If you are using background rendering, place the LUT on all render nodes in the /usr/autodesk/lustre2009/lut/ directory.
Once you have set all the rendering options, you can render flagged shots in the selected region using the Render Local menu.
Access the Render Local menu.

 "Show full-size image")
|
|
|
Click Start.
The render starts and its progress is shown in the Shot and Scene progress bars. The Start button label changes to Stop. When the Shot progress bar reaches 100% and the Render button is no longer highlighted (it again reads "Start"), the render is complete.
If needed, you can abort the process by clicking Stop.