Smooth skinning workflow improvements
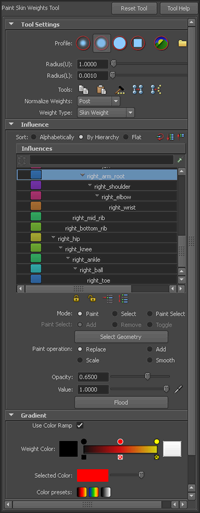
Several new tools and options in the Paint Skin Weights Tool enhance the smooth skin weighting workflow.
See Paint Skin Weights Tool for updated information including the following improvements.
|
Tools to copy, paste, move, and fix weights New buttons let you do the following tasks with one click:
Use a color ramp to assign color values for weights, making it easier to see small values when painting, and to determine if a joint is influencing unwanted vertices. Color swatches next to the color ramp let you quickly set colors to represent values of 0 and 1. |
|
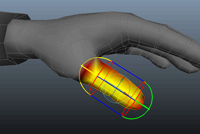
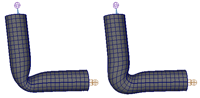
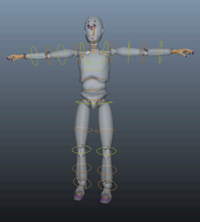
This smooth binding method lets you quickly set initial skin weights using interactive volume manipulators. By adjusting the shape, length, and position of the manipulators in the viewport, you define the area of the mesh affected by each influence. Interactive skin binding can help you achieve a quicker initial bind and better smooth skin deformation. Once you establish the rough weighting with the manipulators, you can refine weights using the weight painting tools. |
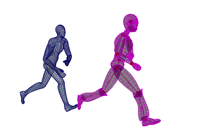
Non-destructive animation retargeting
|
The Autodesk® HumanIK® character solver is now integrated in Maya to provide an improved character animation retargeting solution. Using the HumanIK plug-in with animation layers lets you retarget character animation and modify it non-destructively. The new retargeting workflow is a live process, letting you adjust various parameters and see the results immediately. Refer to the following topics for more information: |
|
New options in the joint node give you alternate ways of representing and visualizing a character’s skeleton. You can change how joints are drawn using the Draw Style drop-down list. This list now includes options to draw joints as circles, squares, or sticks. See Draw Style and Change joint display options. |
Improved smooth skin weight normalization
|
A new Normalize Weights drop-down menu in the Paint Skin Weights Tool and in the skinCluster node has been added to improve the smooth skin weight normalization process. This menu lets you set how you want weights normalized, which can reduce the incidence of small weights unintentionally distributed across the mesh as you paint and smooth. The Interactive normalization mode replicates the weight normalization from previous versions of Maya, while the new Post normalization mode gives you the improved normalization behavior. See Smooth skin weight normalization and Set normalization mode and normalize weights for updated information. |
|
A new item in the Edit Deformers menu lets you mirror weights for the blend shape, cluster, jiggle, and wire deformers. See Mirror deformer weights and Edit Deformers > Mirror Deformer Weights. You can now use the pickwalk hotkeys to navigate along lattice deformer points. See Edit lattice deformers for updated information. A new Falloff Mode for the wrap deformer lets you select from Volume and Surface options. The default Volume mode sets the wrap deformer to use direct distances to calculate weights for wrap influence objects, and the new Surface mode sets the deformer to use surface-based distances to calculate the weights. See Falloff Mode. Support for negative weights in the Blend Shape deformer A new Support Negative Weights attribute in the blendShape node lets you set whether you want to allow negative weight values. See Support Negative Weights. |