Use controls on the Keyframing Tools rollout to clear animation from a biped or selected parts, mirror biped animation, and cause the neck to rotate in body space rather than parent space. You can also bend the horizontal center of mass track around a selected horizontal key.
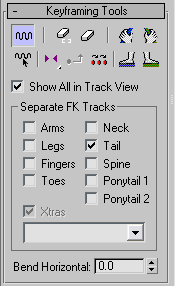
By default, Biped uses an optimized method for storing animation keys. For example, keys for the fingers, hand, forearm, and upper arm are stored in the Clavicle transform track. If you prefer instead to have a transform track available for each arm object, use the Separate FK Tracks settings to make these transform tracks available; separate tracks are displayed in Track View.
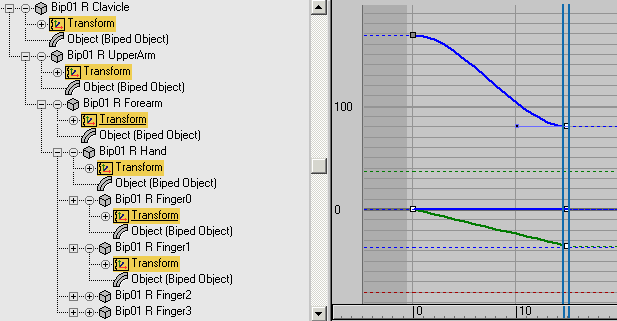 When the Separate FK Tracks options are on for the Arms and Fingers, only these tracks receive keys. |
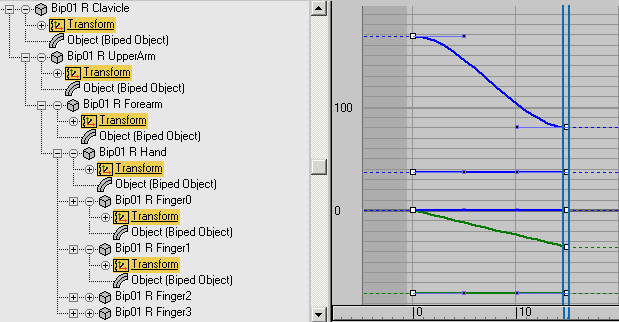 When the Separate FK Tracks options are off, all limb tracks receive keys. |
 Enable Subanims
Enables Biped subanims. For more information about Biped subanims, see Using Controllers
 Manipulate Subanims
Modifies Biped subanims. For more information about Biped subanims, see Using Controllers
 Clear Selected Tracks
 Clear All Animation
 Mirror and Mirror In Place flyout
This flyout offers two options. Both options mirror the animation locally, so that the right side of the biped now does what the left side does, and vice versa. Also, if the spline leaned to the left, it now leans to the right. The same goes for the neck, pelvis, head, and so on.
 MirrorReflects the animation about the world-space XZ plane. This option reverses the biped’s position by 180 degrees, so it now
faces in the opposite direction.
MirrorReflects the animation about the world-space XZ plane. This option reverses the biped’s position by 180 degrees, so it now
faces in the opposite direction.
 Mirror in PlaceReflects the animation locally, but at the initial frame, maintains the world-space position and orientation of the biped.
The biped continues to face in the same direction.
Mirror in PlaceReflects the animation locally, but at the initial frame, maintains the world-space position and orientation of the biped.
The biped continues to face in the same direction.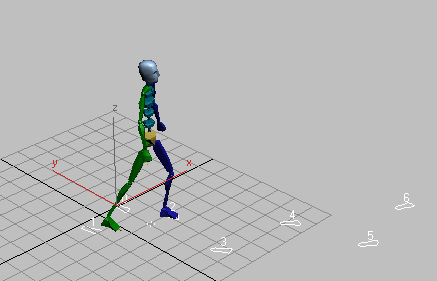
Original animation: The biped turns to the left as it walks.
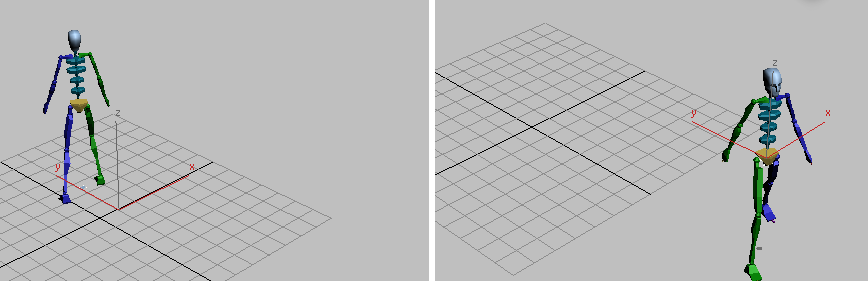
Left: When you click Mirror, the animation and the biped turn completely around.
Right: When you click Mirror In Place, the biped still moves forward, but now it turns to the right.
 Set Multiple Keys
Select keys using filters or apply a rotational increment to selected keys. Use this to change periodic motion keys in Track View. Displays the Set Multiple Keys dialog
 Set Parents Mode
When a limb key is created, keys are created for the parent objects also, provided Set Parents Mode is turned on. Use Set Parents Mode when you turn on Separate FK Tracks.
Set Parents Mode stores the position of the entire limb when a biped limb is moved using inverse kinematics instead of rotated using forward kinematics. For example, if Set Parents Mode is off and Separate Tracks are turned on for the biped arms, then the arm will snap back to its original position if you transform the biped hand.
If Separate Tracks are turned on for a biped body part, then turn on Set Parents Mode. This lets you use the Move transform to position the biped limbs.
 Anchor Right Arm, Left Arm, Right Leg, Left Leg
Let you temporarily fix the location and orientation of hands and feet. Use anchors when you are setting up animation with inverse kinematics object space, in which the arm or leg follows an object in the scene. Anchors ensure that the arm or leg keeps its alignment until you set the second key that establishes the object-space sequence.
By default, character studio stores a finger, hand, forearm, and upper-arm key in the Clavicle track. The toe, foot, and calf keys are stored in the thigh track. This optimized approach to key storage works well in most cases. If you need extra tracks, turn them on for a specific biped body part. For example, turn on Arms if you plan to create extensive finger-hand animation; if an arm key is deleted, it will not affect the finger-hand keys.
You must turn on Set Parents Mode for these toggles to take effect.
Turn on to create separate tracks for an extra tail. See Xtras group.
This dialog lets you select biped keys based on foot states and apply an increment to selected keys.


 Motion panel