The parameters on this rollout apply to buffer-rendered hair generated by Hair. In the case of geometry-rendered hair, the hair coloring is derived from the growth object. In the case of hair rendered by “mr prim”, all parameters apply except Self Shadow and Geom. Shadow. With instanced hair, Hair uses the material from the instanced object.
You can apply a map to any value by clicking the blank button to the right of the parameter. Values in the map act as multipliers to the base value.
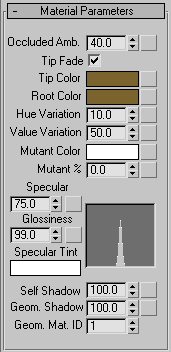
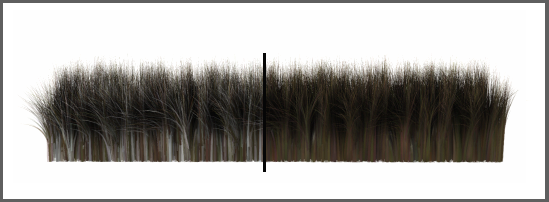
Controls the bias of the ambient/diffuse contributions of the illumination model. A setting of 100.0 renders the hair with flat lighting. A value of 0.0 is lit only by scene light sources, typically resulting in a higher-contrast solution. Default=40.0. Range=0.0 to 100.0.
Left: Occluded Amb=0.0
Right: Occluded Amb=100.0
Both: Color=white, Self Shadow=50.0
Applies only to mr primrendering (with the mental ray renderer). When on, the hair fades to transparent toward its tip. When off, the hair is equally opaque for its entire length.
Hair color at the roots, closest to the growth object surface. To change the color, click the color swatch and use the Color Selector.
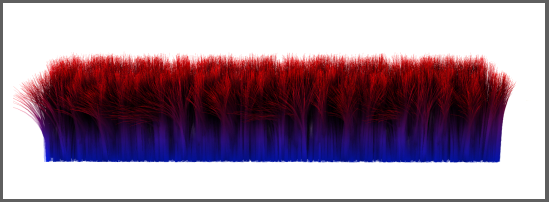
Tip Color=red
Root Color=blue
Hue Variation=0.0
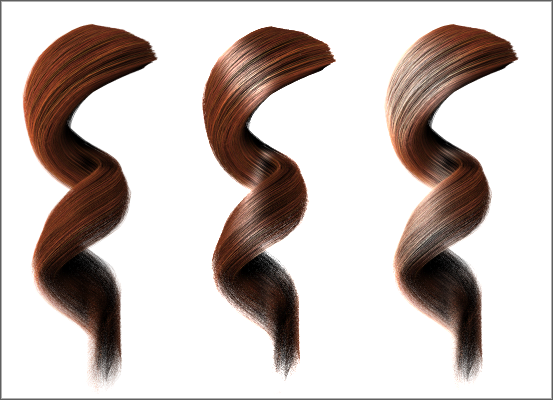
The Tip Color and Root Color attributes are also mappable via the map buttons to the right of the spinners. These let you add texture maps to control the hair coloring, separately at the tip and base. The UVW mapping used for the texture is the same as that of the growth object.
For results closest to the map colors, set Tip Color and Root Color to white. Alternatively, set a different color to tint the map coloring.

Left: The texture map used for the hair (center and right)
Center: The map applied to Tip Color and Root Color causes the hair to use the same coloring.
Right: Setting Tip Color and Root Color to orange adds an orange tint to the hair.
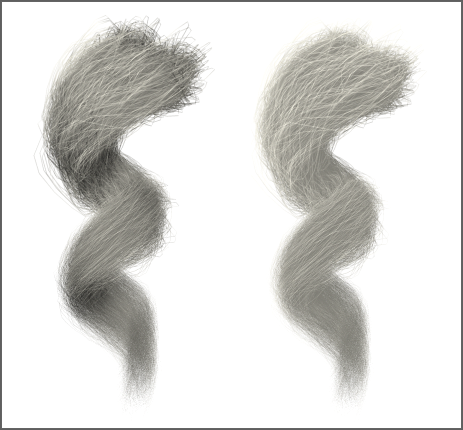
The relative size of highlights on the hairs. Smaller highlights result in glossier-looking hair.
The combined results of the Specular and Glossiness settings appear in a graph to the right of the two parameters.
Left: Specular=0.0, Glossiness=0.0
Center: Specular=100.0, Glossiness=75.0
Right: Specular=100.0, Glossiness=0.1
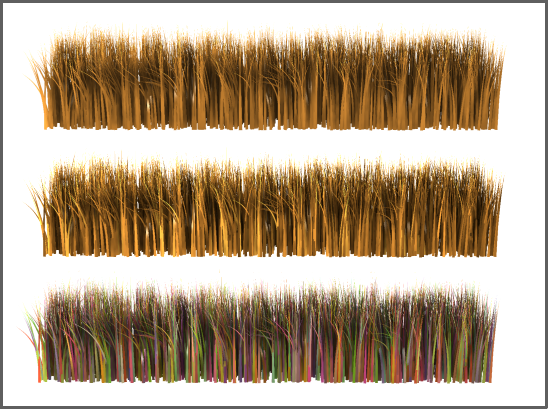
Controls the amount of self-shadowing; that is, hairs casting shadows on other hairs within the same Hair And Fur modifier. A value of 0.0 disables self shadowing, while a value of 100.0 results in maximum self-shadowing. Default=100.0. Range=0.0 to 100.0.
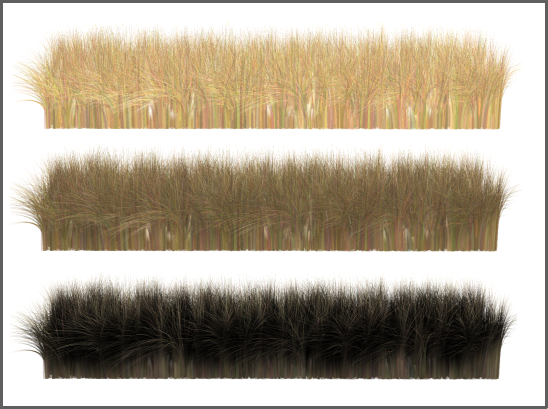
Top: Self Shadow=0.0
Center: Self Shadow=50.0
Bottom: Self Shadow=100.0
The material ID assigned to geometry-rendered hair. Default=1.


 Modify panel