Command entry:
Select a biped.


Motion panel
Biped Apps rollout
Mixer
Motion Mixer menu bar
Clips
Add Time Warp
Command entry:Graph Editors menu
Motion Mixer...
Clips
Add Time Warp
You can cause varying changes in speed throughout a clip with a time warp. Adding a time warp to a clip allows you visually
to squash and stretch time over different parts of the clip.
You can use a time warp to:
- Cause the object to do some parts of the motion quickly and others slowly.
- Cause a particular motion within the clip to occur at a specific time.
You use a time warp by picking a time within the motion clip and dragging that time's motion to another time in the same clip.
The overall time of the clip is unchanged, so the object takes the same amount of time to do the entire motion, but does some
parts quickly and others slowly.
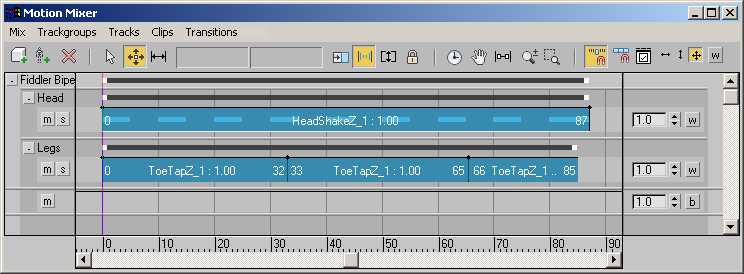
Dashed lines appear on a time-warped clip in the Mixer to indicate the motion speed at different points in the clip.
 Warping a clip's time requires two steps. First a time warp must be added to the clip with the Clips Add Time Warp menu option. Then you turn on Editable Time Warps to see the dashed lines and adjust the clip's timing.
Procedures
To prepare to warp a clip's time:
- Open the Motion Mixer, add a biped to the Mixer, and load a clip on a track. See Adding Tracks to the Mixer.
- Scrub the time slider to find a motion you would like to occur earlier or later in the clip. Note the frame number. This frame
number is the original time.
- Scrub the time slider to find the frame on which you would like the motion to occur, and note the frame number. This frame
number is the warped time.
With a time warp, you will cause the motion to occur at the desired frame by moving the original time to the warped time within
the clip.
To warp a clip's time:
- In the Motion Mixer, zoom in on the original time for the time warp. This is the frame number you noted in step 2 of the previous
procedure.
- In the Motion Mixer, select the clip.
- From the Motion Mixer menu, choose Clips Add Time Warp.
The appearance of the clip does not change when a time warp is added.
- On the Motion Mixer toolbar, click (Editable Time Warps).
A series of evenly spaced dashes appears on the clip. The lengths of the dashes indicate the relative speed of the clip at
various points. Right now, all dashes are evenly spaced to indicate the clip is playing at its original speed from beginning
to end.
- Move the cursor over the clip's horizontal center line until an arrow cursor appears.
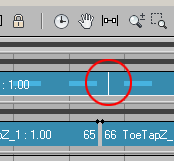
- At the approximate original time, click the clip to set a time warp bar.
A time warp bar actually consists of two parts, a top and a bottom.
- Click the top half the bar. The top half turns white to indicate it is selected.
- Drag the top half of the bar to the left or right to set it to the warped time noted in step 3 of the previous procedure.
This will cause the motion at the original time to occur at the warped time.
TipAs you drag the top bar, watch the Frame value at the top of the Motion Mixer window to see the top bar's new frame number.
The lengths of the dashed lines change to indicate the new timing. Where lines are shorter, the motion will play faster. Where
lines are longer, the motion will slow down.
- Select and move the bottom bar to change the original time.
Either bar can be moved to change the effect of the time warp. The length of separation between the two bars sets the degree
of time-warping that will occur. When both bars are aligned, no warping occurs.
To add multiple time warps to a clip:
- You can time-warp other parts of the clip by adding more time-warp bars with the arrow cursor, then moving the new top bars.
When you add a second time warp bar after editing the first, the top bar appears where you click, but the bottom bar appears
in a different location. The bottom bar's location corresponds to the original time of the top bar before the clip was time-warped.
NoteYou cannot move one time warp's top bar past another on the clip.
- When you have finished warping the clip's time, turn off (Editable Time Warps).
When Editable Time Warps is turned off, the bars and the dashed line between them remain displayed on a clip to indicate it
has been time-warped.