 Command entry:Click or right-click the Point-Of-View (POV) viewport label.
  POV viewport label menu Extended Viewports ActiveShade
ActiveShade gives you a preview rendering that can help you see the effects of changing lighting or materials in your scene. When you adjust lights or materials, the ActiveShade window interactively updates the rendering.
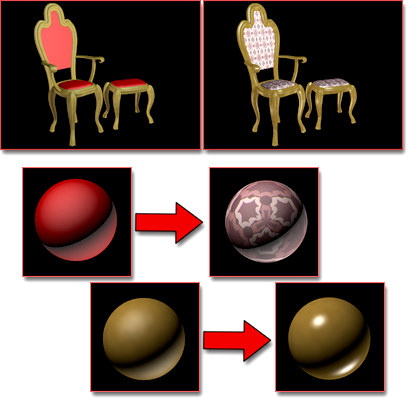
ActiveShade preview of material changes
Above left: Before the update
Above right: After changing the material for the fabric to a mapped material and increasing the highlights on the material for the wood
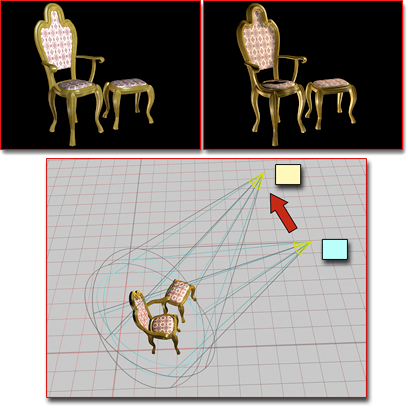
ActiveShade preview of lighting changes
Above left: Before moving a light in a viewport
Above right: After moving the light
There are two ActiveShade options:
 FloaterThe ActiveShade rendering appears in its own window.
Only one ActiveShade window can be active at a time. If you choose one of the ActiveShade commands while an ActiveShade window is already active, you get an alert that asks whether you want to close the previous one. If the previous ActiveShade window was docked in a viewport, the viewport reverts to the view it previously showed.
When you right-click an ActiveShade window, the quad menu displays an ActiveShade menu. This menu contains a number of ActiveShade commands.
ActiveShade and Object Selection
If you select an object before you invoke ActiveShade, ActiveShade is done only for that object. This can greatly increase the speed of ActiveShade.
Similarly, once the ActiveShade window is open, the initialize and update steps (whether automatic or manual) are done only for the selected object.
In a "docked" ActiveShade viewport, you can select objects by right-clicking, turning on Select Object in the Tools (lower-right) quadrant of the quad menu, then clicking the object you want to select. In an ActiveShade viewport, only one object at a time can be selected.
What ActiveShade Does and Doesn't Do
For the sake of interactivity, the ActiveShade window is limited in what it can update interactively. An ActiveShade rendering is typically less precise than a final production rendering.
Initialize from the quad menu (lower-right quadrant). This updates the ActiveShade rendering. If you see this happening, right-click the ActiveShade window and choose Tools Initialize from the quad menu (lower-right quadrant).
To display an ActiveShade window in a viewport:
To display a free-floating ActiveShade window:
Choose ActiveShade from the Render flyout.
To update an ActiveShade window after moving an object or changing object geometry:
To see the toolbar in an ActiveShade viewport:
Pressing spacebar again toggles the toolbar off, and so on.
You can also turn toolbar display on or off by right-clicking and using the quad menu.
To change an ActiveShade viewport to another kind of viewport:
You can also restore the viewport to its previous status by right-clicking the viewport and choosing View (upper-left) quad
Close.
To zoom and pan in an ActiveShade window:
You can zoom in and out and pan the image in the ActiveShade window. You can even do this while a scene is rendering.
If you have a three-button mouse, you can use its third button or wheel to zoom and pan:
Both the viewport and floating versions of the ActiveShade window have the same controls as a Rendered Frame Window. In an ActiveShade viewport, the toolbar is off by default. In a floating ActiveShade window, the toolbar is always visible.


 You can't make a maximized viewport an ActiveShade window, or maximize an ActiveShade window.