The Plane Angle manipulator looks like a lever or joystick. By wiring its Angle value to a parameter of another object, you can create a custom control, with visual feedback, within a scene.

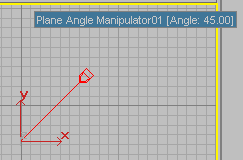
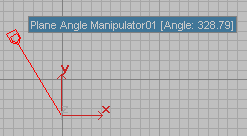
Plane angle manipulator at different angles
To create a plane angle manipulator:
 Create panel, activate
  (Helpers) and choose Manipulators from the drop-down list.
The plane angle manipulator is always created vertically, along the Y axis of the viewport in which you drag.
To change the angle of a plane angle manipulator:
 (Select And Manipulate).
The manipulator turns red when the mouse is over it and it is available to be manipulated. Also, a tooltip appears, showing the name of the manipulator and its current value.
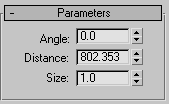
The Angle value changes as you drag the manipulator. This value can range between –100000.0 and 100000.0.
To select a plane angle manipulator:
 (Select Object).
You can also use  (Select And Move),
  (Select And Rotate), and
  the scale options on a plane angle manipulator.
 (Select And Manipulate).
If you don't turn off Select And Manipulate, you adjust the manipulator's Angle value without affecting its properties.
To connect a plane angle manipulator so it controls another object:
 Select the plane angle manipulator.
 Wire Parameters Wire Parameters.
You can also right-click the manipulator and choose Wire Parameters from the Transform (lower-right) quadrant of the quad menu.
Angle.
3ds Max opens the Parameter Wiring dialog.
Now when you turn on (Select And Manipulate) and use the manipulator, the object updates under the manipulator's control.