Command entry: Render Setup dialog
  Choose Default Scanline Renderer as the active production renderer. Advanced Lighting panel Select Advanced Lighting rollout Choose Radiosity from the drop-down list. Radiosity Meshing Parameters rollout
Controls the creation of a radiosity mesh and its size in world units.
In order to create the lighting of a scene, 3ds Max calculates the intensity for discrete points in the environment by subdividing the original surfaces into elements which are part of a radiosity mesh. This rollout allows you to determine whether you want a mesh or not, and to specify the size of the mesh elements in world units. For quick tests, you might want to turn off the mesh globally. The scene will look flat, but the solution will still give you a quick impression of the overall brightness.
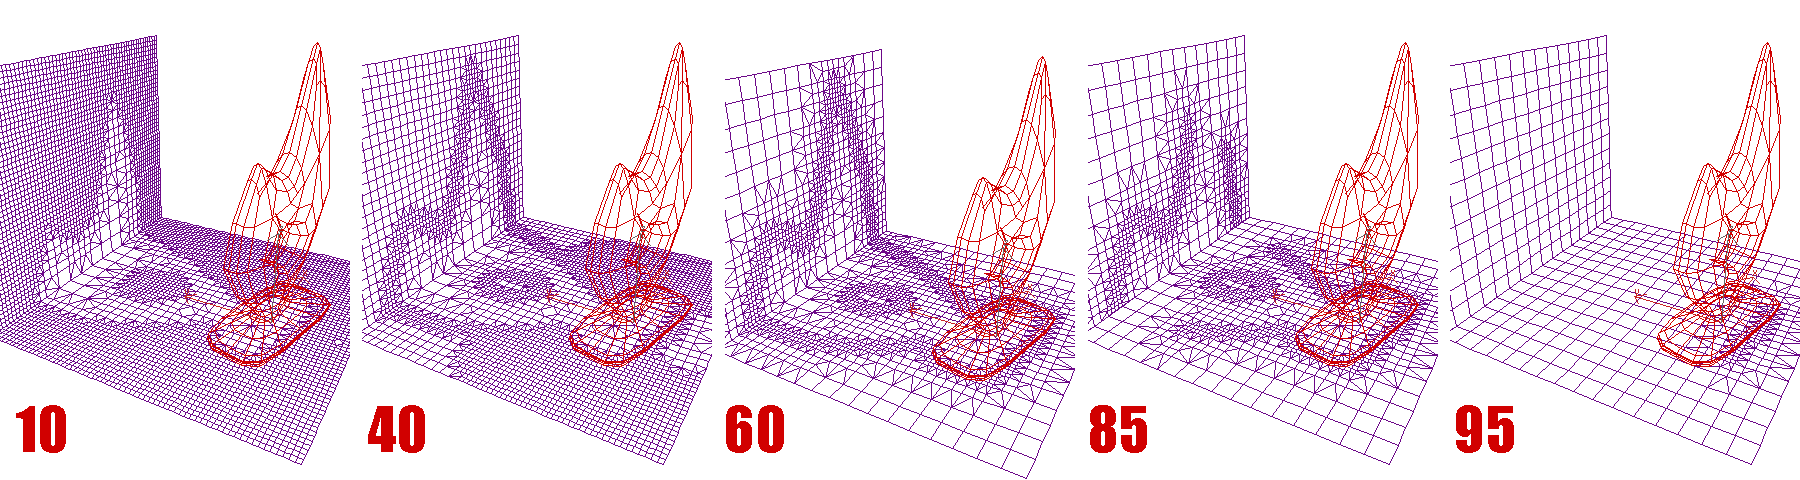
The finer the mesh resolution is, the more accurate the lighting detail will be. But there is a trade-off in time and memory.
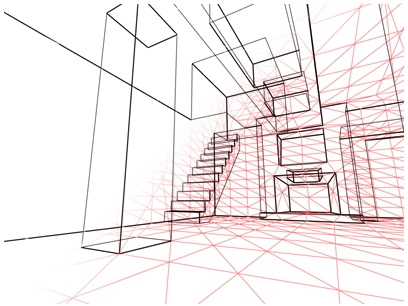
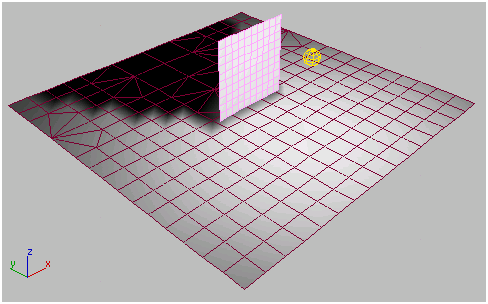
Meshing (shown in light red) subdivides flat surfaces in the scene.
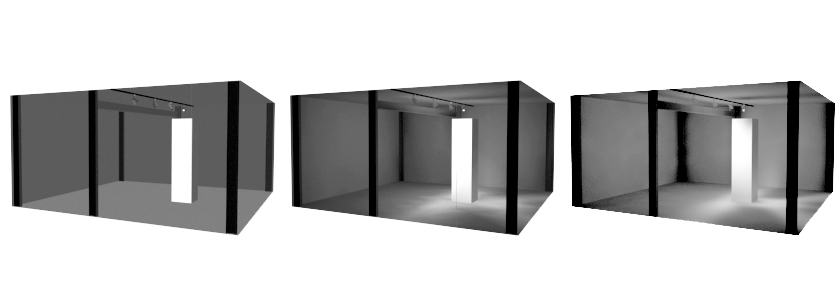
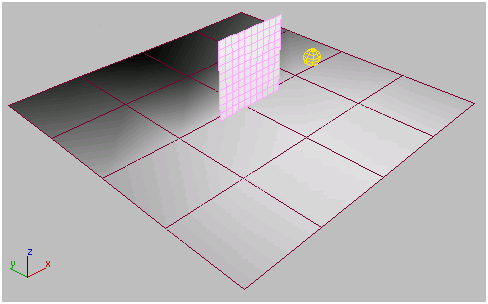
Left: No mesh. The solution looks very flat.
Middle: Coarse mesh, every 24 inches. The lighting improves.
Right: Fine mesh, every 4 inches. The lighting reveals more subtle effects.
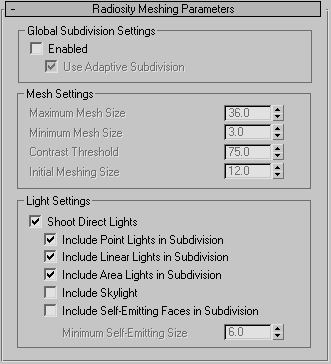
Global Subdivision Settings group
Turns on the radiosity mesh for the entire scene. Turn off the mesh when you want to perform quick tests.
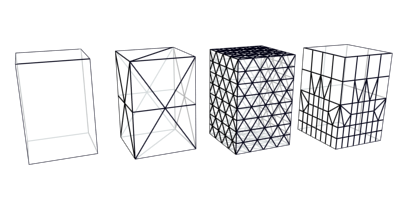
Left: A simple box with no subdivision
Middle Left: The box faces are subdivided
Middle Right: The box faces are subdivided with a smaller Meshing Size
Right: The box faces are subdivided with Adaptive Subdivision
Adaptive Subdivision using the default mesh and light settings
When improving the face shape, faces that are smaller than the Initial Meshing Size are not subdivided. The threshold for deciding whether a face is poorly shaped also gets larger as the face size is closer to the Initial Mesh Size. Default=12 inches (1 foot) for US Standard units and 30.5cm for metric units.
When adaptive subdivision or shoot direct lights is on, the direct lighting on all of the objects in the scene is calculated analytically, based on the following switches. Lighting is analytically computed without modifying the object's mesh which produces lighting that is less noisy and more pleasing to the eye. This switch is implicitly enabled when using adaptive subdivision since it is a requirement. Default=on.
This switch is available when the Use Adaptive Subdivision switch is turned off.
Adaptive Subdivision with light settings turned off
This switch controls how self-emitting faces are used when shooting direct lights. If this switch is turned off, then self-emitting faces are not used in illumination calculated at vertices directly. Default=off.
This setting is unavailable unless Include Self-Emitting Faces In Subdivision is on.