


In the following procedure, you add a Control rig to the 3ds Max character you characterized in the previous procedure (Characterize the 3ds Max character) so you can animate it in MotionBuilder.
To add a Control rig to the characterized 3ds Max character:
In the Viewer window, click the View menu and choose Perspective Producer Perspective (or press Ctrl-E).

 ), drag the Travelling tool (
  ) upward or Shift-drag to pan the camera and camera interest.
 ) or Ctrl-drag to zoom in on the character.
Setting the Control Rig as the source makes the skeleton an active character in the scene.
The Create Control Rig dialog appears.
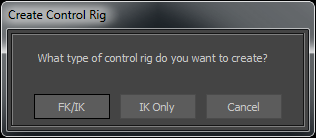
FK/IK is the method commonly used to animate characters.
The Control rig is created and its effectors are shown on the character in the Viewer window.
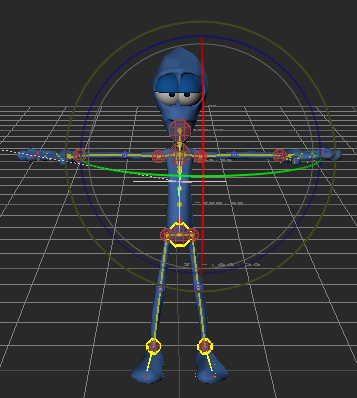
3ds Max character is characterized and rigged
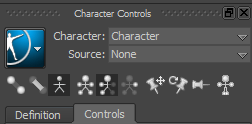
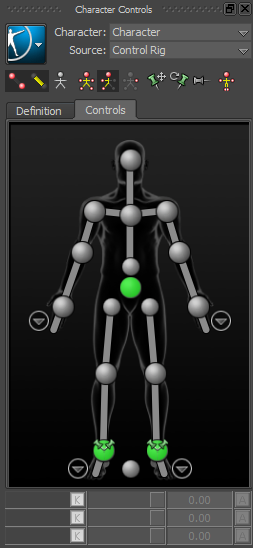
In the Character Controls window, the Control Rig settings are activated and include all the effectors you need to animate the Control rig.
The Character representation is an image of a human form meant to represent the biped skeleton.
 ), click the Full Body option (
  ).
).
Setting the Control Rig to Full Body enables you to move the body using the entire Control rig.
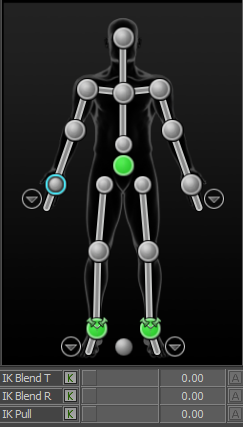
Character representation Right Wrist effector selected
An effector that is selected is displayed with a blue (  ) contour.
 ) or click in the Viewer window and press T.

3ds Max character body follows the hand movement
Notice as you move the hand, the arm extends and the rest of the body follows in a natural movement.
Now that your character is characterized and rigged, you can transform and animate the 3ds Max character in MotionBuilder with motion capture and fine-tune your animation with keyframes. Go to the next procedure: Animate the 3ds Max character.
 Except where otherwise noted, this work is licensed under a Creative Commons Attribution-NonCommercial-ShareAlike 3.0 Unported License

