The
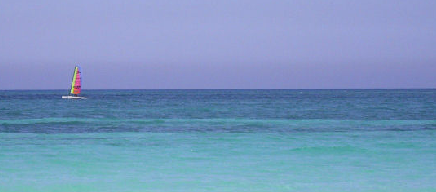
Clone tool lets you copy a region of the layer and paint it on a
destination area. For example, if your clone source includes a sailboat,
when you paint on the destination area, the sailboat will be replicated.
The clone source and destination occupy the same layer. To clone
part of one layer on a different layer, use the Reveal tool—see
Revealing Parts of an Image.
To clone part of a layer and paint it
on the same layer:
- Under Stroke, select the Clone operation.
The brush changes from
green to red.
- Set Pressure and Blend attributes—see
Blend Modes.
- Set the brush attributes—see
Paint Brush Controls and Attributes.
- To clone the contents of a different
frame than the one you are currently viewing, enter its frame number
in the Slip field.
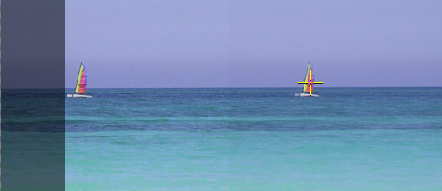
In this example, the
sailboat will be cloned to a location further to the right.
- Set the source area of the clone and
the target destination for the clone by pressing Ctrl and clicking once. When you
click the canvas, the red brush is anchored and the green brush
reappears.
NoteThe Preview option
offers a more intuitive way of previewing the effects of the reveal.
When you enable Preview, the layer is superimposed over itself,
and the Opacity field is activated to allow for transparency adjustments.
This allows you to see exactly what your brush strokes will clone.
- Position the green brush over the destination
area, then click + drag the canvas to create the clone stroke. The
offsets are made and immediately shown in the X and Y Offset fields.
The green and red brushes
are now locked into positions relative to each other and move in
tandem.
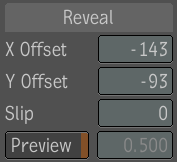
- To set precise coordinates for the reveal
offset, use the X and Y Offset fields.