Chapter 13, Pixel Expressions
| About Pixel Expressions | CTL Tool | ||
Chapter 13, Pixel Expressions |
|||
 PXL, the Pixel eXpression Language
The PXL tool provides the ability to write a C-like program to control the creation of its output image. The program executed by the PXL tool is written in a new language called PXL, the Pixel eXpression Language (pronounced "pixel"). The PXL language offers a rich set of features like conditionals, looping, and numerous built-in functions. The PXL tool offers users the ability to create new effects by writing a PXL language program. The PXL tool can be used to implement any point or gather operator, as it can read any pixel in its input images.
The PXL tool's primary use cases are two-fold. One use case is for quick creation of a short, non-reusable PXL program, for simple image generation or transformation. Another will be to write longer scripts to create customized effects that are not supplied by Toxik, which will be shared by many users. Examples might include:
Image generators
Warping
Transitions (fade & dissolve)
Blur & convolution
Tone mapping
Noise generators
Filters
Masking
Convert color spaces
Compositions
Color correction

The PXL tool has a single image output. It has a single, fixed primary input (which can be unconnected, when used as an image generator). Further image inputs can be added to the tool, which allows for an arbitrary number of secondary image inputs to the tool. These secondary inputs can also be removed from the tool. Because it supports masking, the PXL tool also has a standard masking image input.
The PXL tool allows the user to create an arbitrary number of animated scalar float inputs, to be used as parameters to the PXL script. Because of UI space restrictions, only the first ten scalar parameters will be shown in the UI; however, all parameters can be seen in the composition browser. These parameters are passed as arguments to the main() function of the PXL script.
The PXL tool UI has 3 tabs: the main UI tab, the Output tab, and the Masking tab. The main tab supports two main modes, Develop mode and User mode.
User mode is meant to address the needs of users of the PXL script, who are interested in changing the parameters to the script, but not necessarily the script itself. Develop mode also has parameter controls as in User mode, but has a UI to edit the script using the Toxik internal editor, or read the script directly from a file (to support a developer who wishes to edit the script using an external editor), and view script compilation errors.
The PXL User mode UI is shown below. It shows a PXL tool where two parameters have been added, here named Gain and Rotation. The Develop functionality is muted, so its UI is not shown. The Reset button under the parameters is used to reset only the parameters, not the whole tool, which is done with the Reset button in the General Tool UI.

 "Show full-size image")
| PXL tool User mode UI |
One of the UI layouts of the PXL Develop mode is shown below. In Develop mode, Develop is un-muted, so that developer functionality is exposed in the UI.

 "Show full-size image")
The area on the left displays the same parameters that are shown in User mode, as well as two buttons to add and delete parameters. Parameters cannot be edited, only added and removed.
Clicking the Add button pops up a modal dialog where the user types in the name of the parameter, its minimum, maximum, and default values, as well as the minimum increment to be used when changing the value in the UI. This modal dialog offers a Cancel button.

 "Show full-size image")
Clicking the Delete button pops up a menu where you select the parameter to be removed.

 "Show full-size image")
The Develop controls are to the right of the Parameter controls. The File and Edit radio buttons control whether the PXL script source is read from an external file, or from the Toxik internal editor.
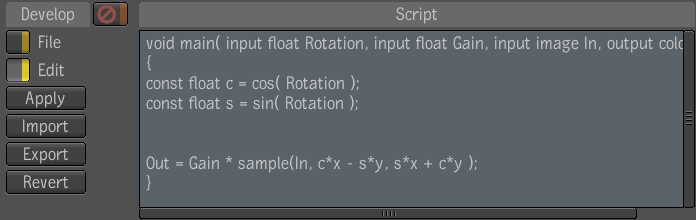
 "Show full-size image")
| Develop UI in Edit mode using internal editor |
The above graphic shows Edit mode, where the PXL script developer is editing the script inside the Toxik internal editor (titled Script), which is displayed to the right of the develop controls.
| Select: | To: |
| Apply | compile the edited script and, if successful, applies it as the new image processing script. |
| Import | display a modal dialog to read an external file into the Toxik internal editor. The contents of the external file replace the contents of the Toxik internal editor. |
| Export | to display a modal dialog to write the contents of the Toxik internal editor to an external file. |
| Revert | to replace the contents of the Toxik internal editor with the currently-applied script, thereby reverting the edited script back to what it was when previously applied. |
The script status and the applied script display share the right portion of the PXL UI. Push toggle buttons on the top of that column control which text viewer is shown. Both text views are read-only views. The status text viewer shows compilation errors from the latest applied script, if any. If there are no errors, the display shows a success message. The applied script viewer shows the currently-applied script. This can be useful as a reference, when the PXL script is actively undergoing editing, and you want to know what the currently-applied script is.

 "Show full-size image")
| PXL script read from external file with status message |

 "Show full-size image")
| PXL script read from external file with applied script |
While in Develop mode and the PXL script is being read from an external file, you will edit the PXL file with an editor external to Toxik, then save the file to disk. You will then click on the Apply button to have Toxik read the script from the file and apply it. In this mode, the Import, Export, and Revert buttons of the Develop controls are not relevant, as they pertain to the Toxik internal editor, and are therefore not shown.

 "Show full-size image")
Because the PXL tool can be an image generation tool, it requires an Output tab to define the output properties. To define output properties, it uses the same tab as found in Toxik image generators. If the primary input is connected, all options in this tab will be greyed-out and disabled, as is the case with the Slate tool--see Slate Tool.
 "Show full-size image")
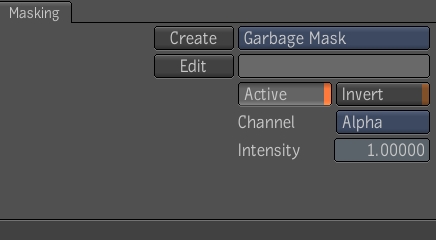
The PXL tool has the same masking capability that is available on other image modifier tools, in the standard Masking tab--see Creating Masks.
An important use case of the PXL tool is that even if you are not an experienced PXL script writer you can still use the PXL tool to quickly write a simple expression to create a basic effect. Use cases might be multiplying one of the pixel channels by a constant, or multiplying two input images together, or a simple conditional test to reveal out of gamut pixels as a false-color image. Typically, these PXL tools will not be reused.
Another important use case is where a PXL script will be written by an experienced developer, and distributed to others to be used in User mode. In such a case, an easy means of distribution is important. Distributing the PXL script alone is insufficient, as parameter names and min, max, default values will not be available. Tool presets allow users to name, save persistently, and distribute presets for any given Toxik tool. This is exactly the functionality required for you to develop custom tools written with the PXL tool. You can write your own color corrector, keyer, or any other effect using a PXL script. You can then package it as a PXL tool preset.
You can load and save PXL tool presets using the Preset controls in the Tools Options area located at the far right of the tool UI--see Tool Presets.
 "Show full-size image")
There are several PXL tool presets installed with Toxik and they are described below:
Blur 5 x 5 -- A simple 5 x 5 blur kernel with hard coded weights.
|
|
|
| Original | Blurred |
Clouds -- Creates a cloud texture.

 "Show full-size image")
Corner Pin -- Provides eight parameters to control the four corners of the image, and computes a perspective transformation to place the image based on the corners. By setting expressions to link the eight parameters to a garbage mask rectangle, a simple interactive corner pinner can be made.

 "Show full-size image")
Directional Blur -- Performs an anti-aliased blur using a rotated rectangle to achieve a blur in a particular direction.
|
|
|
| Original | Blurred |
Emboss -- Simple emboss, based on gradients of luminance.
|
|
|
| Original | Embossed |
Erode Alpha -- Erodes alpha using a simple square kernel.
|
|
|
| Original | Eroded Alpha with a 10 pixel radius |
Gamma -- Applies a simple gamma exponential to all channels.
|
|
|
| Original | Gamma correction applied |
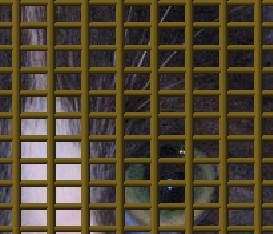
Lattice -- Adds a lattice of shaded tubular bars to the image channels.
 "Show full-size image")
Lens Flare -- Provides 1 to 5 lines of flares centered on bright points on the image. You can control the weight of the lines relative to the weight of the source pixel at the center of the blur. There is also a falloff gamma factor for the weight of the lines as they get more distant from the centre of the blur.
|
|
|
| Original | Lens flare applied |
Marble -- Creates a marble texture.
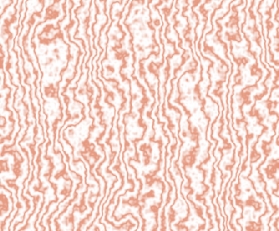
 "Show full-size image")
Mandelbrot -- Generates a mandelbrot fractal image.
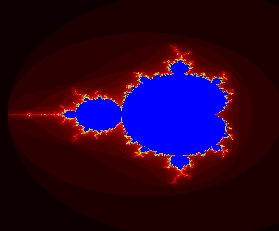
 "Show full-size image")
Noise Wipe -- Performs a wipe transition between two images where each pixel switches at a random time.

 "Show full-size image")
Noise -- Creates a pattern of random noise.

 "Show full-size image")
Num Colors -- A preset that reduces the number of colors to create images with banding. It can also add dithering noise to reduce the banding.
|
|
|
| NumColors = 6, Dither = 0 | NumColors = 2, Dither = 1 |
Out of Range -- Marks pixels outside of a specified range with a specified color, such as red in the following image.

 "Show full-size image")
Polygon Blur -- Performs a simple anti-aliased polygon blur, to simulate a lens effect. You can choose the number of sides, the radius, and rotation angle.
|
|
|
| Original image | Polygon Blur applied |
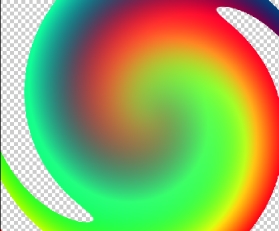
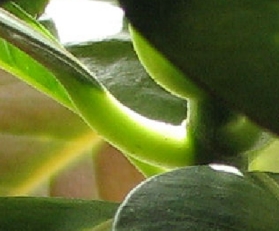
Ripple Twirl -- Atwirl effect with some extra ripples.
|
|
|
| Original image | Ripple Twirl applied |
Sharpen 5 x 5 -- A simple 5x5 sharpening kernel with hard coded weights.
|
|
|
| Original image | Sharpened |
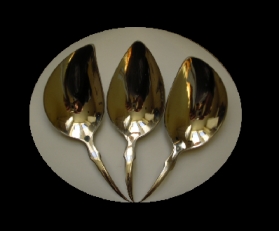
Spherical Mapping -- Applies spherical mapping to the current selection.
|
|
|
| Original image | Spherical mapping applied |
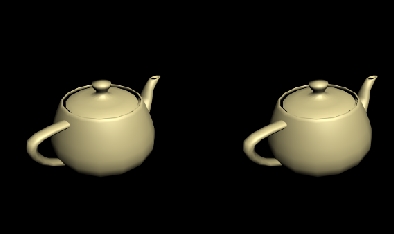
Stereo Anaglypha -- A preset that provides two methods of combining colors into a single Red/Blue glasses image (left image) and one method for cross-eyed viewing (right image).
|
|
|
| Red/Blue glasses | Cross-eyed viewing |
Wood Frame -- Creates a wood frame. You can specify the frame's thickness and lighting qualities.
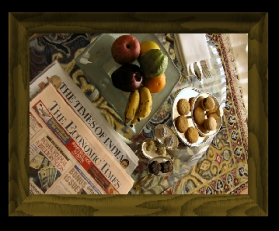
 "Show full-size image")
Wood -- Creates a wood texture. You can specify the scale, size, and fineness of the grain.

 "Show full-size image")
The following section outlines the traits inherent to the PXL language.
The following example PXL script and procedure multiplies the input pixel R, G, and B components by 3.
Add a PXL tool to the dependency graph.
Click the Edit button and type the script into the script editor.
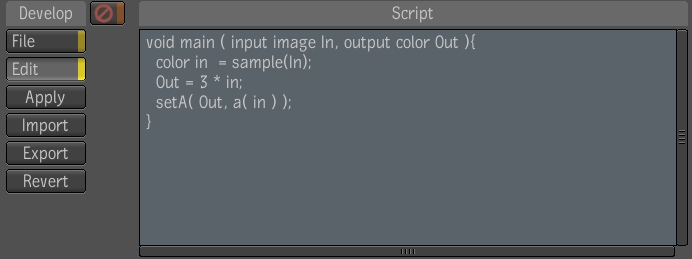
 "Show full-size image")
The pixels in the image are multiplied by a factor of 3.
There are three types of image processing operators: the point operator, the gather operator, and the scatter operator. They are based on a workflow in which there are one or more input images and a single output image:
Point operator -- Image processing operation that only reads pixels from the input images at the current position, and only writes one pixel to the output image, at the same position.
Gather operator -- Image processing operation that reads pixels from the input images from any position, and only writes one pixel to the output image, at the current position.
Scatter operator -- Image processing operation that reads pixels from the input images from any position and writes one or more pixels to the output image at any position.
Note: The PXL tool can perform point and gather operations, but not scatter operations.
PXL supports a specific set of fundamental types. It is case sensitive. Like C, all the variables must be declared before they can be used in an expression statement, unless the variable is a built-in variable, or a function argument. Unlike the C++ language, it is not possible to define new types with objects or structures. Here is the list of supported fundamental types:
image
float
color/vec4
The color and vec4 types are aliases of one another, and are provided for convenience and readability. Otherwise, they are syntactically identical for PXL, and can be used interchangeably. Any reference in the documentation to type color can be understood as vec4, and vice versa.
Note: PXL does not support vectors, arrays, or matrices.
The color / vec4 type is a quadruplet of floating point values for R, G, B, and A (or equivalently, X, Y, Z and W). These values are unclamped (even for A), which fully supports high dynamic range scene-referred color manipulation. No explicit type casting or type conversion is supported. However, many mixed-type assignment operators and functions are provided.
If a variable of image type is used where type rules would require a color type, the language automatically calls the built-in single-argument sample (image) function. This is provided as a convenience.
As PXL has no Boolean type, the float type is used to represent Boolean values. Any value that is different from 0.0. PXL Boolean operators return 1.0 as a true value.
A variable can be defined as const. In this case, the variable cannot be modified after his initialization. An error will be issued if a const variable is modified after initialization.
As previously described, function arguments can be qualified as input or output. These are currently only used by the PXL tool to pass in data to the main() function and read out the output pixel value. The initial value of an output argument is undefined.
Comments use the same syntax as C. Two consecutive slashes ("// Comment") are used for starting a single line comment. The slash-star ("/*") is the beginning token for multi-line comment, while the star-slash ("*/") is used to stop the multi-line comment.
PXL supports the "if" statement, the "while" statement and the "for" statement. They also use the same syntax as in the C language. The only exceptions are that PXL has no break or continue statements to affect looping.
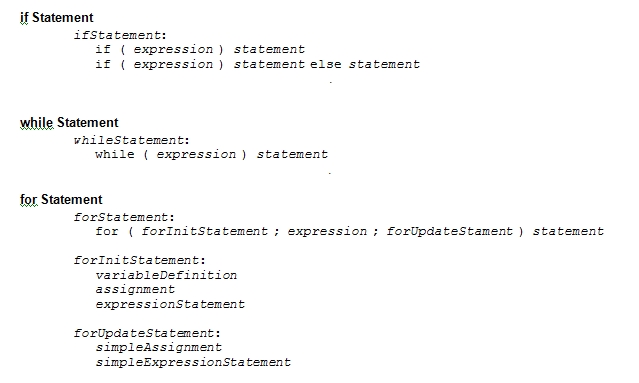
 "Show full-size image")
PXL supports the following operators, which are a subset of those found in C. Of note are the lack of bitwise manipulation operators, as well as the lack of a modulo operator, however the modulo is available through the built-in mod() function--see Built-in Functions.
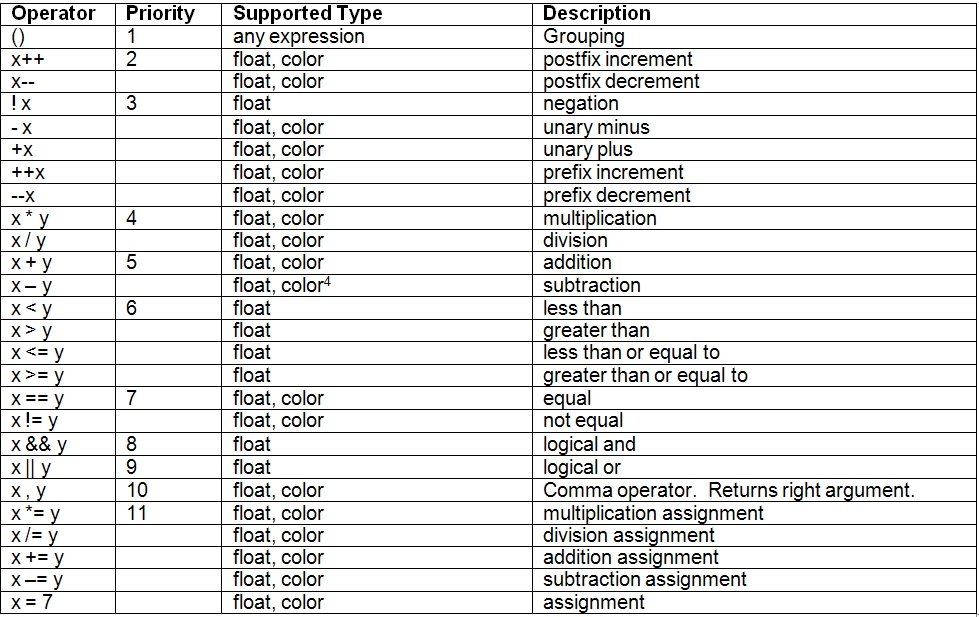
 "Show full-size image")
Note: Operations on color / vec4 are done on a per-channel basis.
The naming of variables uses the same rules as C. A variable name must begin with an alphabetical character, followed by none or many alphanumeric characters or underscore character. It must not contain any white spaces.
All variables are initialized by Toxik upon declaration, depending on type:
Float variables are initialized to 0.
Color / vec4 variables are initialized to (0, 0, 0, 1).
Image variables are initialized to an uninitialized image. An uninitialized image will return (0, 0, 0, 1) on sample(), has a pixel aspect ratio of 0, and has a size of (0, 0).

 "Show full-size image")
PXL has built-in variables to ease script writing. These variables are "x", "y", and "t". The first two are the floating-point normalized image reference frame (x, y) coordinates of the pixel being computed--see Calculating Image Size in Toxik. "t" is the floating-point current time, in seconds. All built-in variables are declared constant by the system, so they cannot be assigned to. PXL exposes the IRF coordinates of each pixel in its x and y built-in variables. This means that in PXL horizontally adjacent pixels will have a value of the x built-in variable that differs by 0.9 for an NTSC image.Thus, an NTSC image (with 720x486 pixels) is actually 648x486 IRF units (720 * 0.9 = 648), which represents a 4:3 image aspect ratio (648/486 = 4/3), as expected.

 "Show full-size image")
PXL provides a number of built-in functions. Functions can return any of the PXL fundamental types, or can return void. Built-in function argument overloading is supported by the sample() function to provide two implementations, one with a single argument, the other with 3 arguments.
Note: In the following table, all references to type color also refer to vec4, and vice versa.
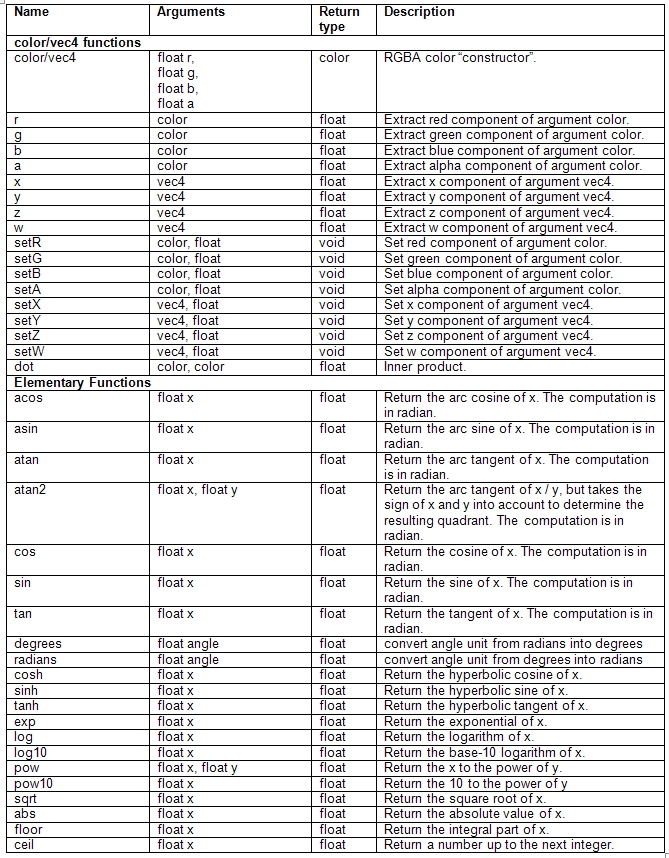
 "Show full-size image")

 "Show full-size image")
The Toxik executable interfaces with the PXL script in the following way:
The function declaration is optional. If present, it must be called "main()".
Function arguments can be any of the PXL basic types. Arguments to "main()" of type "image" with the "input" qualifier are the PXL tool image inputs, and must match the name of the input image socket. This implies that accessing the primary image input must be done with an input image argument named "In". Arguments to "main()" of non-image type with the "input" qualifier are PXL tool parameter inputs, and are matched by name and type with the input parameters of the PXL tool. For example, a float parameter named "Gain" would be passed in the "main()" function as "input float Gain". Arguments to "main()" of type "color" with the "output" qualifier are the pixel outputs. The first version of the PXL tool will support a single pixel output, which must be called "Out".
The return type is limited to void and the return statement is not supported.
If no function header is present for main(), Toxik will create one automatically. It will include all defined image inputs, and all defined parameter inputs.
No warning is given if main() function arguments are not referenced by the function. However, a reference to a non-existent parameter or input image is an error.
All images read by the PXL script are read at the current time t. There is no way to read images at a time different from t within a PXL script. To do so, a user must use external Toxik Retimer or Time Offset tools before inputting images to the PXL tool.
All parameters read by the PXL script are read at the current time t. There is no way to read parameters at a time different from t within a PXL script in this version of Toxik.

 "Show full-size image")

 "Show full-size image")

 "Show full-size image")

 "Show full-size image")

 "Show full-size image")

 "Show full-size image")
 "Show full-size image")

 "Show full-size image")

 "Show full-size image")

 "Show full-size image")

 "Show full-size image")

 "Show full-size image")

 "Show full-size image")

 "Show full-size image")

 "Show full-size image")

 "Show full-size image")

 "Show full-size image")
 "Show full-size image")
 "Show full-size image")

 "Show full-size image")

 "Show full-size image")
 "Show full-size image")

 "Show full-size image")
 "Show full-size image")